
I never really had a firm plan for this part of the Nurgle Knight, my original sketch has a big eye visible underneath the cracked open cockpit door, and even that never made it to the final design. However, it soon became one of the most interesting and fun parts of the build.
I wanted to add some details here and there around the top of the knight to supplement the existing differences between this build and other Knights. To start off with, this knight only has half of one shoulder guard, which already marks it quite differently, but an absence of pieces isn’t good enough, I wanted it to LOOK Nurgle, and not just have bits fallen off.
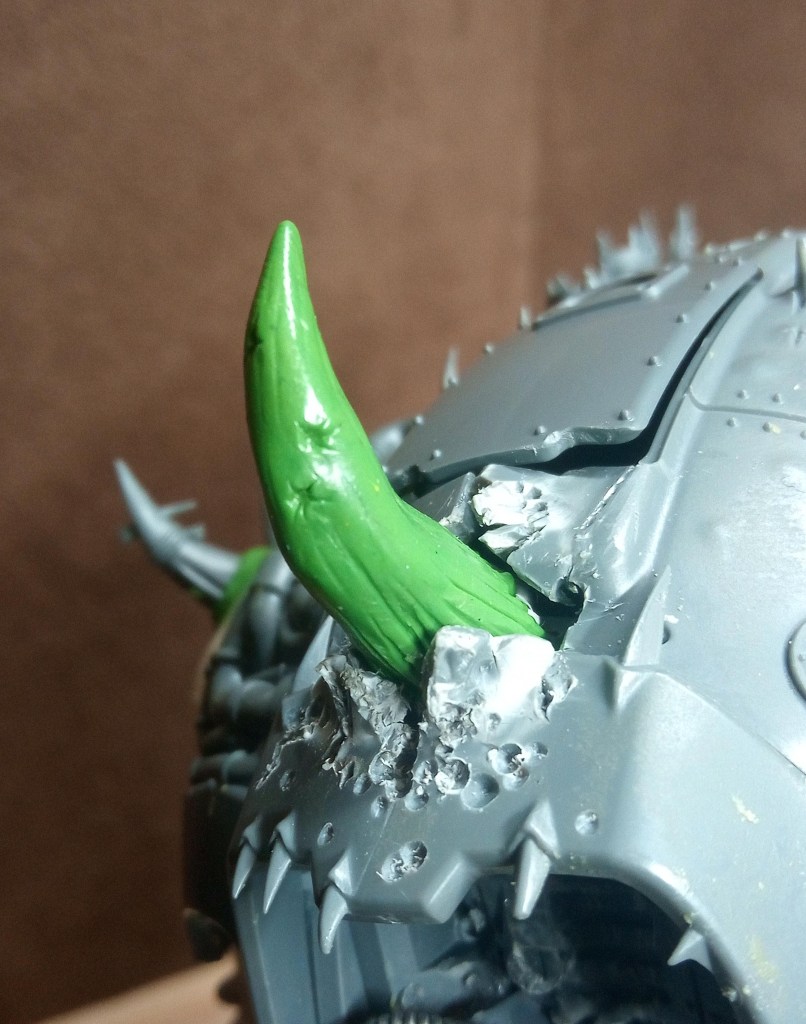
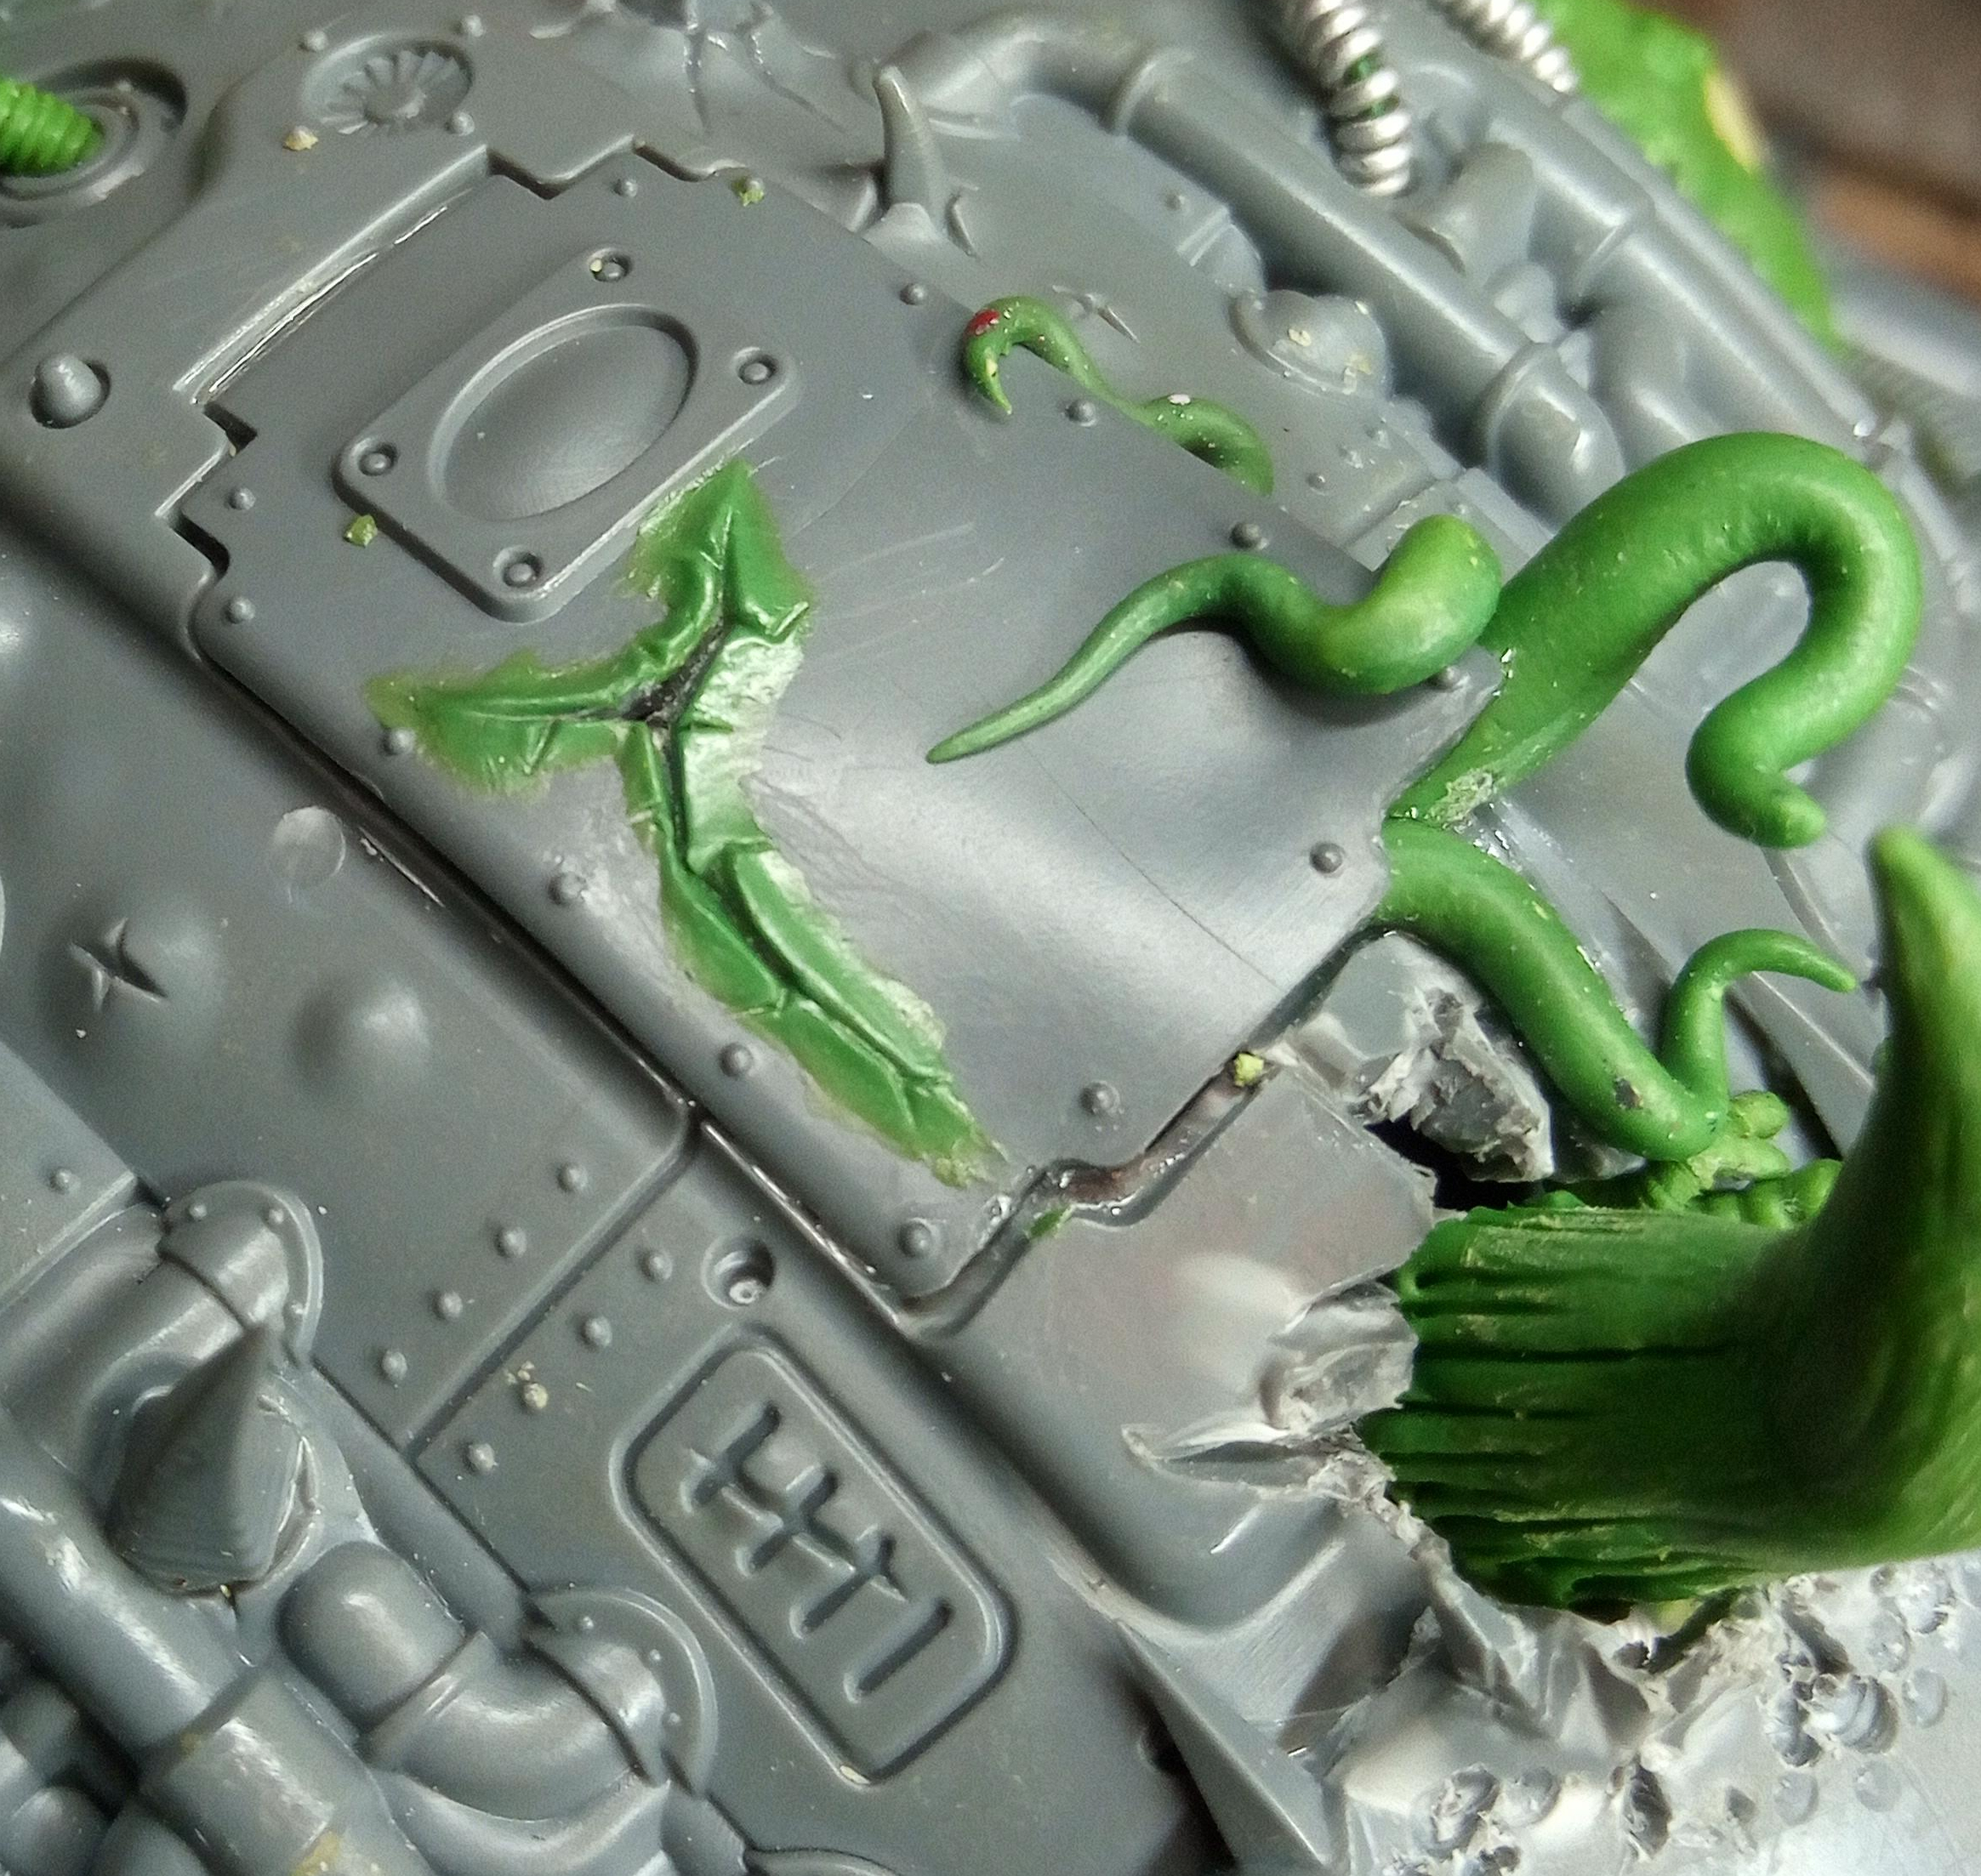
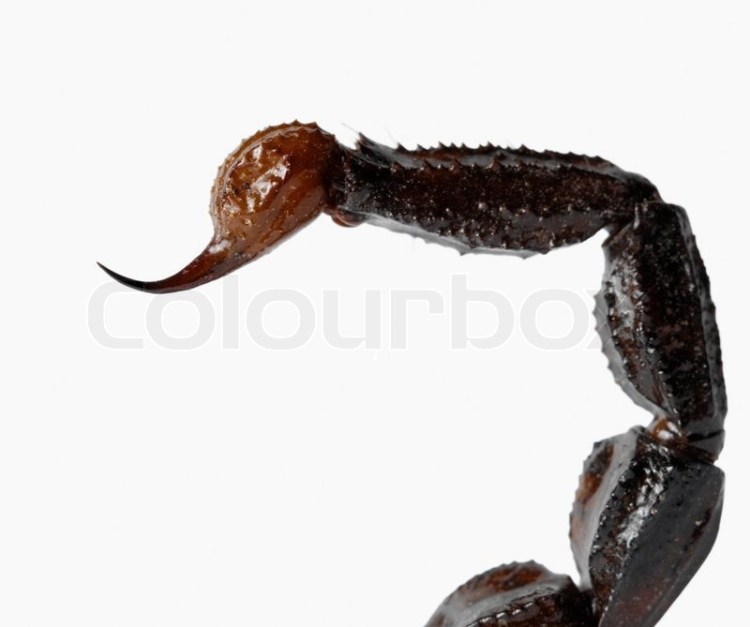
I started with the front of the Carapace. As I mentioned, I wasn’t going to put a large cyclopian eye in the door… it just seemed too far, too caricatured and silly (which is saying something for both Nurgle and Warhammer 40k in general). I just didn’t think I could pull it off well enough to even try. I did want a cool focus though and rather than the classic one eye, that is on many of the designs, I went for the forehead horn. I dont show the steps of it here but how I made it was, I drilled and cut through the armour until I could get my clippers in through the hole. I cut away at the hole and used the clippers to peel the hole open. Once I had made enough of a hole, I cut the profile of the horn out of 2mm plasticard, and then cut two smaller ones to stick on the sides and give it bit more width. I glued that in place and then built the Green Stuff up around it, scoring lines into it and then making some bullet impacts. Once it was dry I scraped it so that the lines were more like edged grooves (more boney, less puffy and organic). After I did the horn I closed the door on one side by heating it up with a heat gun (after making the whole for the horn the door wouldn’t sit closed. Then in the gap I sculpted some tentacles and the suggestion that there may be something of the pilot left in there! Finally as the door looked a bit too unscathed (I don’t like the big blank panels void of detail) I added some cracks to it, that I later added some very small tentacles coming out of.


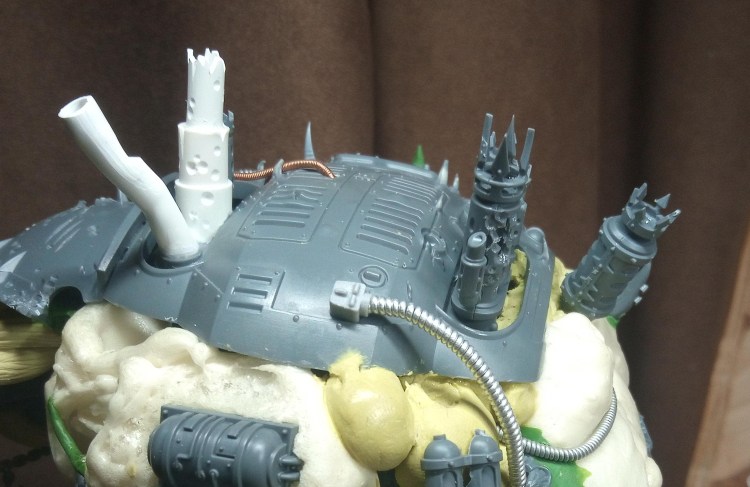
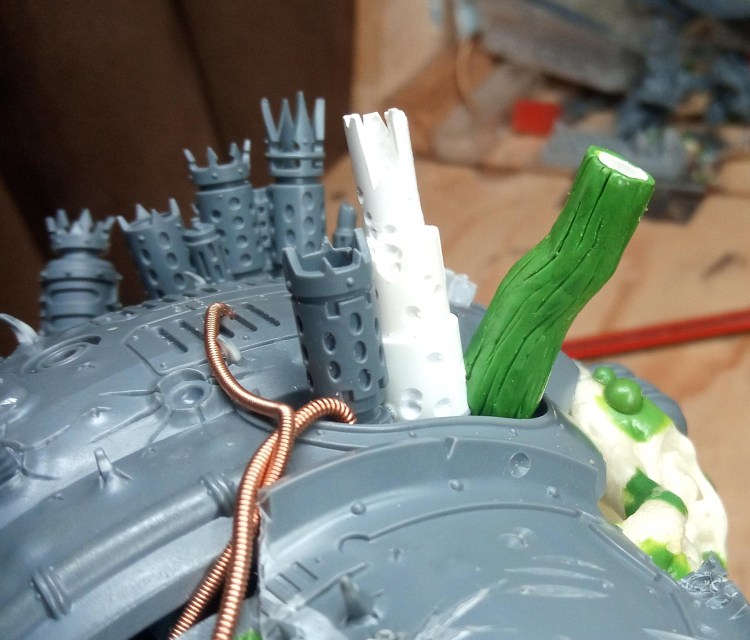
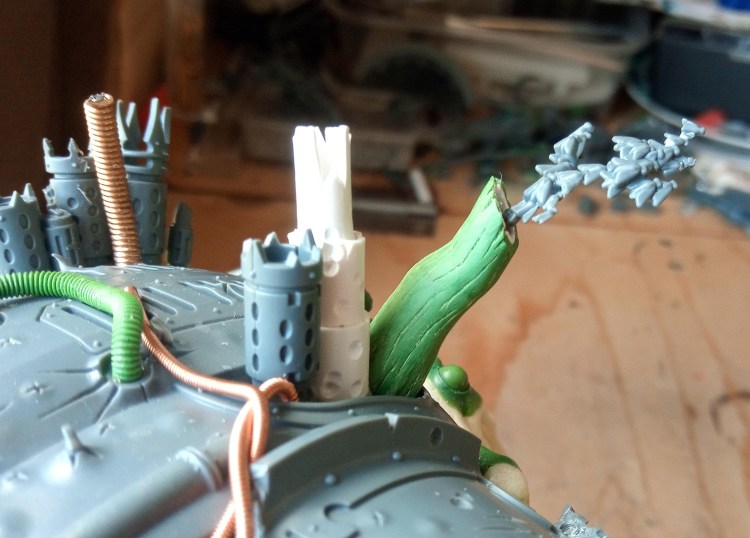
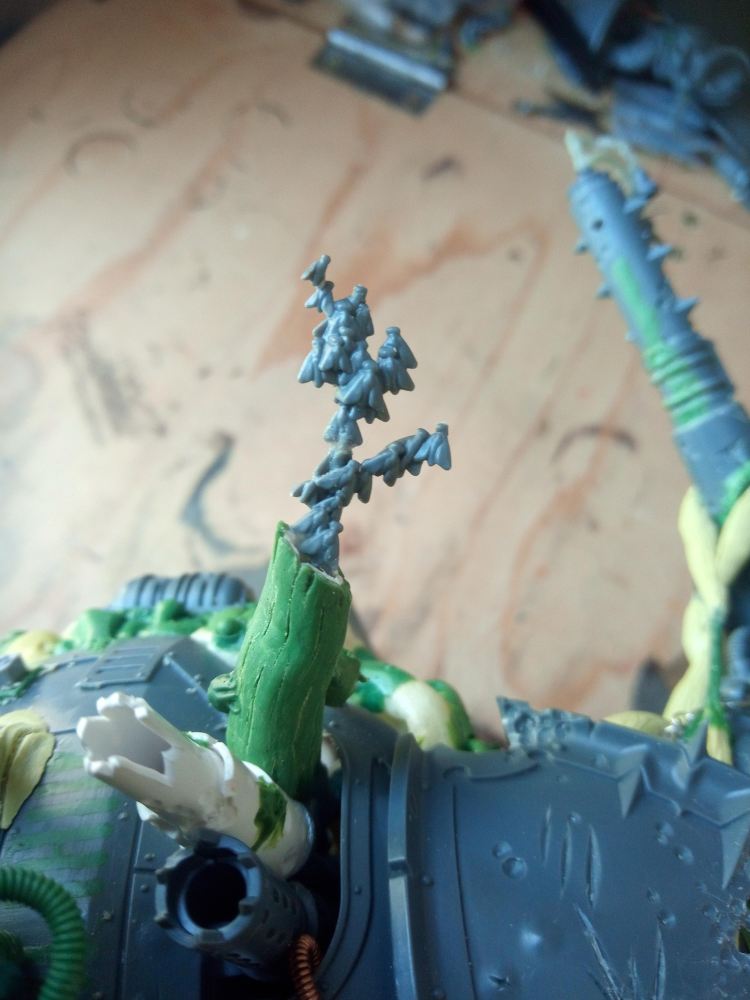
At the back of the Knight there were the chimney stacks to deal with. I had modified these on the Khornate Knight too, but that was a much simpler job, just some addition to the existing Imperial design stacks. These though, I was starting off with the Chaos Knight stacks and then I also wanted them to look a lot more asymmetrical. So I put in one set of regular stacks, but Nurgled them up with a bit of damage and corrosion. Next to those, jutting out of the fatty tissue on the side, I added another similar, crowned exhaust… I really liked how this looked. On the other side I went somewhere significantly different. I cut a single chimney off the original set, and stuck that on, leaving room for two more stacks. While I was making random junk for the teeth of the mouth I made this 3 layered pipe which I didn’t make use off in the end. After some pock marks and some chips in it I liked it as another exhaust. So I needed one more… I deceded it would be cool if one was organic, a bit like the ones coming off Typhus. So I needed to make it look, but I wanted the end sheered off so you could see inside it (unlike the horn I had already made). So I bend a bit of pastic tubing with a heat gun, shaved away the bits I thought would ruin the shape, then build up around it with Green Stuff. I used much the same technique as I did with the horn, putting grooves in before it set, and then sanding/scraping the surface smooth without getting rid of the striations entirely. Finally, in my bits I found a swarm of flies while trying to figure out something else and decide that it definitely needed to be coming out of the boney chimney. I pinned the flies into the chimney so that they had some give and would be less likely to snap (they were certainly more resistant to snapping, but snapped several times, and were pinned in multiple locations, throughout the build)

Ok… now for the REALLY fun bit. So I sort of had this dilemma that I had with the Khornate Knight, to carapace weapon, or to not carapace weapon… that is the question. I agonised over it, krakendoomcool is a pretty good player and doesn’t needlessly spend points on rubbish stuff so I wanted to pick the best option, if any of them were worth taking at all!
With the Khornate Knight I had the bizarre circumstance of forgetting there was a carapace weapon. then asking if they guy wanted to have options for it and he said no… so I just picked the one he liked the most. Then discovered it didn’t sit at a great angle because its leaning forwards so it took some bodging and conversion to get it at a better angle… THEN discovered that the Rampager knight (which he is likely to take it as) CANT EVEN TAKE A CARAPACE WEAPON!!!!
I didn’t want this mess all over again… but I encountered a new issue. I wanted to put one on, but I wanted it to look really cool. Like… integrated in a very non conventional way. I knew that this would mean that I couldn’t really do options though. So I spent some time asking advice from people on which weapon to pick. Eventually to come to a conclusion, get ready to make it and get blindsided again! This time, the revelation wasn’t that the knight couldn’t take the weapon I chose… it was that i was using a Desecrator kit as a base, and THAT cant take a carapace weapon… which meant THERE WASN’T ONE IN THE BOX!!!!!
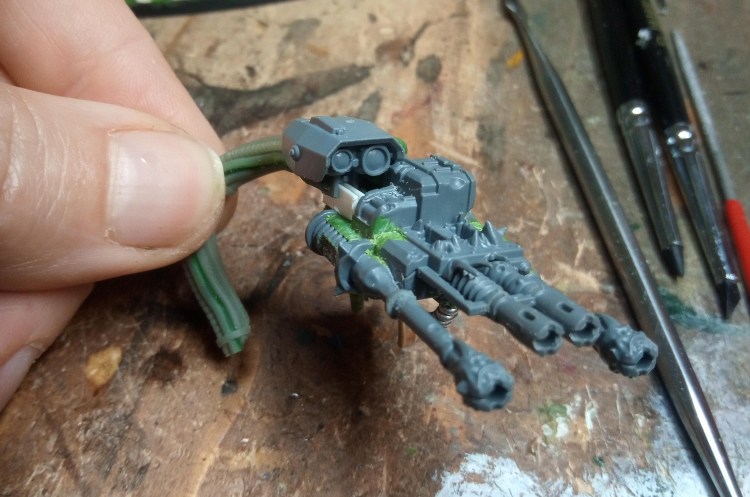
Ok cool. Cool, cool, cool, cool, cool, cool. I was giving it to him in one month from this point, I wanted it to have a carapace weapon, but I didn’t have a carapace weapon. So… I would just have to make one! I put a shout out on Twitter for anyone that had Nurgley looking ranged weapons and Bees came through for me again (these were not the first parts she had sent me). I had a Nurgle auto cannon and three Nurgle flamers… to make something.
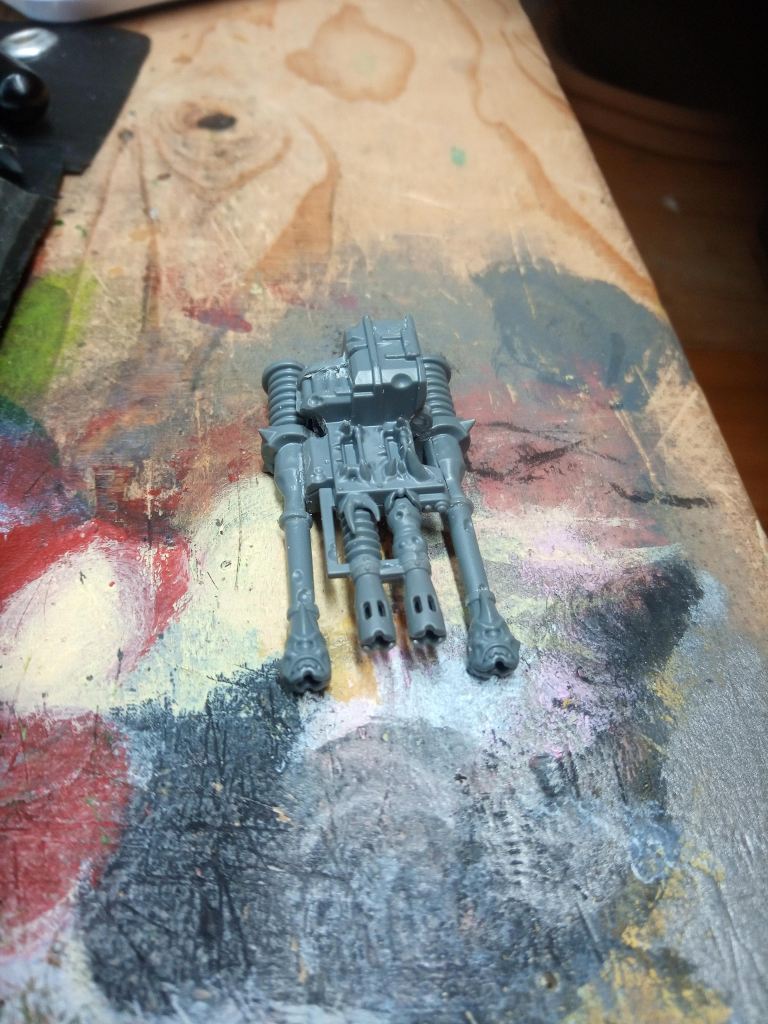
So thats settles that, its having and Icarus Auto cannon type weapon. still… it was bugging me that if I fix this to the knight then that would lock out two of the potential knight options that cant have carapace weapons. Sure, we could just ignore the weapon as just decoration, but what if it COULD be optional. What if I could make a fully integrated looking carapace weapon that could be removed and not leave too much of a bland void in its place…. and do that in one month. So without hesitation I accepted this challenge stuck in a paper in the gun, bent it around and put it in the prospective final position.
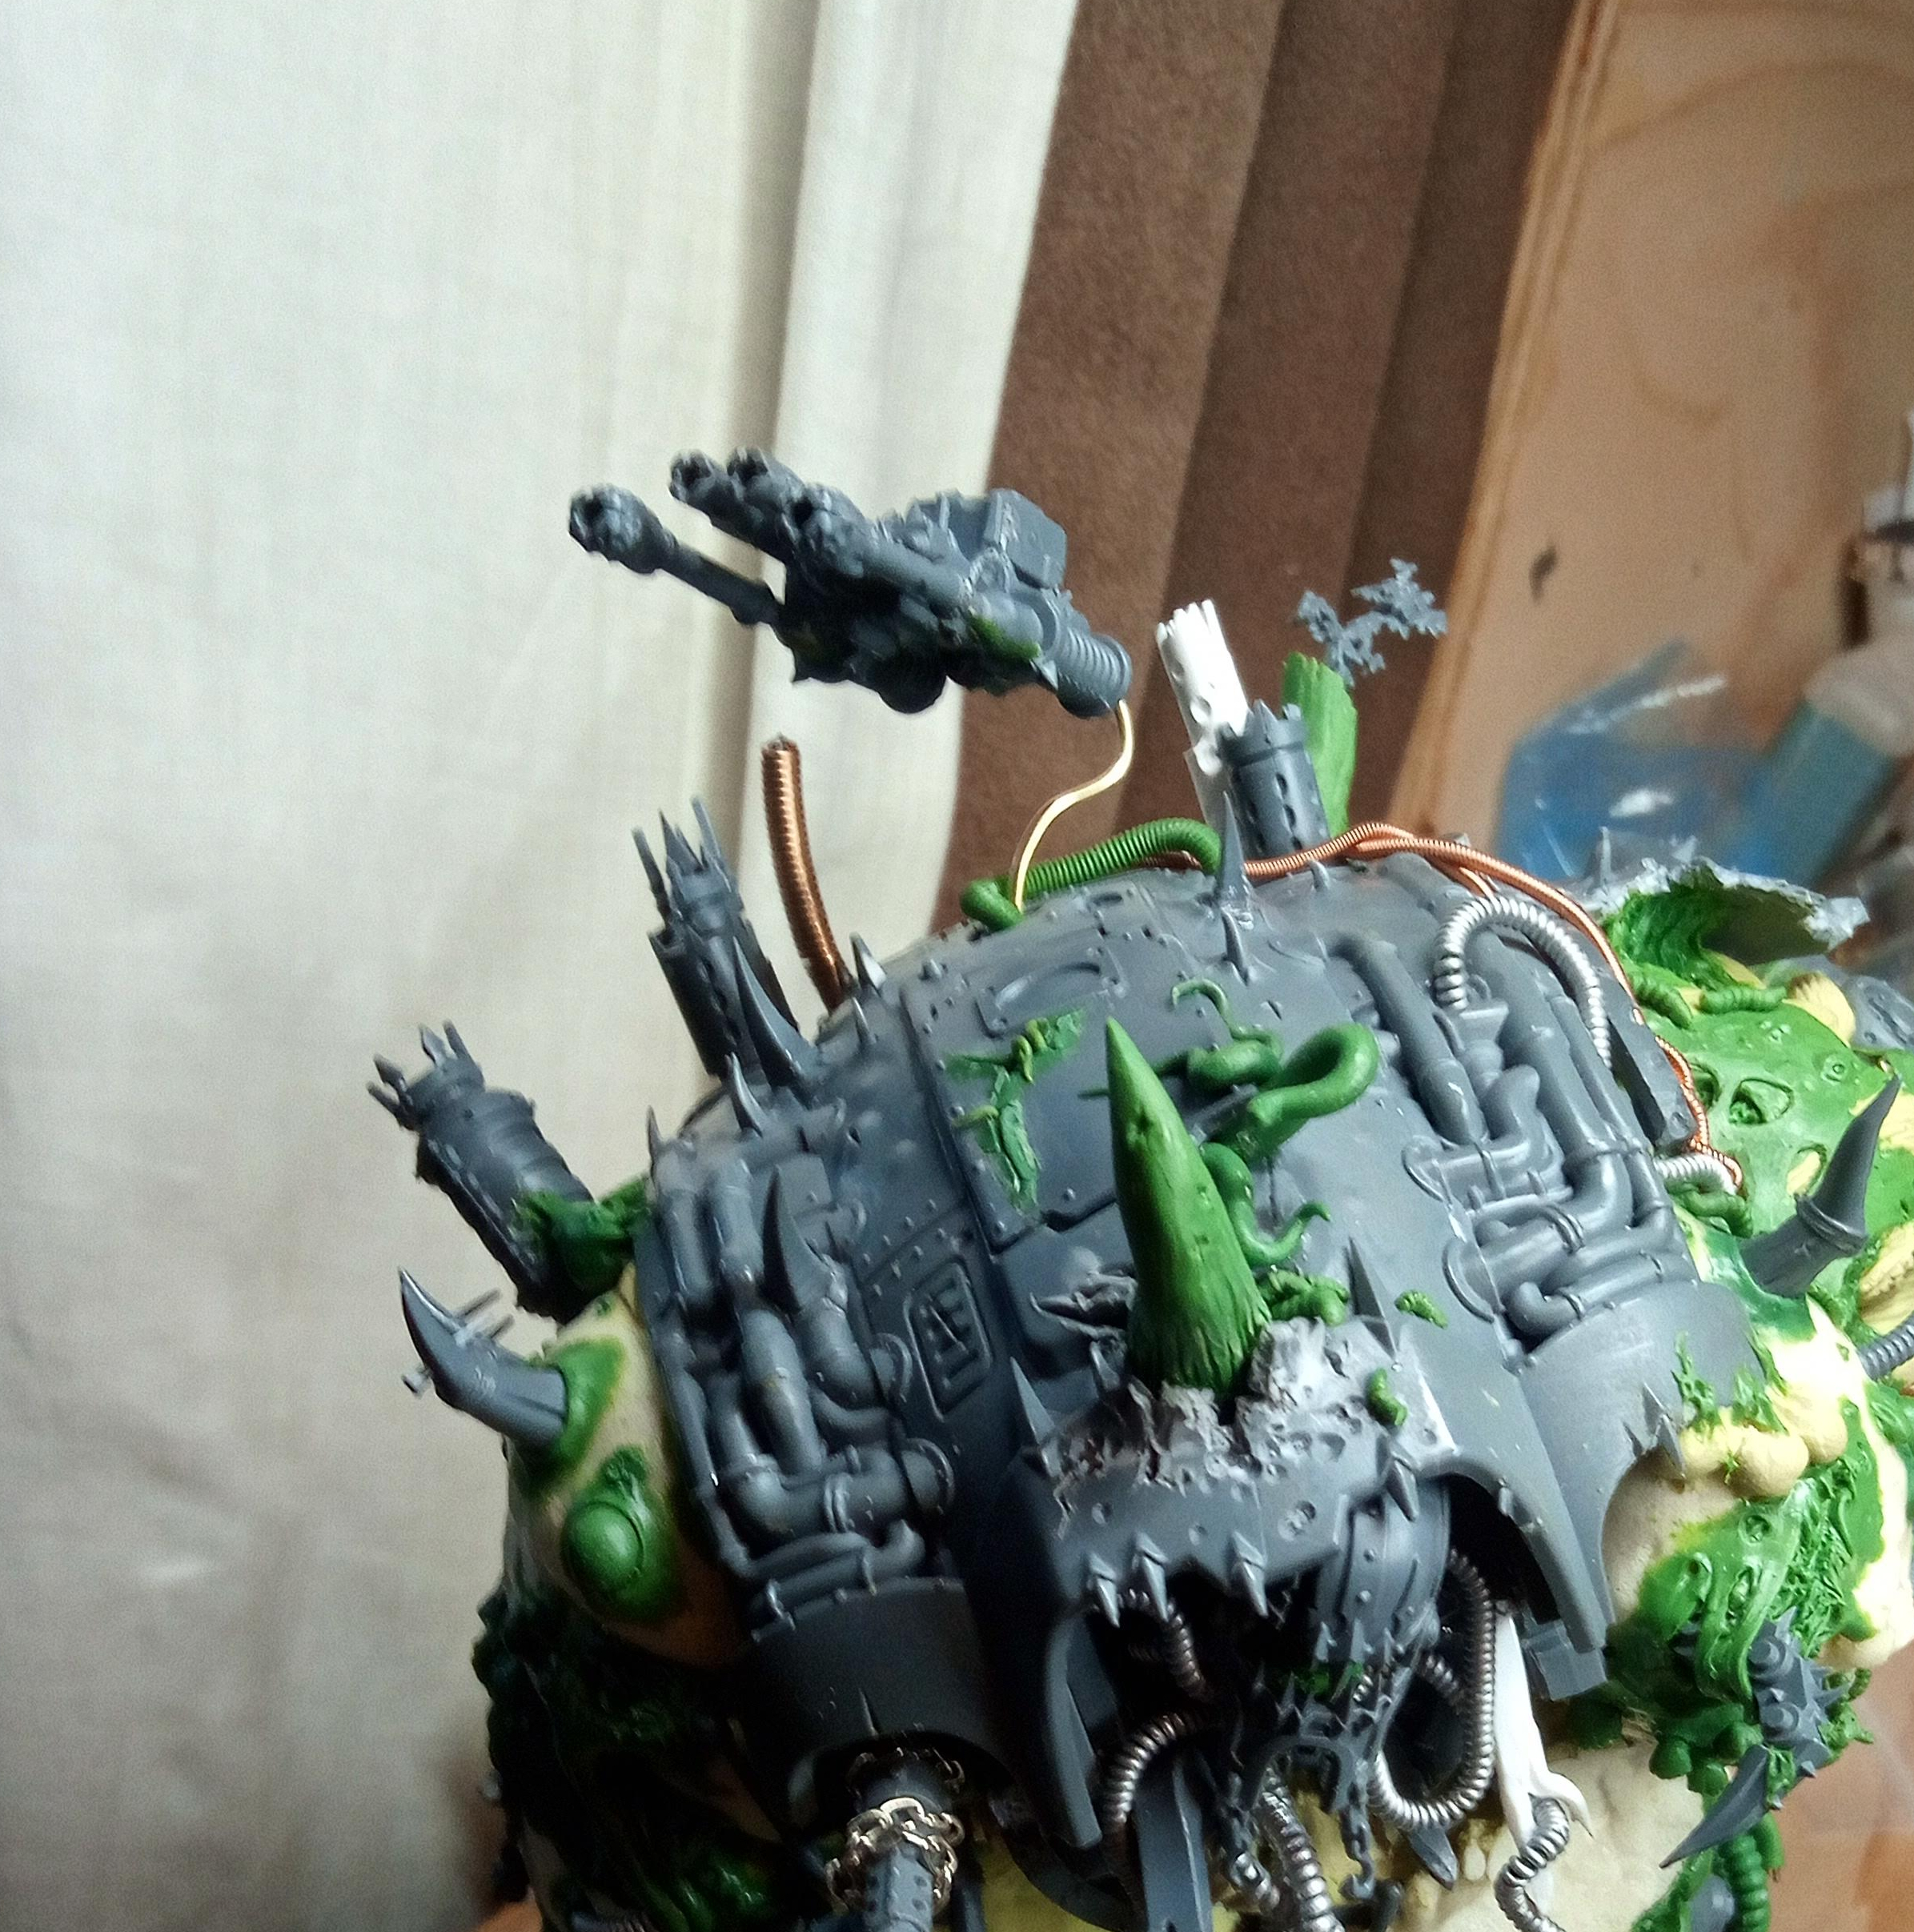
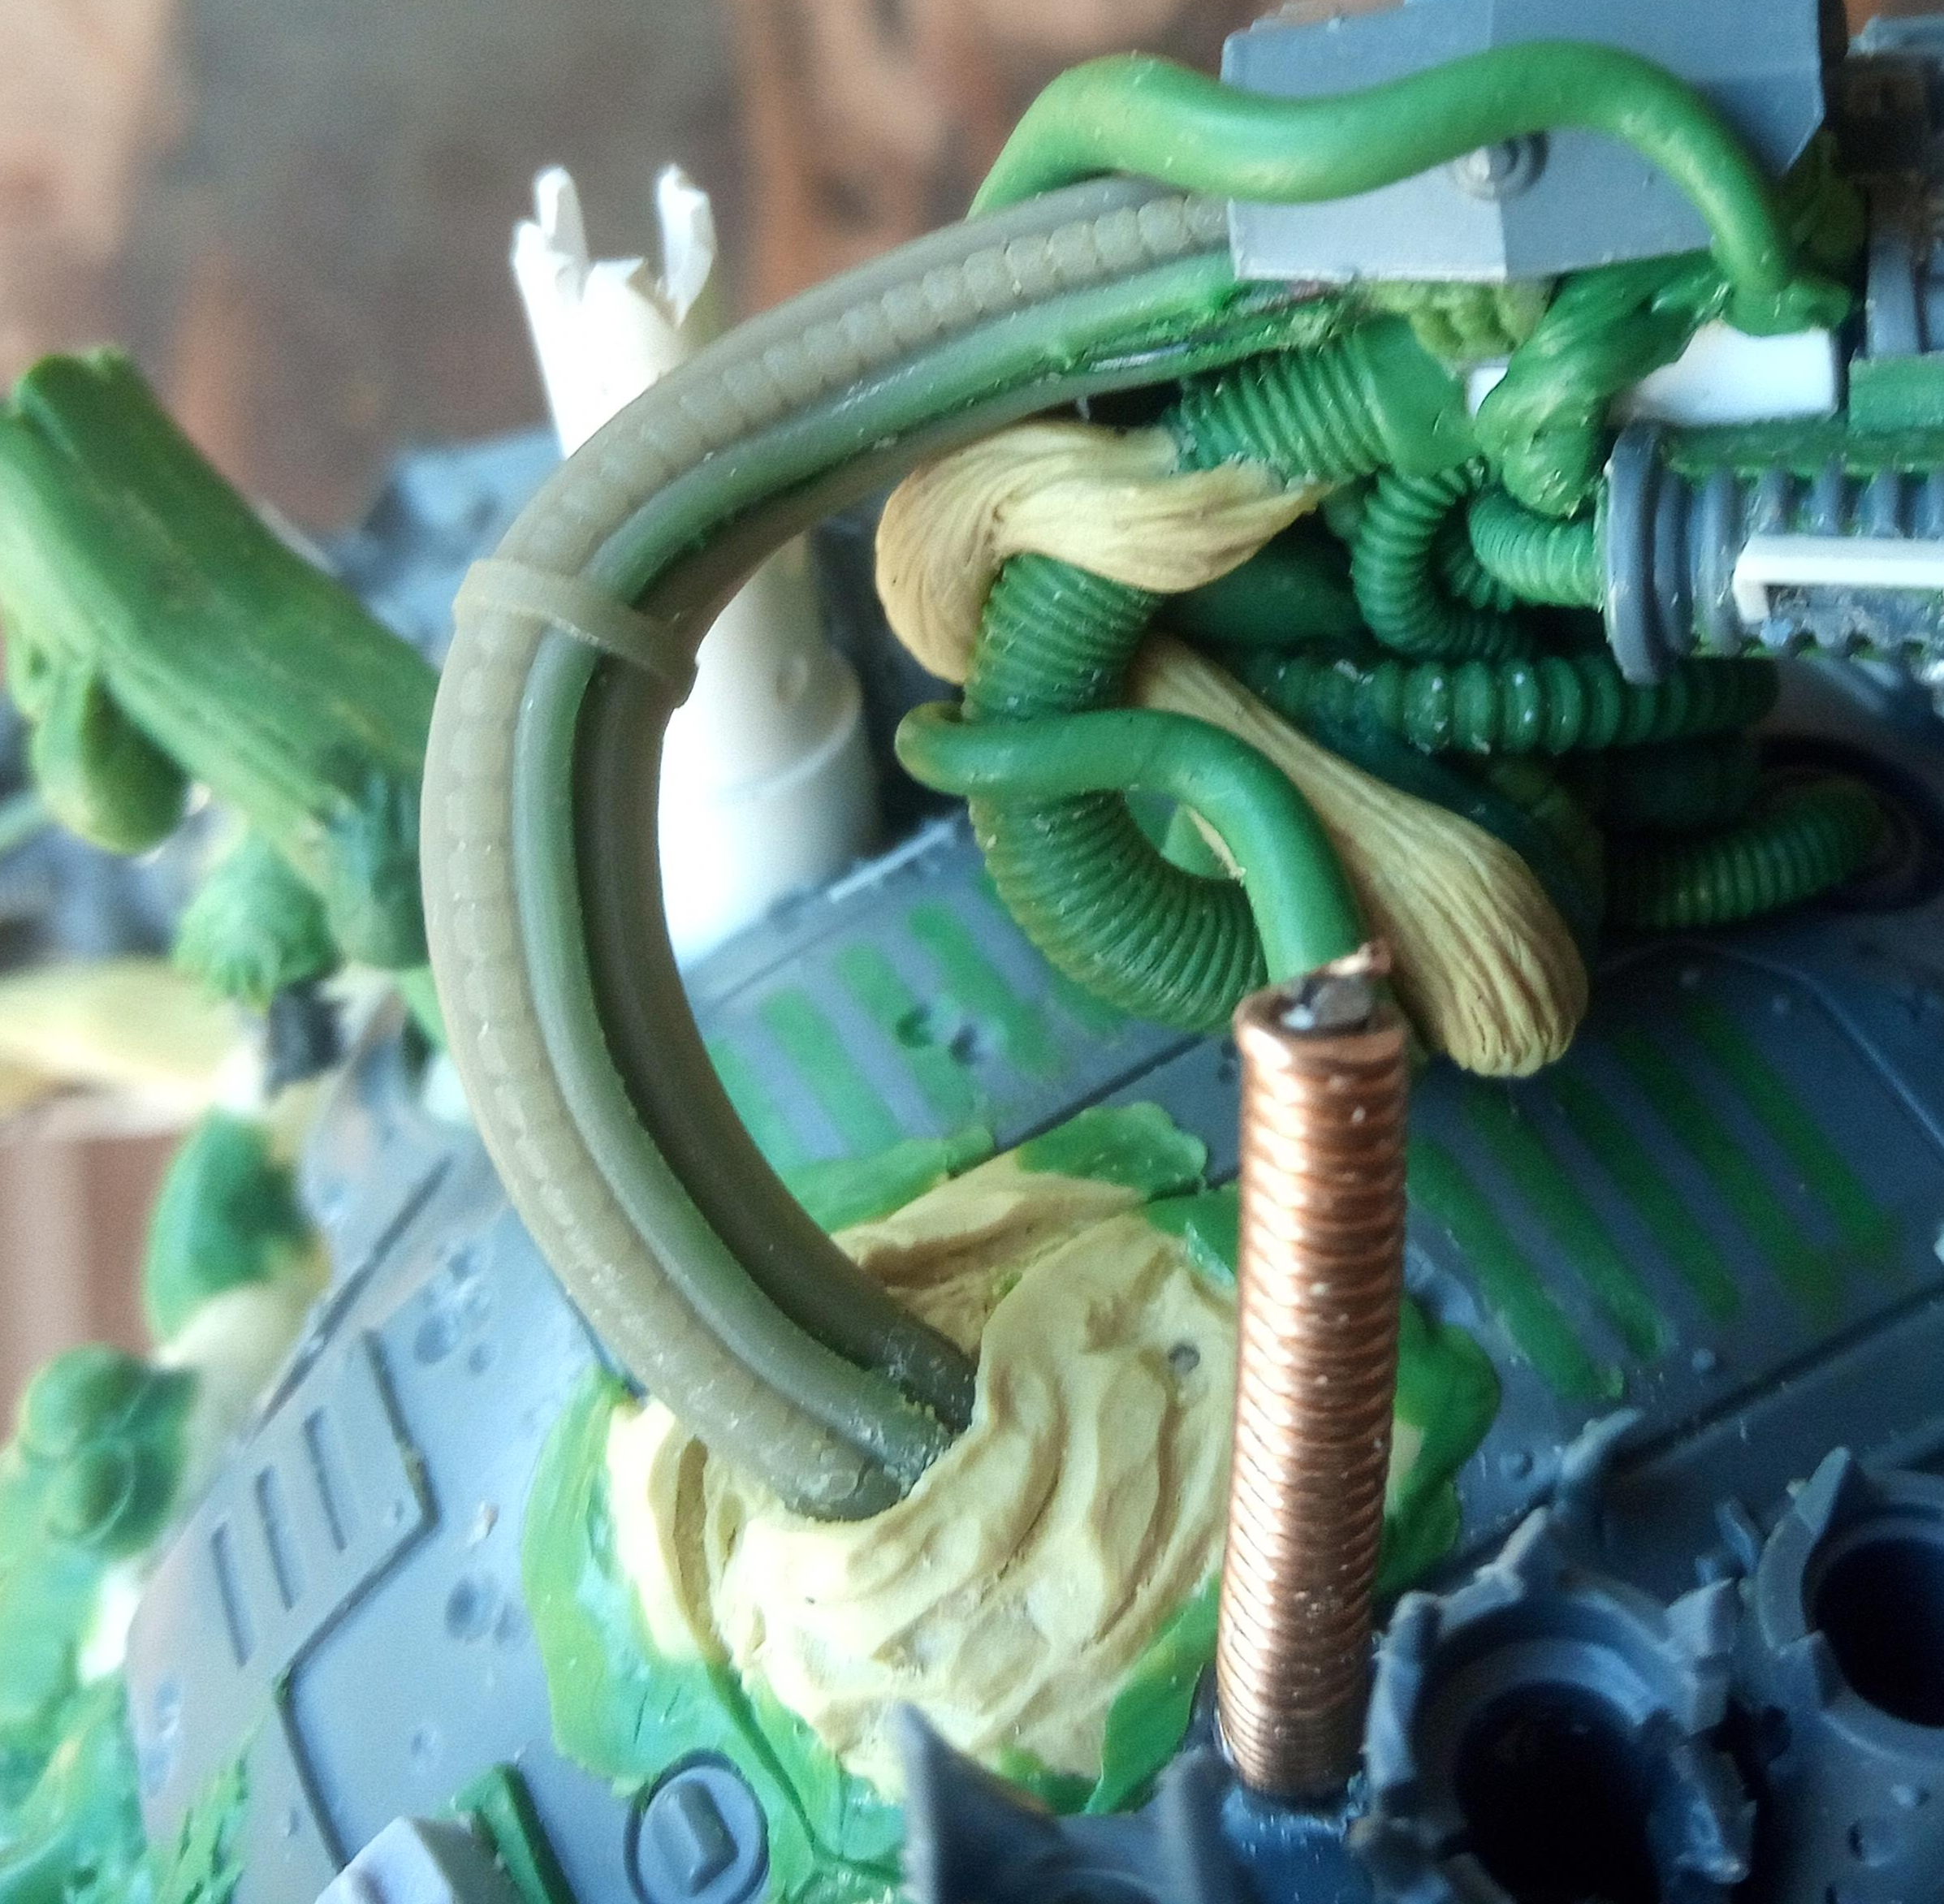
So I had a sort of idea for how I wanted the gun to be suspended. I obviously didn’t have any of the mounting for the regular gun (not that any of that would have been a particular help with this unique pattern of gun). I would use a load of cabling made of green stuff to suspend it in a sort of organic fashion.


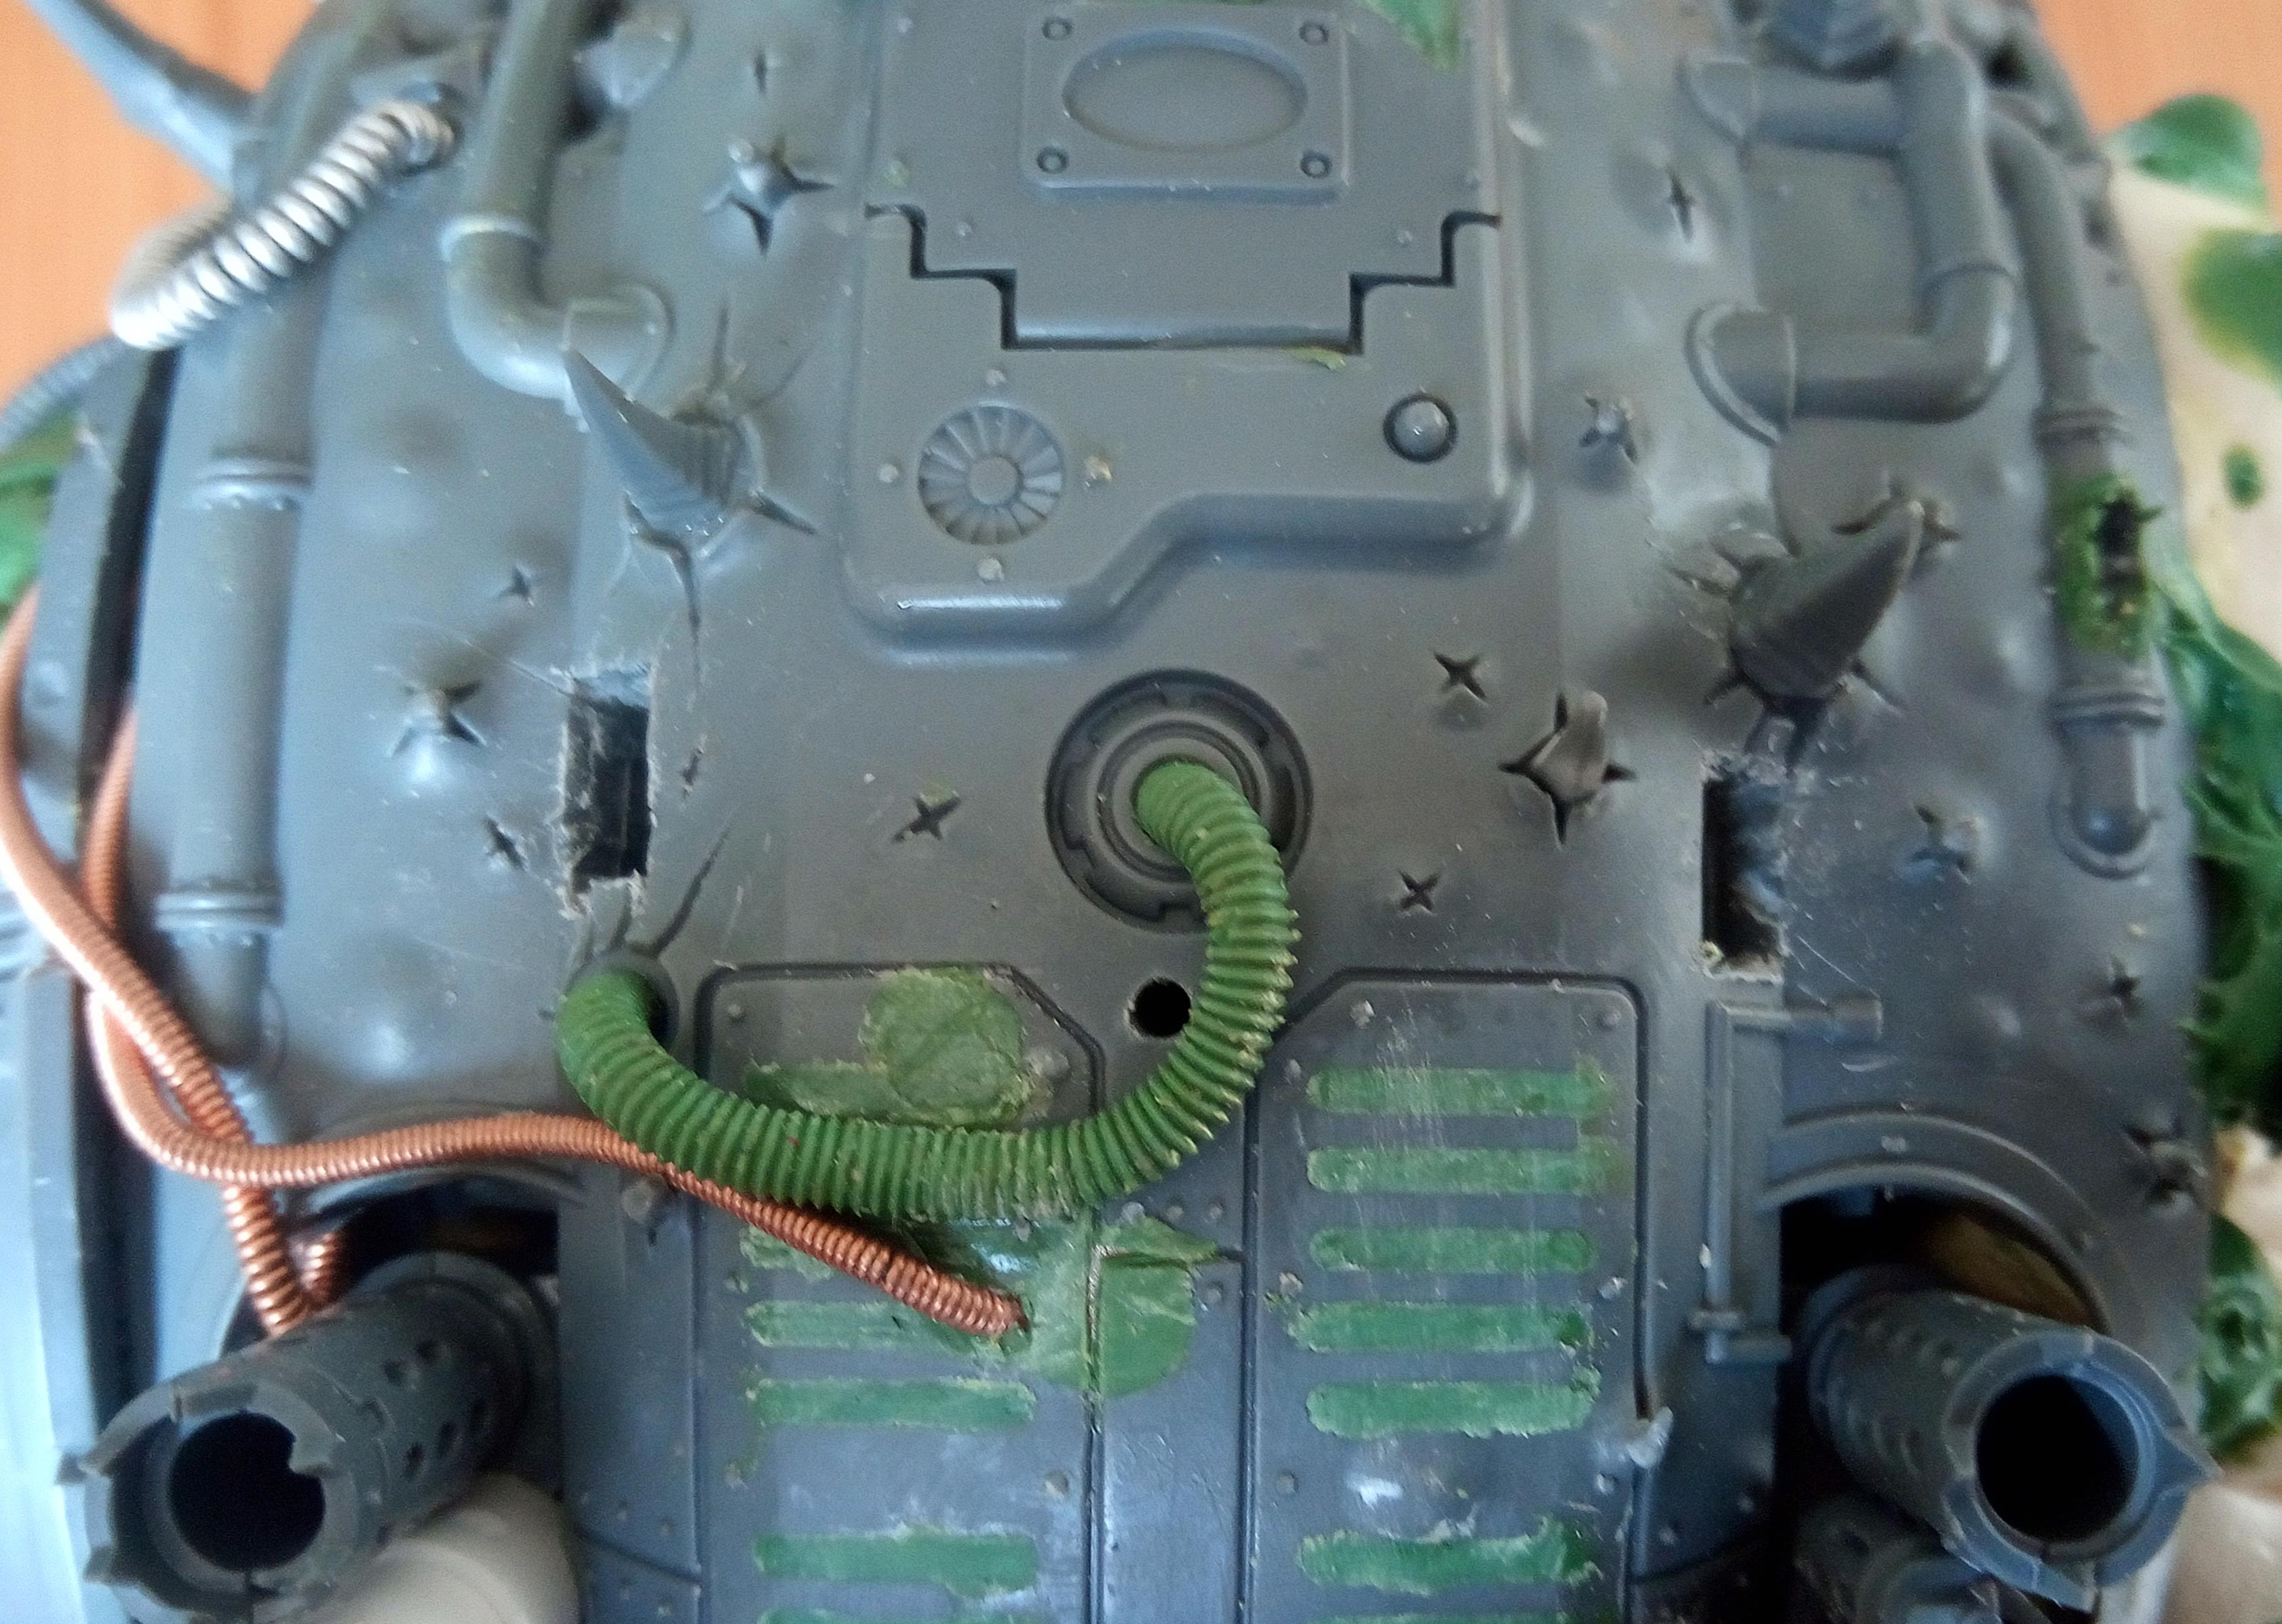
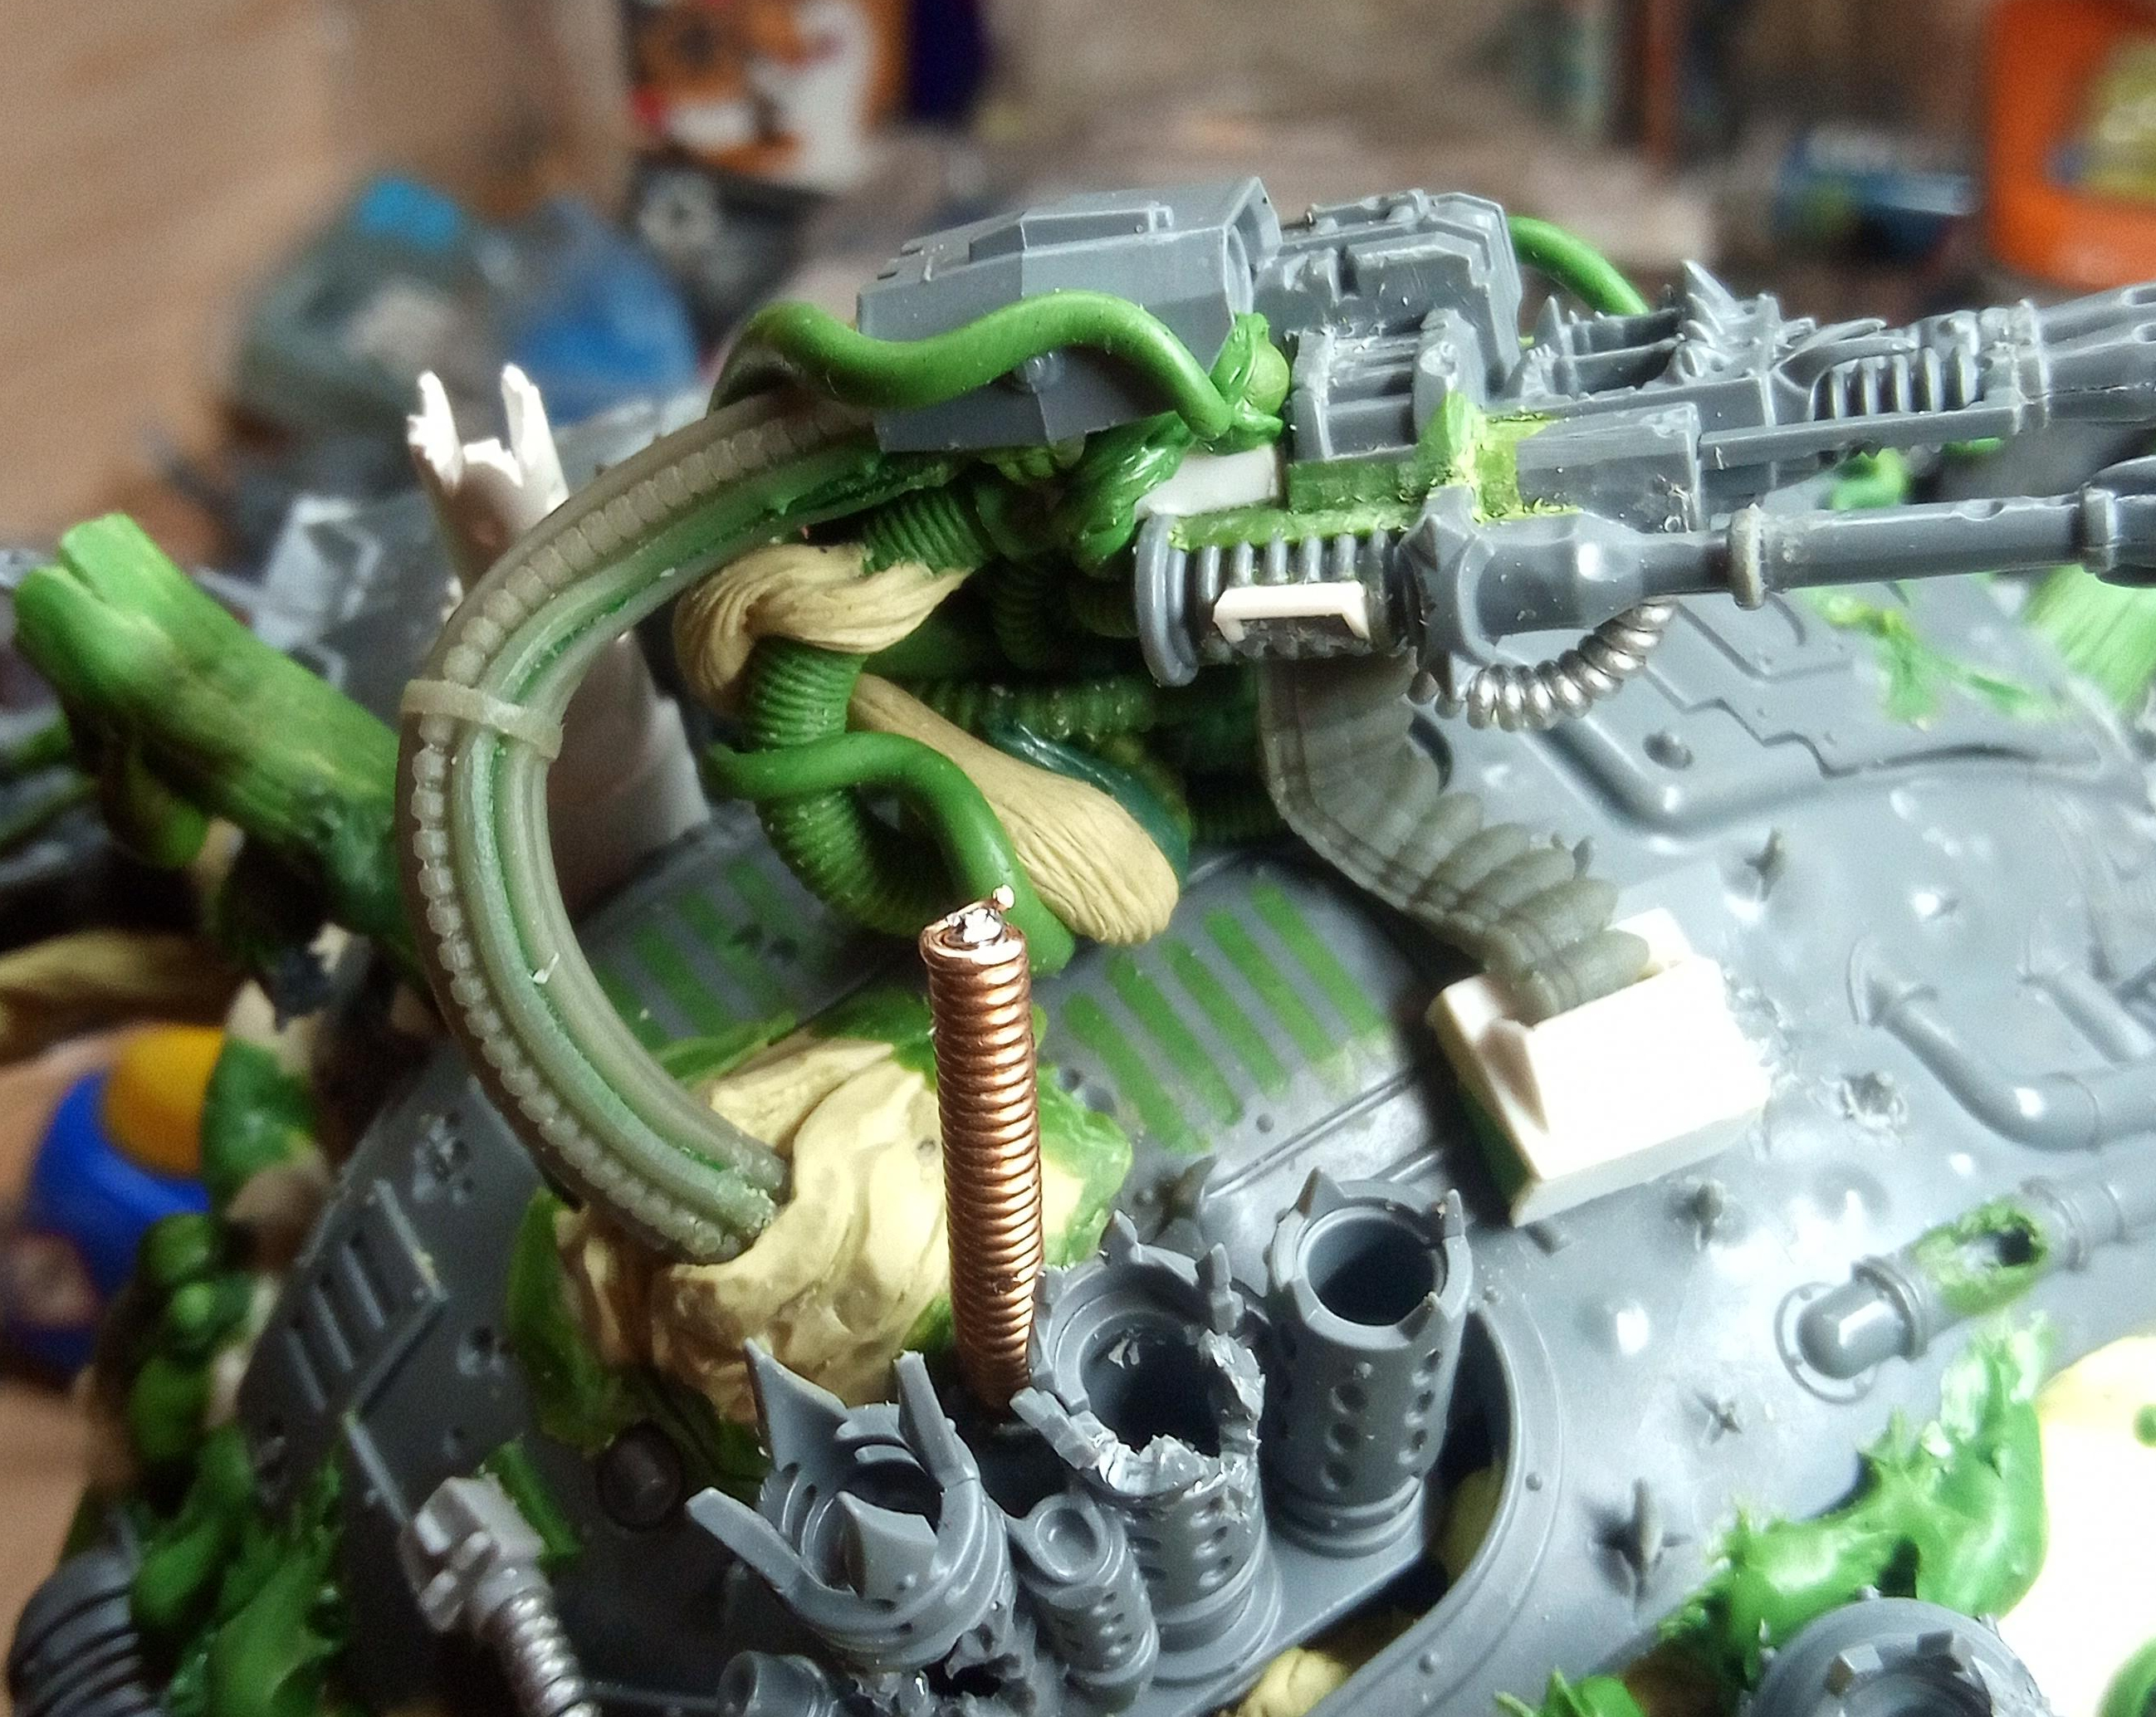
So I got on with adding the power cables, making an effort to try and keep their over all form an interesting shape along the lines of these. I also added something else though, I got some cool cables from Zinge. I really liked these ones that looked like bundled cables so I got some of those but they were all a lot bigger than I was expecting. So I took the smallest one and decided to try and run with it anyway. Instead shaping it like the rest of the cables though (it wasn’t bendy enough) I decided to incorporate it anyway but attaching separately to the carapace. It was also at this stage I started to incorporate the magnets required to hold it all in place


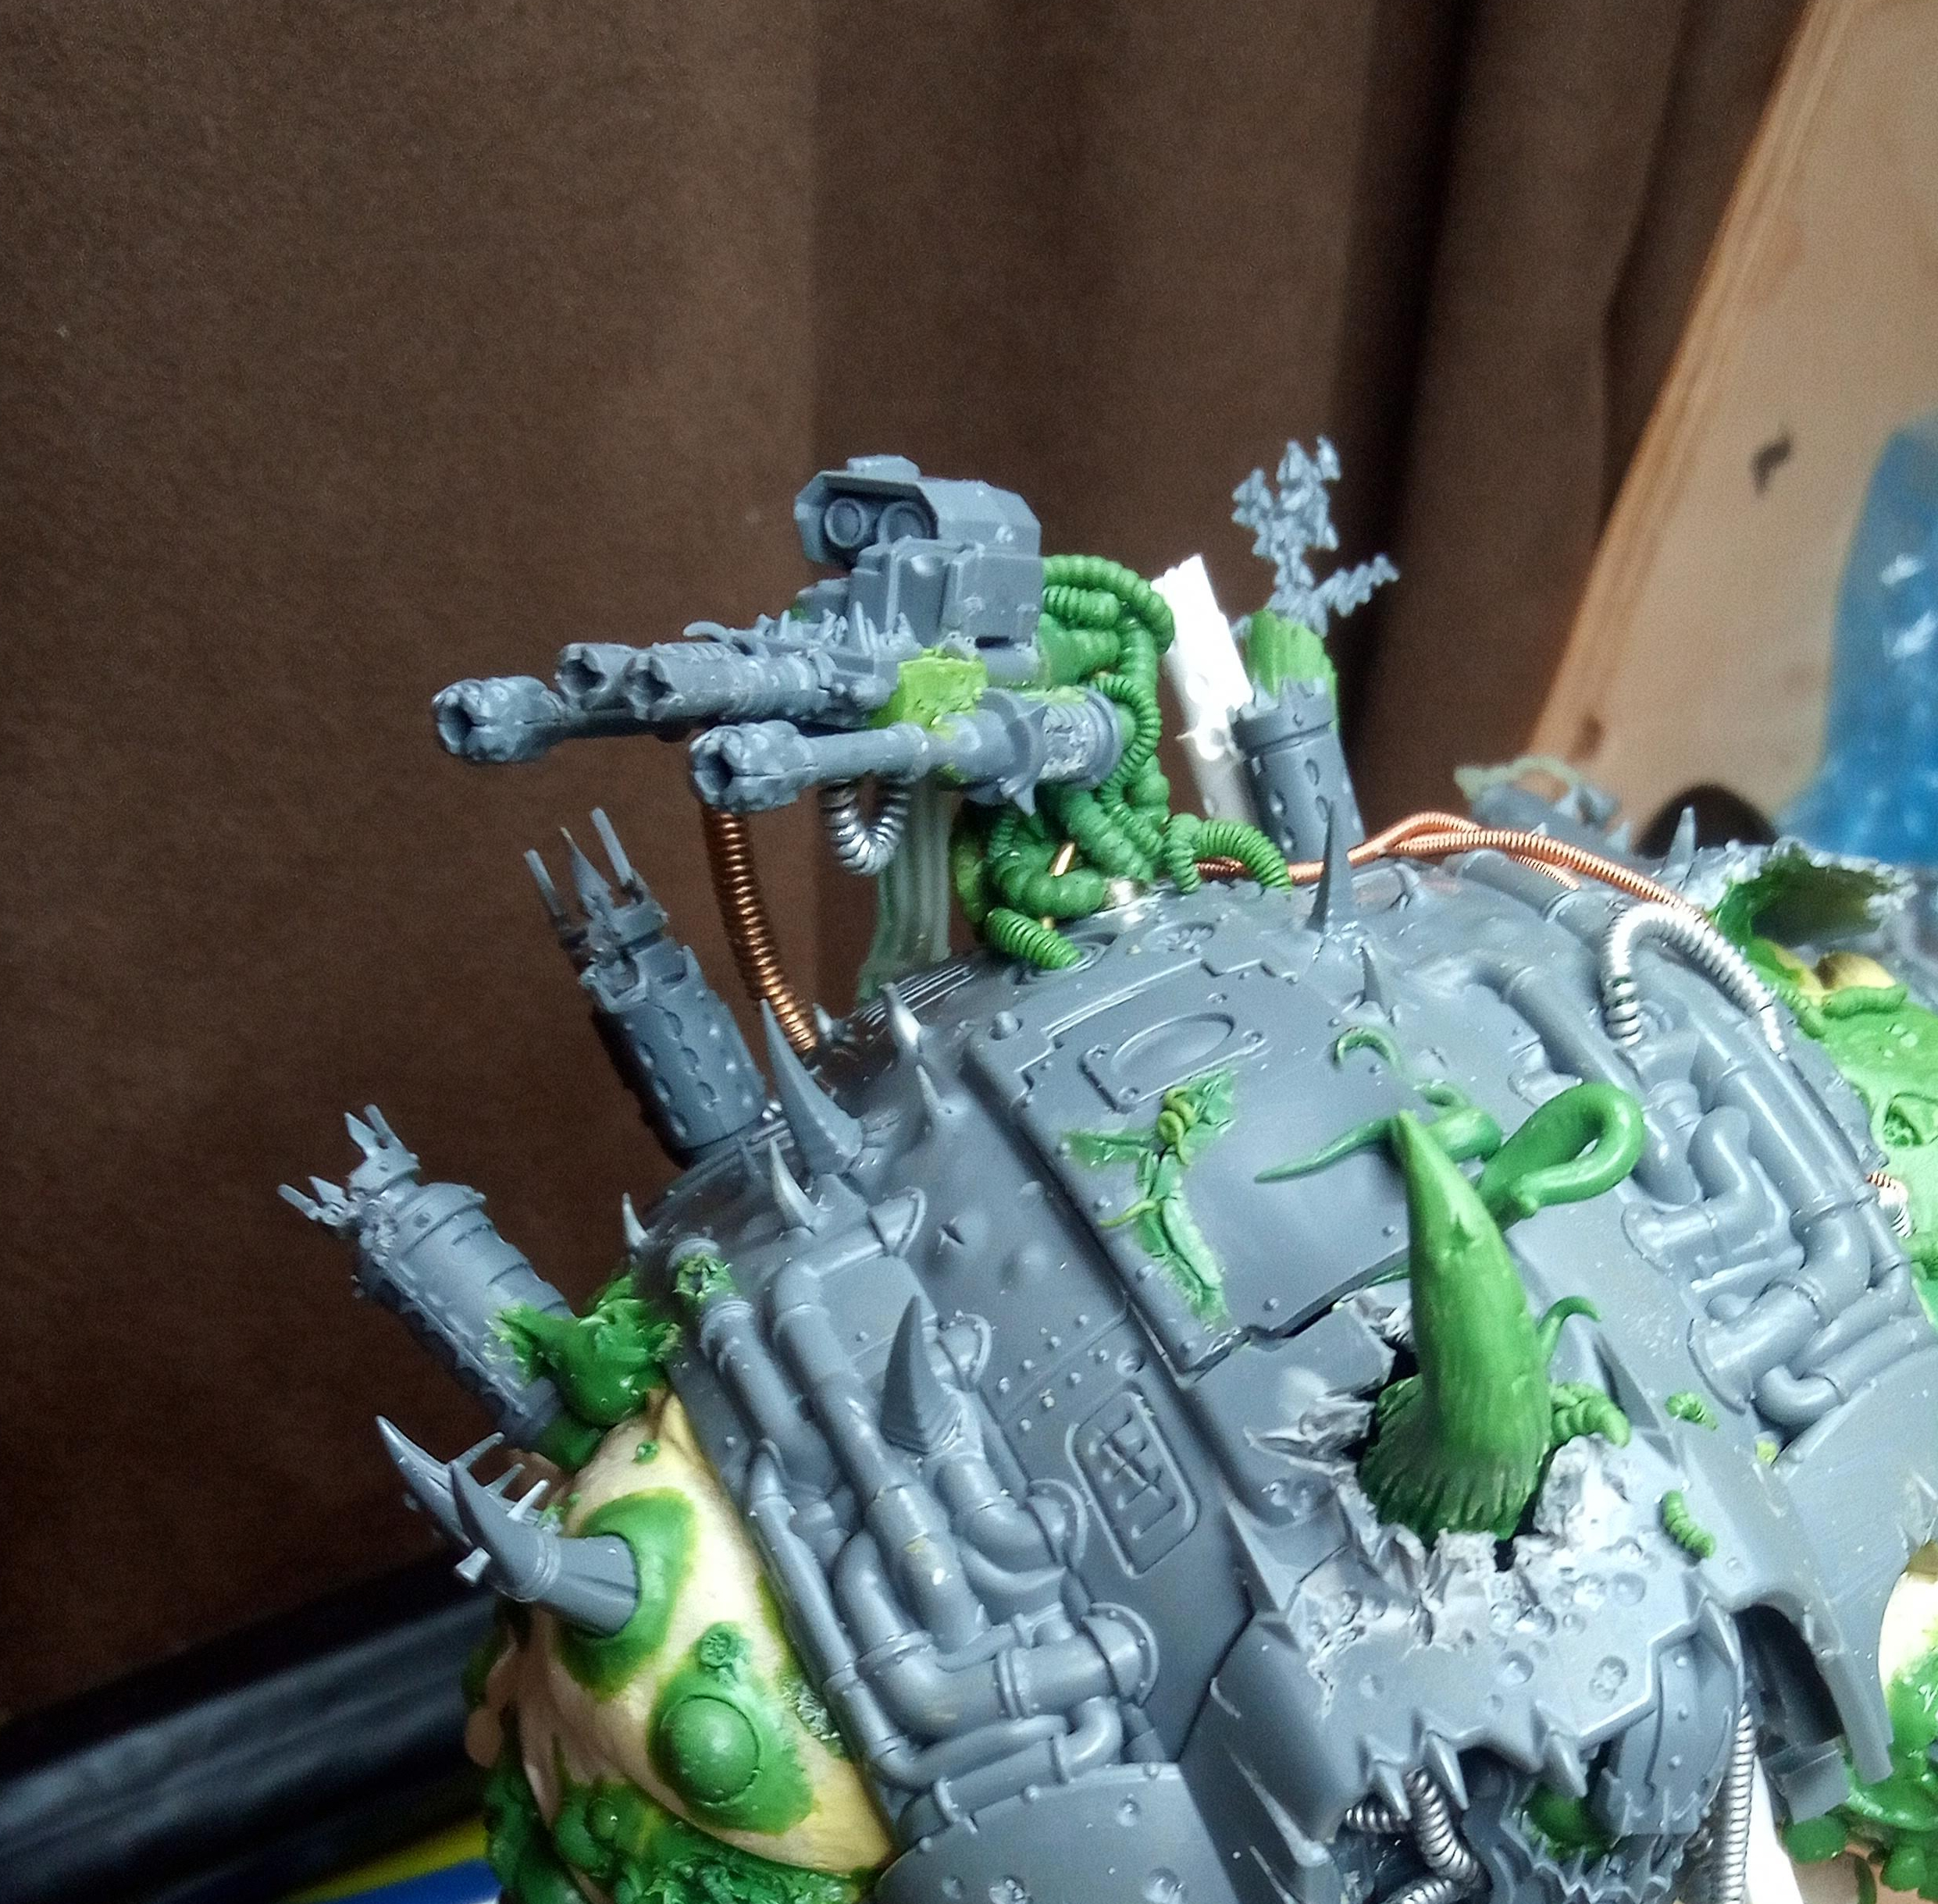
I wasn’t satisfied imagining the cables alone would move and writhe for some reason, its a cool concept but it could just as easily look as though that’s simply the position they are stuck in. So I decided to add some tentacles to it that look as though there were helping to manipulate the position of the gun but pulling on it and the cables. You can so see a couple of other cheeky little details I added here like some fleshy sacks to that organic bone exhaust and also an organic eye to create the Nurgle trinity of optics for the gun.


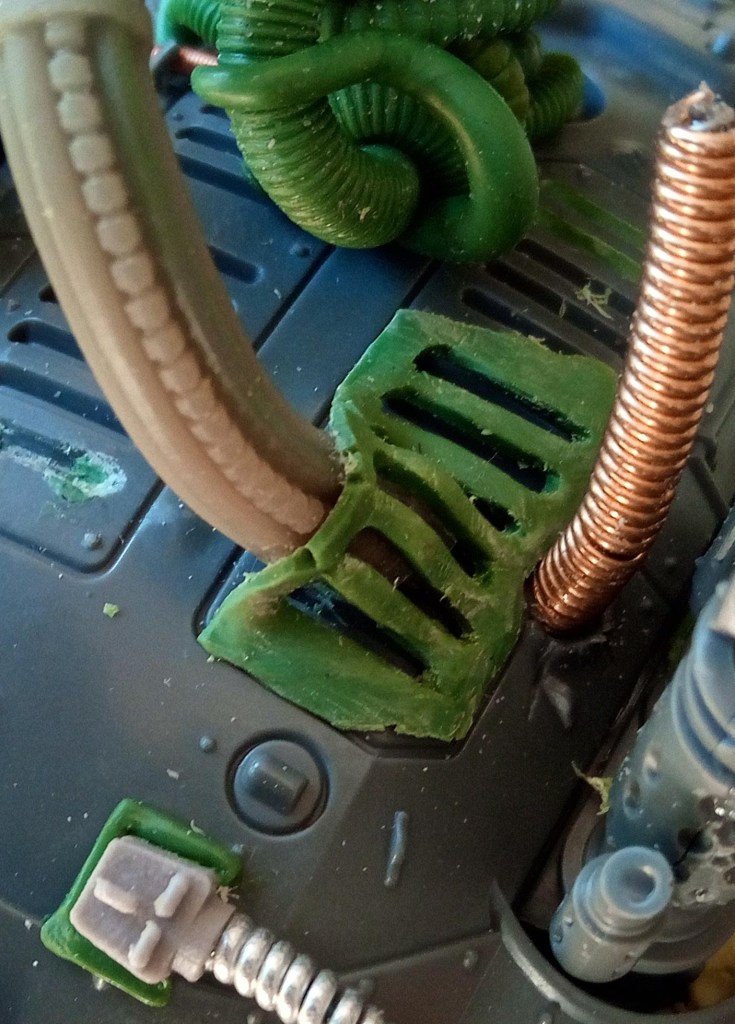
Ok, from this point… it got REALLY involved. This was one of the bits I was worried about. Making it look really detailed and integrated but being able to remove it without being able to see too much of a seam around where this component met the model. These cables are very organically arranged, so I wasnt going to sculpt sockets around them, these things were clearly, wildly bursting forth from the carapace, I needed the hull to be all lifted an torn where all the wires came through. Any effects I added at this point to do that would have to be attached to the gun too, so that the hull didn’t have the same damage if there was no gun. I added torn metal to the bottom of the cables and then worked on lifting one of the grills for the wrapped cable that was snaking out from beneath it… but I was NOT happy with the result. even after trying to stop it looking so “puffy” by scraping and cutting at it, as well as adding notches… It just wouldn’t work. I couldn’t see how you would not be able to see the regular carapace through the gaps.

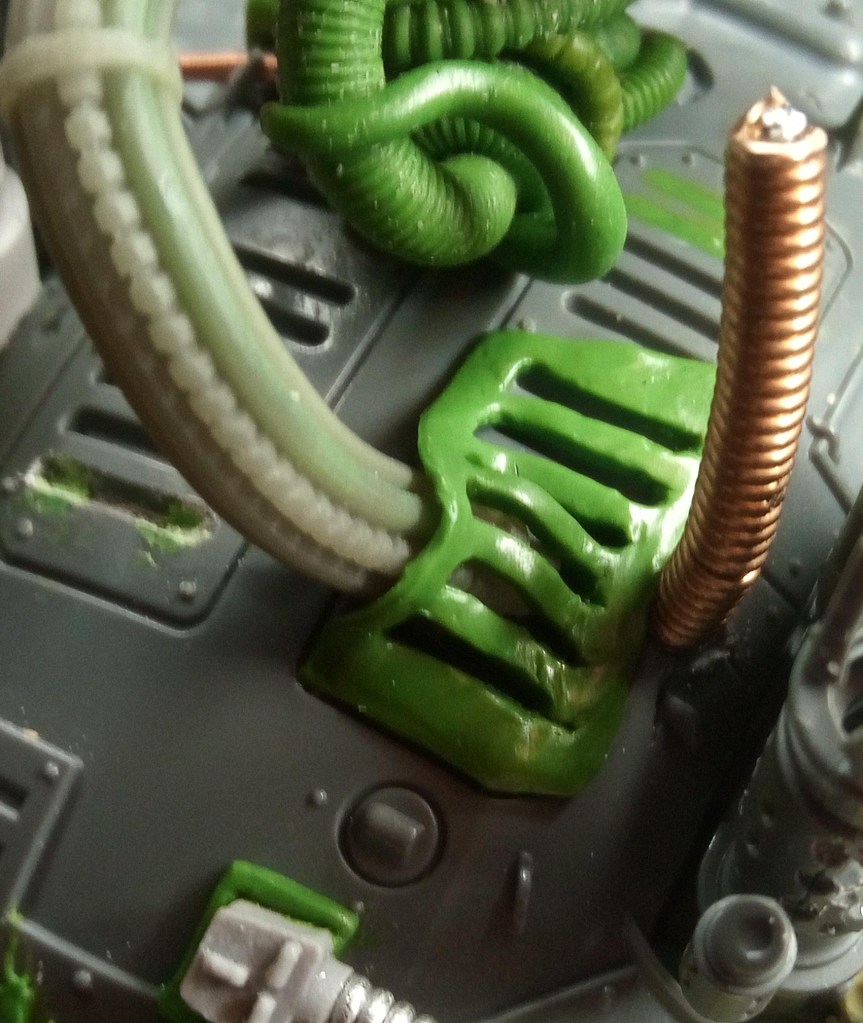

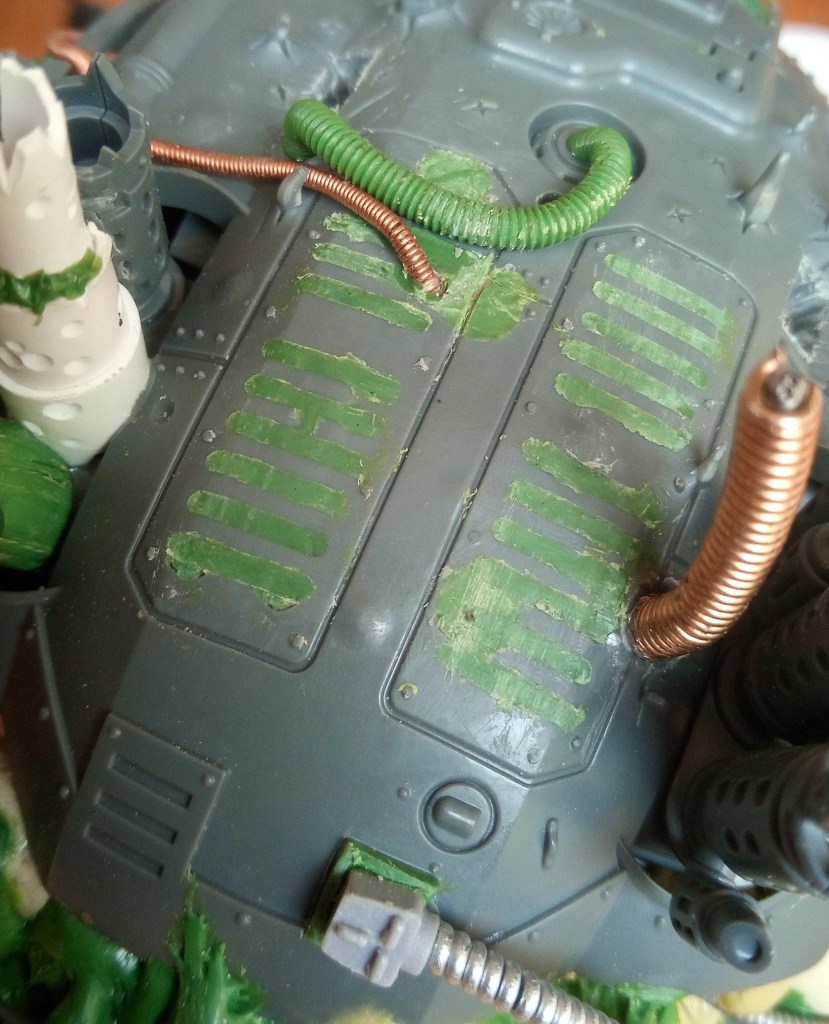
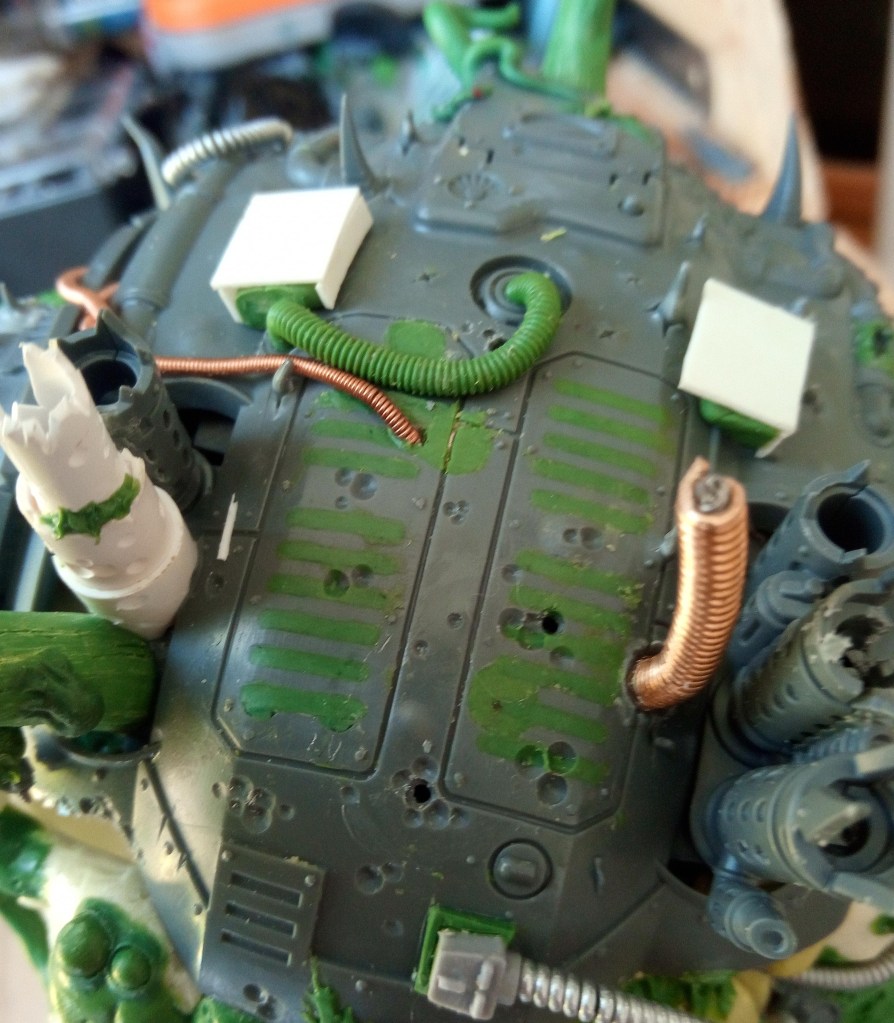
…This meant I couldn’t have a grill there, it would have to be a solid panel, and since the magnets I set into it were all offset and all ready blocked some of the grills on both sides I just decided to block all of the grills. This would hide the magnets and make it more uniform as if it was designed that way and also give me a blank canvas with which to add some pock marks and damage to later. The other thing I did here was add two holes for the ammo feeds… which I then realised was idiotic because the whole concept was for this to be removable and not leave holes behind when the gun wasn’t there. These hole were fortunately narrow enough to take some magnets quote well for the ammo feeds I would make.
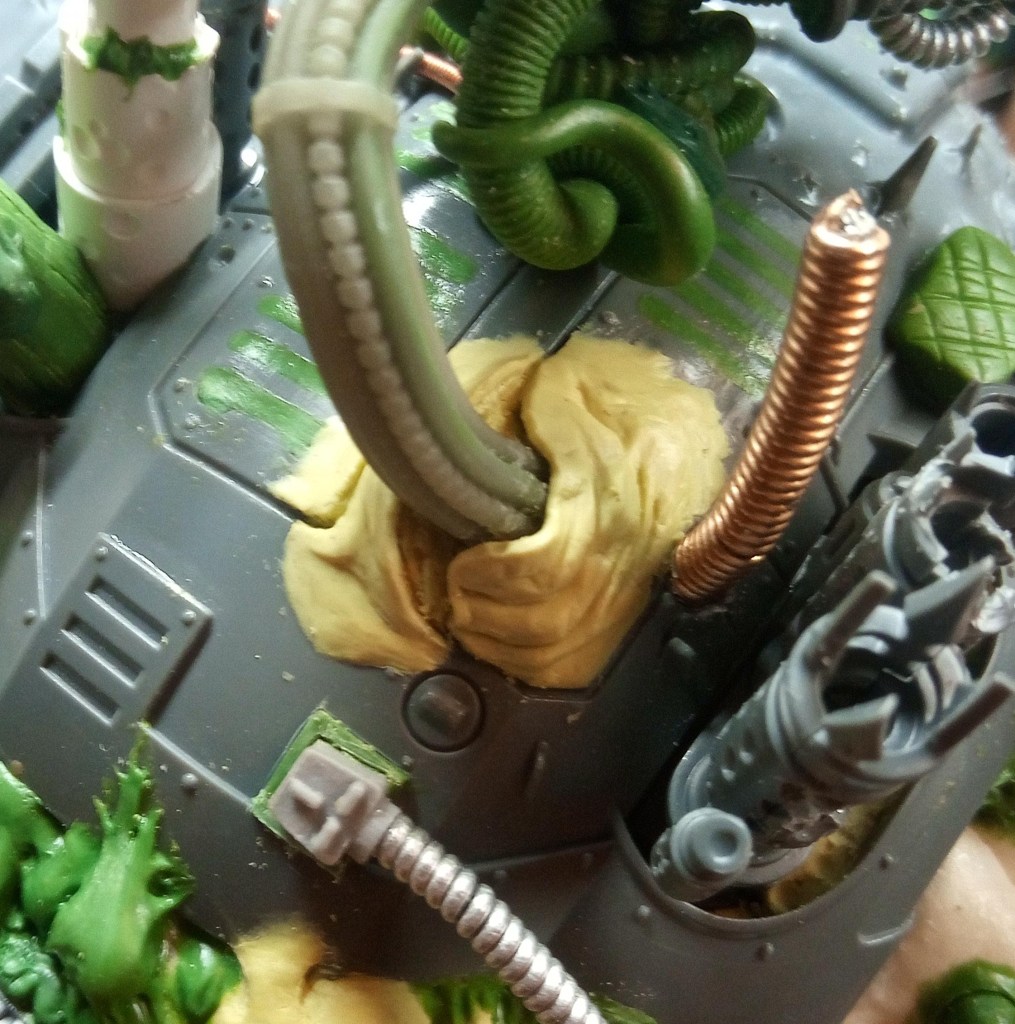
So in place of the grill now I just wanted to have the panels bending out of the way. This time I used Milliput instead of Green Stuff, it sets more ridged and I knew that the face would mate that of the carapace perfectly every time with no give. again after sculpting it, it looked about round edged and organic, so I came back in with a craft knife and scraped away at it to hopefully make it look more like a hard surface that was buckling instead. Around the Edge of it I used Green Stuff, which because it sets sort of plastic/rubbery it was less likely to chip if knocked (you can see a chip missing out of the Milliput in the third photo) The other details you can see in the last photo here are I added muscles to the cables, this would give the idea that they could operate a bit like tendons and move independently, as well as having more organic material originating from inside the body of the knight.


Next I concentrated on getting these ammo feeds out of the way. This was another aspect I had been procrastinating, I didn’t want to do it, it felt like the Zinge ammo belts I got were never going to bend enough to sit right, that the glue seals would just break under the stresses… I didn’t have a good feeling but I was in too deep and I had to try. I made some little boxes that the ammo would feed from rather than the holes in the carapace, these were plasticard with some Green Stuff stuffed in them to help give them a bit of structure, then once that had all set I pushed Milliput into all the holes and let that set so that it would fit flush against the Carapace. I was right about the feeds, I couldn’t get the angle on them, so I had to cut between all of the rounds in each feed to give it a tiny bit more posability and it actually worked!
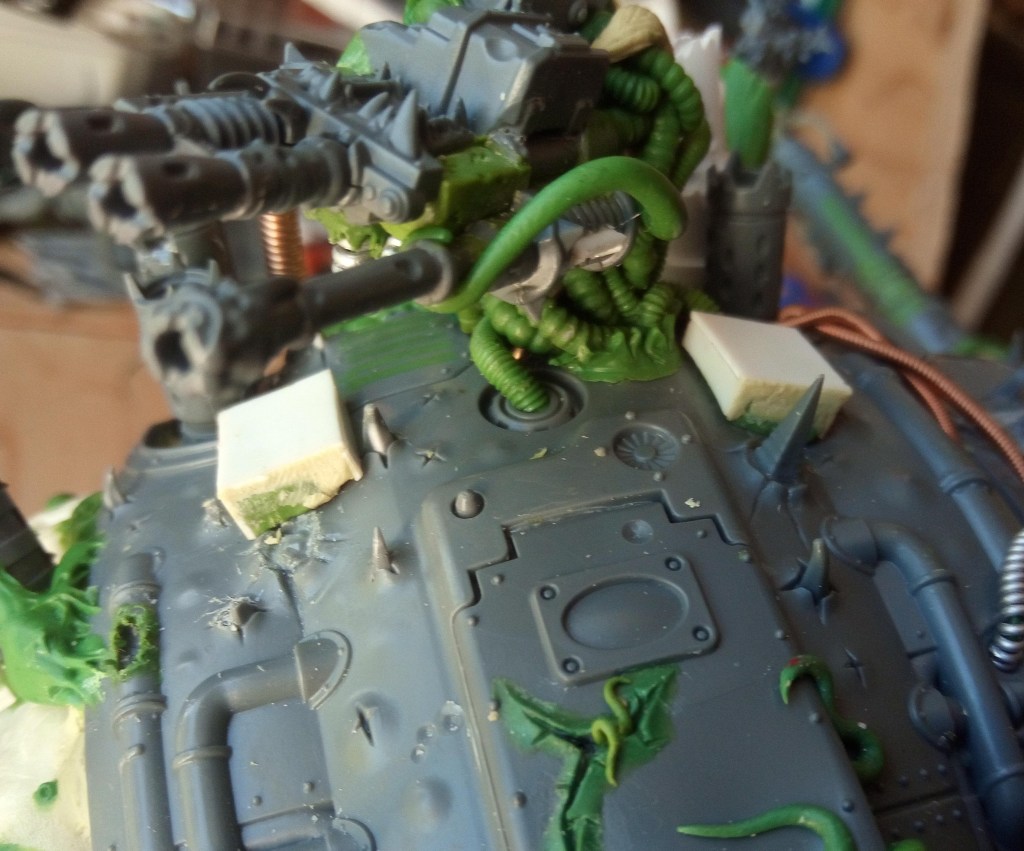

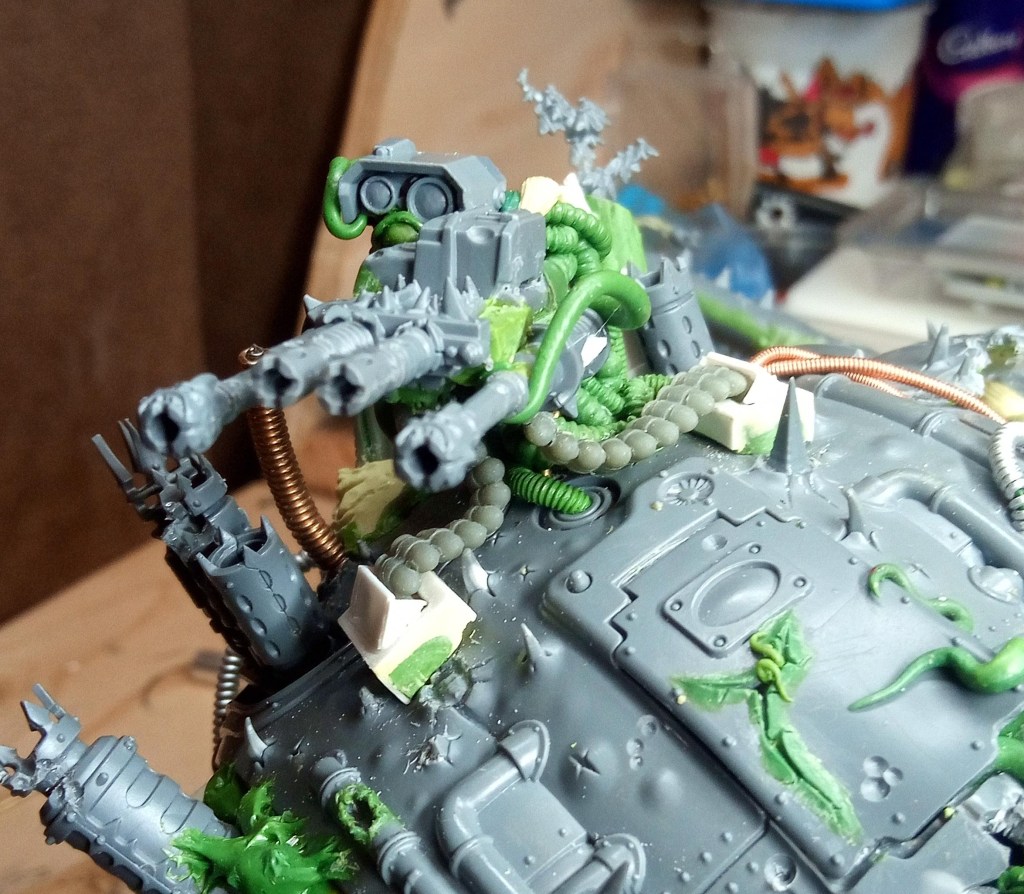
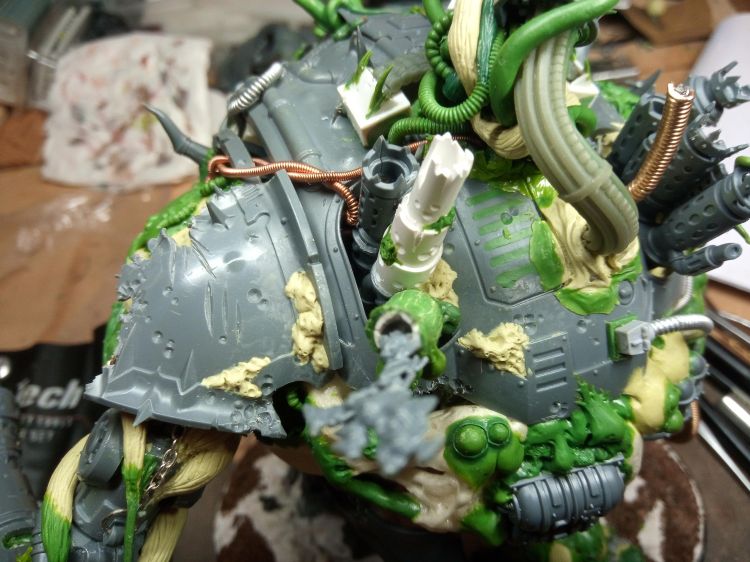
Now the bit with the bundled cabling met the hull, it had a magnet and two small pins (made from staples I think), to help lock it in the right place… but it was a bit of a faff to get it lined up because the give in the Zinge bundled cable meant it wouldn’t necessarily line up correctly. To fix this I decided to extend the buckling metal and lock its position in with that of the gun cables, that would mean that it couldn’t move around independently and it should in theory make it a lot easier to slot into place. Then I just had a quick look over the top of the model and added some Milliput growths on the wrecked pauldron and carapace.


just in case you wonder how it looks on and off and how easy is to chance that, I organised this…
…And thats it for the carapace and optional yet integrated carapace weapon! I normally say I’m “pretty happy” or “pleased” with the results of the stuff I’ve worked on, but I’m unashamedly CHUFFED to bits with how well this worked. It was technical, had a lot of design issue, some problem solving involved and lots of things that could have stopped me in my tracks but I was really glad that I bothered to do it, it turned out better than I expected. Just to think I finished this the week before I handed it over, all this work took about 3 weeks I think and 3 weeks earlier than that I was trying to decide whether or not to bother with a weapon at all and allow myself those weeks to relax and just be satisfied I finished in time. HA! Why relax when you can stressfully power through a project, unsure if the effort will be worth it?!?!?
As always your feedback, be it praise, constructive criticism or related project ideas are always very welcome! I’d love to hear from you and what you think of this or any other aspect of the build, and thanks for reading this particularly long post too!
~Pandora’s Bitz Box~

What a beauty!
That integrated/removable nurgly weapon is a work of art! The animation of the removal made me shiver! Is it that flexible? … So there’s no chance to see it painted?
LikeLiked by 1 person
The only flexible parts are the ammo belts, they are a rubbery flexible resin, sadly you cannot see it painted as it is still in the same state. It was a birthday present for my co-blogger Krakendoomcool and it’s up to him now. 😄
I’m really glad you like it though!
LikeLiked by 1 person
Oh, makes sense! It’s precisely what’s seen bending on the video, of course…
Oh, the whole project was inspiring… Send him/her my best wishes for the birthday, and do tell that Nurgle is forgiving… And maybe concoct some brews and have Krakendoomcool sign a dark pact to start painting on the next day! Just my C&C…
LikeLiked by 1 person
Man, what a delightful post to read. I love the attention to detail you have. Also reading about what your thoughts are and how you overcome certain obstacles. You have all the right to be proud of what you have achieved so far.
LikeLiked by 1 person
Thanks! I always worry I’m putting too much in these posts and that people will get bored before they get to the end 😂
Really glad you liked it and hopefully you might find it helpful if you try something similar!
LikeLiked by 1 person
I do not have any mini’s. I collect the books… although… I might have just bought my first “how to Warhammer” book during last week… still need to do a post on it.
LikeLiked by 1 person
Well that’s even more fascinating then that my waffly post was enjoyed by someone that doesn’t even hobby 😂
So you are thinking of getting into the creating side of things too then?
LikeLiked by 1 person
Branching out slowly…
LikeLiked by 1 person
Inspired stuff mate – every time I think you can’t make this any more awesome, and every time you prove me wrong… superb.
LikeLiked by 1 person
Well that in now all caught up on the process, I can move on with my life. The next chapter for that mini is Krakendoomcool painting it
LikeLiked by 1 person
The crowning glory – I hope he sends you pics to conclude your series of posts!
LikeLiked by 1 person
Oh absolutely, there’s no way he would get away with not doing it 😂
LikeLiked by 1 person
Chuffed, you say. Well, you have every right to be chuffed, pleased and proud. It looks amazing.
LikeLiked by 1 person
Thanks man, yeah, it’s been funny going back through the photos to make the posts, I think I got a new appreciation for a lot of the bits after having a break from it I’d been staring at it for so long that I forgot how much I did
LikeLiked by 1 person
Can’t blame you for being pleased with yourself there. That is some brilliant kit bashing.
Cheers,
Pete.
LikeLiked by 1 person
Thank Pete! Yeah it all turned out ok in the end, it was fun not knowing how things would look and seeing them take shape. 😊
LikeLiked by 1 person
Bloody amazing read for a bl;oody amazing build. And then seeing the whole carapace weapon assembly just “pop off” like that… 😀
LikeLiked by 1 person
Thanks man! I m really proud of it, trying to do the whole optional/integrated thing was a challenge but a lot of fun. I really enjoy the technical aspects of building in addition to the aesthetic design, like solving a puzzle.
LikeLiked by 1 person