
Another week, another update on the Wolfspear project. If you joined me last week you would have seen half a Wulfen conversion, half a base, and half a leg. There was also a pauldron of some kind that I actually finished, but mostly a lot of unfinished stuff.
This week is no different! I stuck to (at least) one hour a night painting, and made a fair bit of progress across the board. Lots of finished components, but nothing technically finished, let’s see how I got on…
First up; the base. Once the wall filler was dried I hit it with a trusty mixture of fine sand and small stones. You can make your own mixture like this for next to nothing – just make sure you have somewhere to store a large amount of it (or friends to offload some on to) – as buying a bag of pool filter sand for cheap is great, but takes up a lot of space.
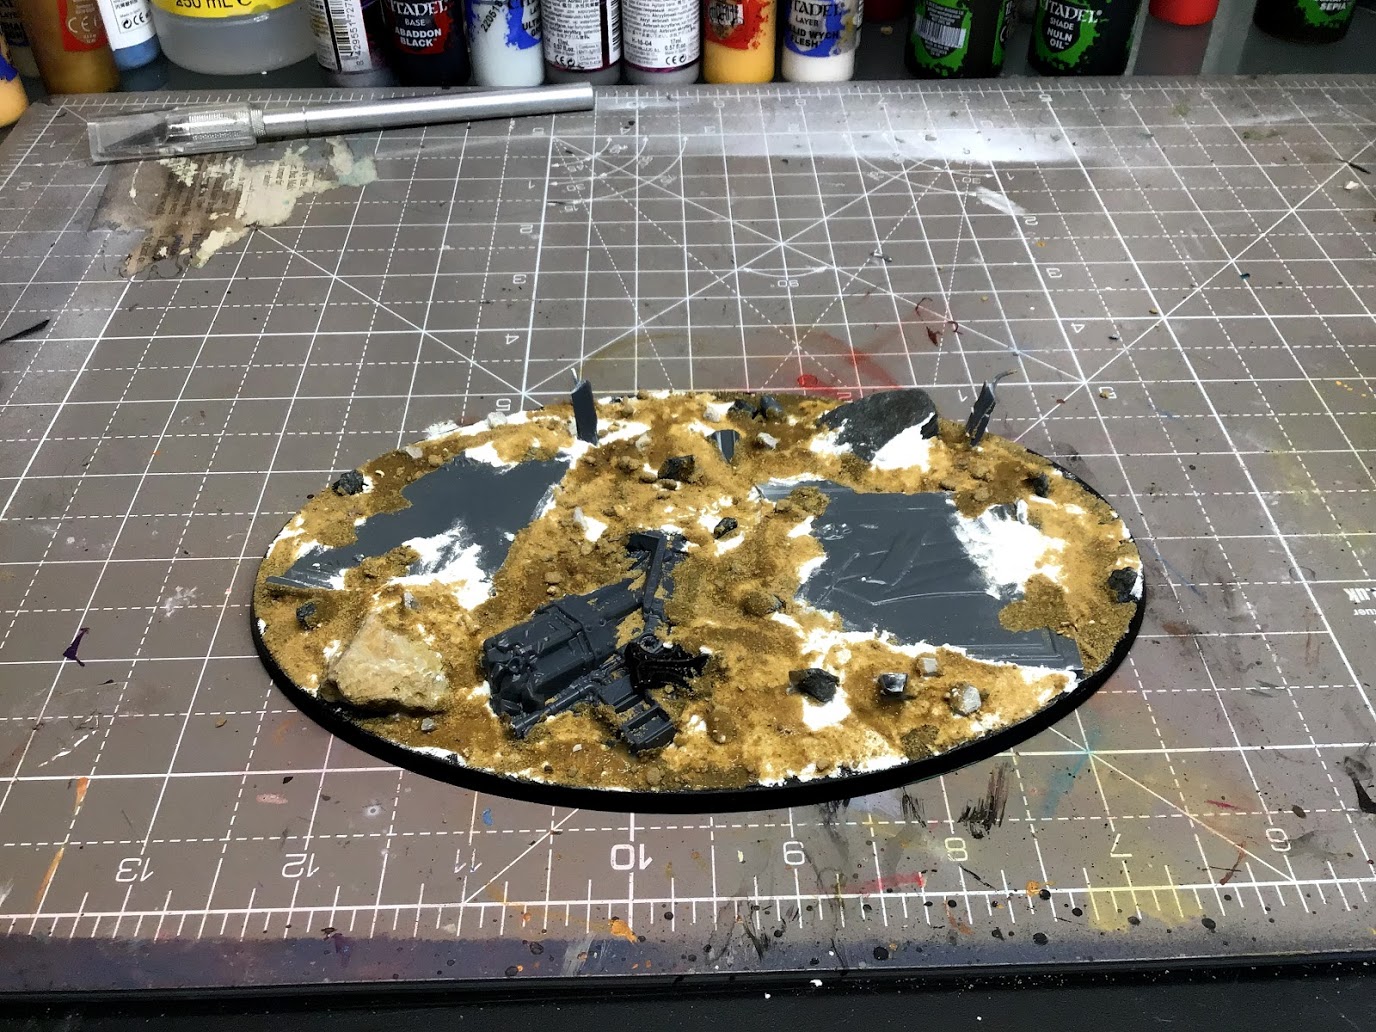
I then got on to the fun part, painting. For this I primed it black and then hit it with a variety of dark browns and greys stonework and metals.
After a pretty strong black wash over everything I did an initial pass with some pigments and my trusty AK Interactive engine grime and engine oil. I love this weathering kit a lot, with a bit of enamel thinner it’s easy to spread around and get some good effects. The gloss on the oil is also nice for adding a gross wet effect.
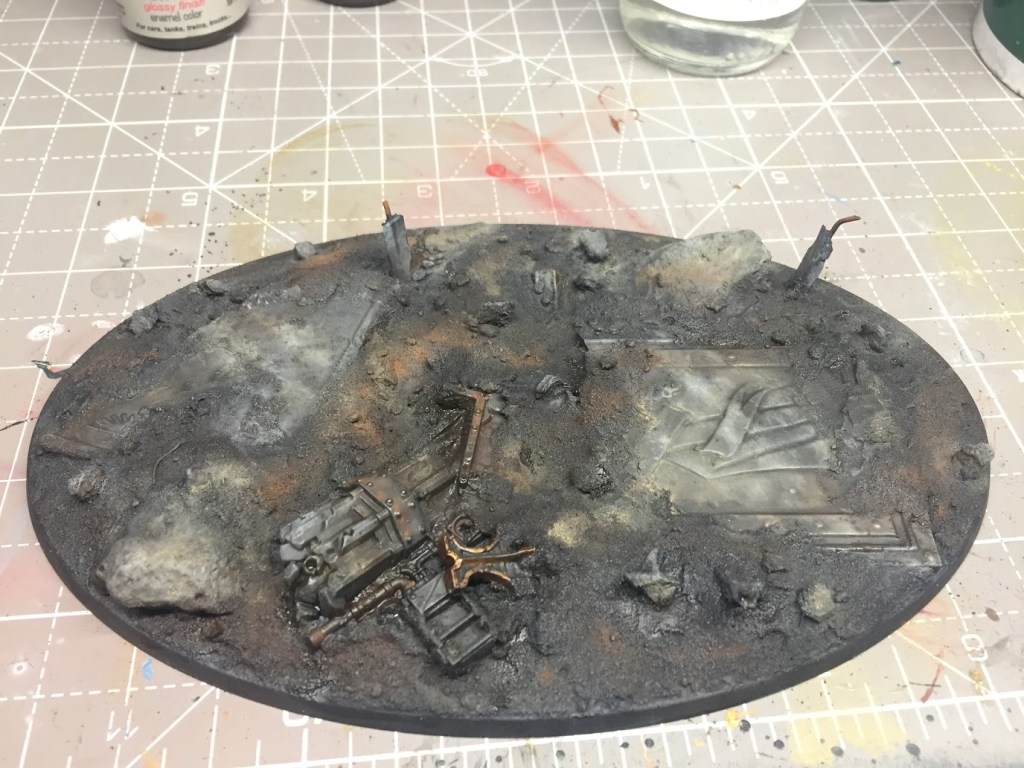
I let this dry fully and then did another pass, building up the pigments in places they seemed to make sense – red in the crevices and grey around the rocks.
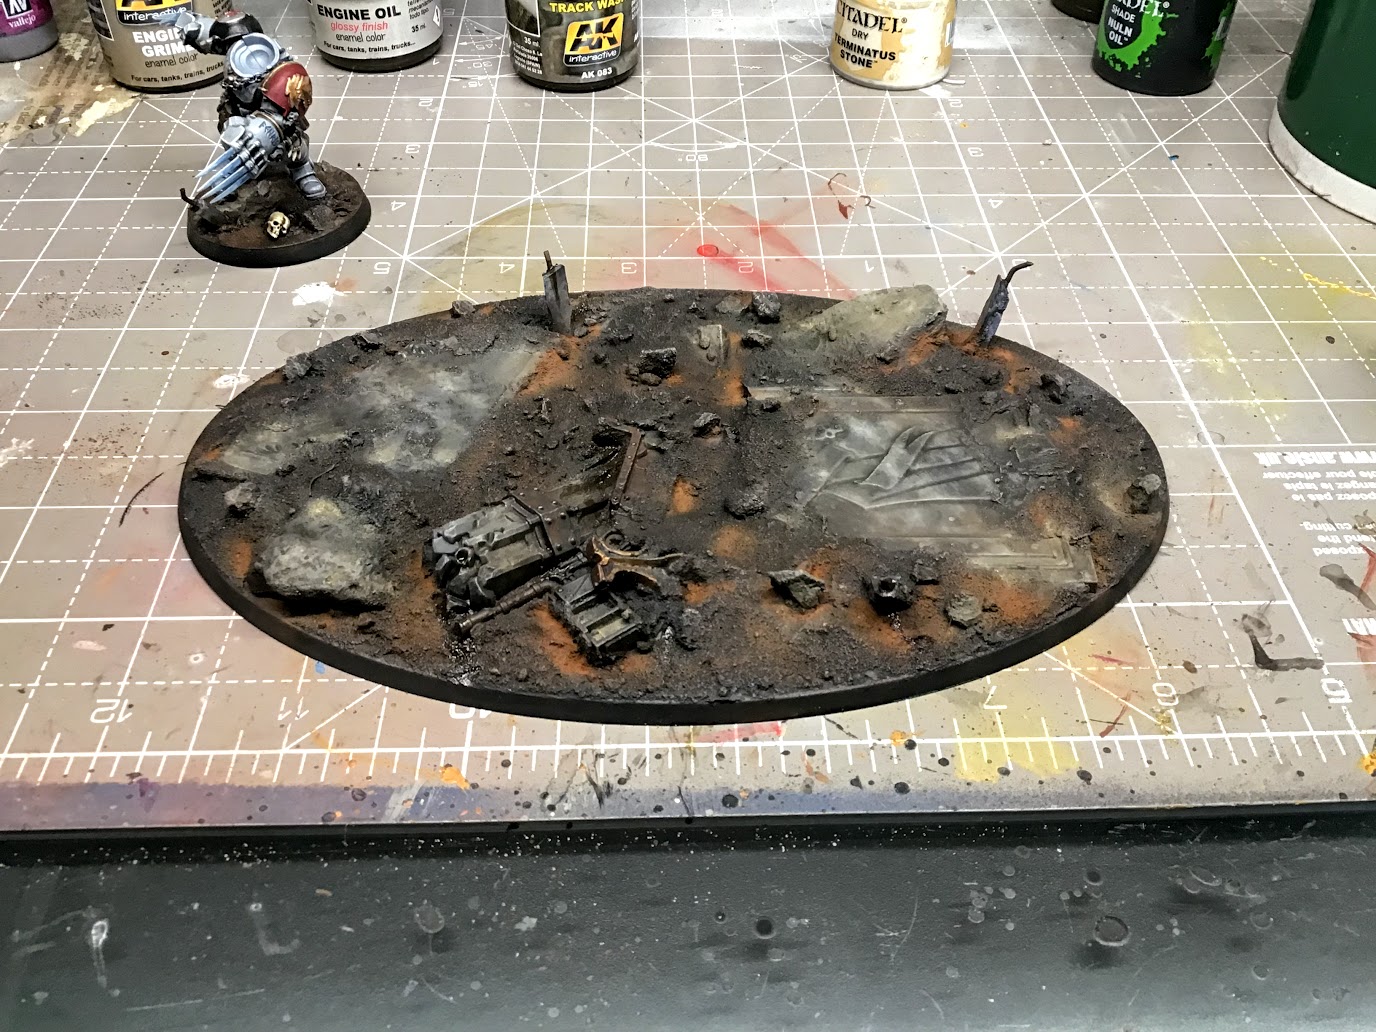
That was the done, apart from a name plate which will be coming in the post in the next week or two, then I can paint that and the rim of the base.
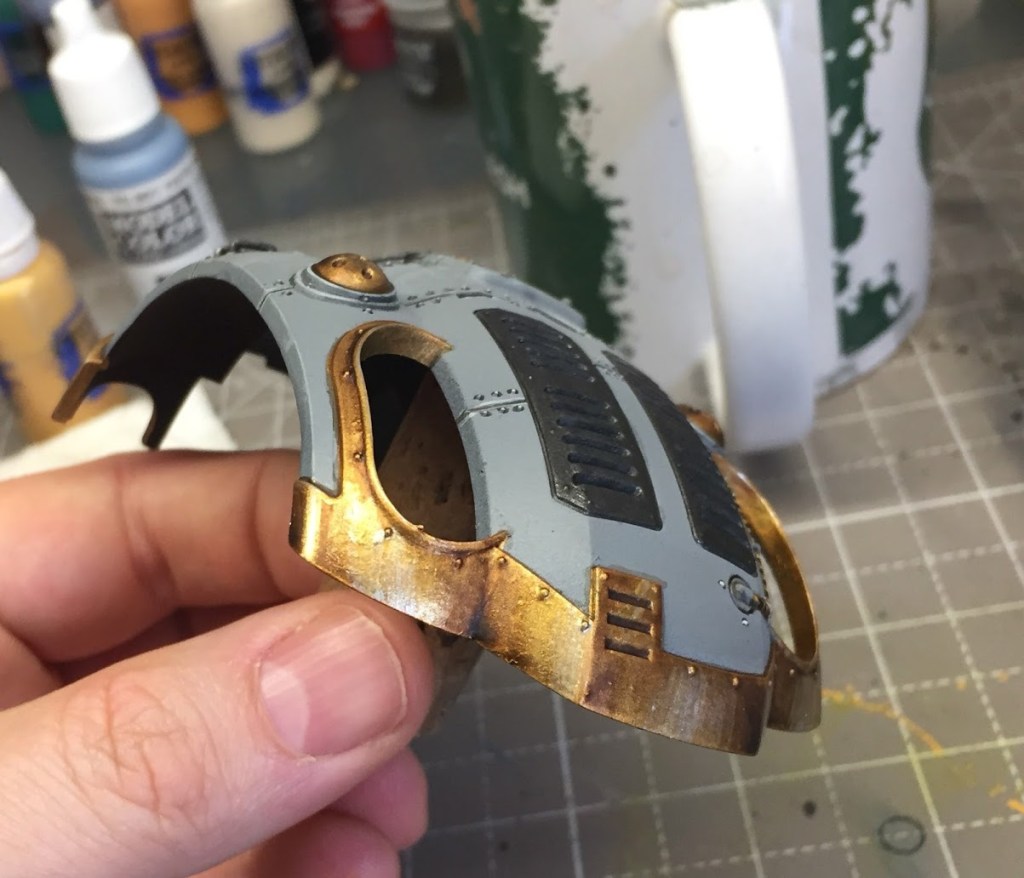
I also spent a bit of time and finished off the other leg after starting them last week, so the lower half of the frame is finished now.

Nothing really of note here, it was mainly just done using the weather enamels and enamel thinner.
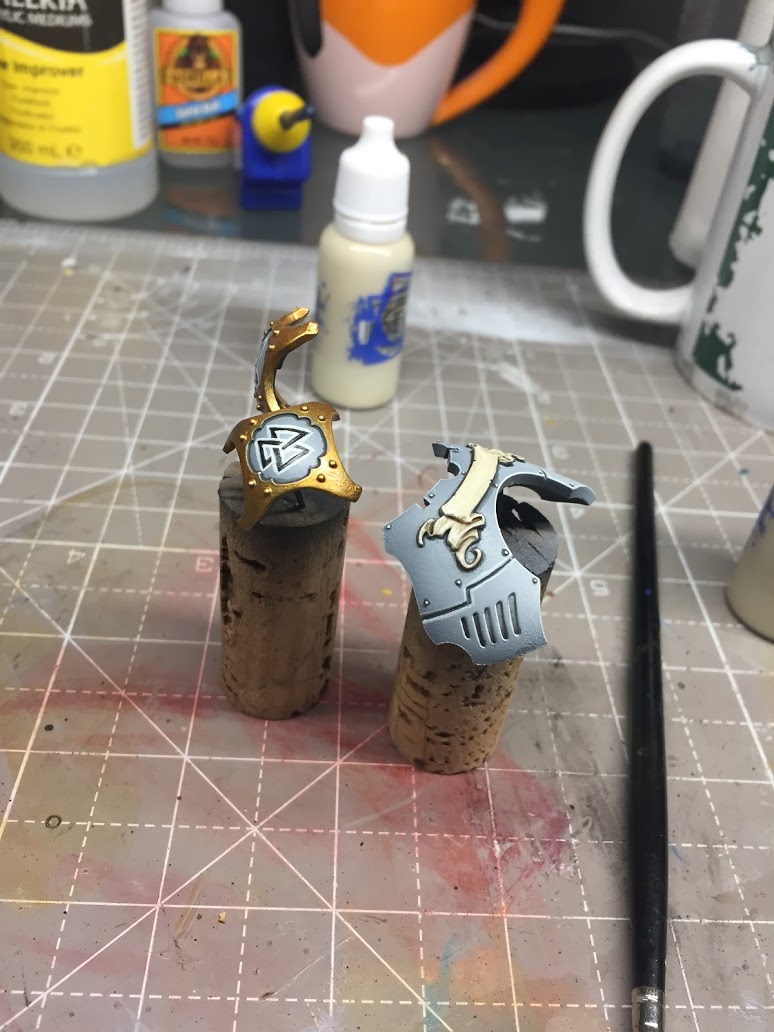
Next up when I got home on Friday night after work I felt inspired to get painting some more of the freehand for this piece, and by Saturday afternoon it was finished.
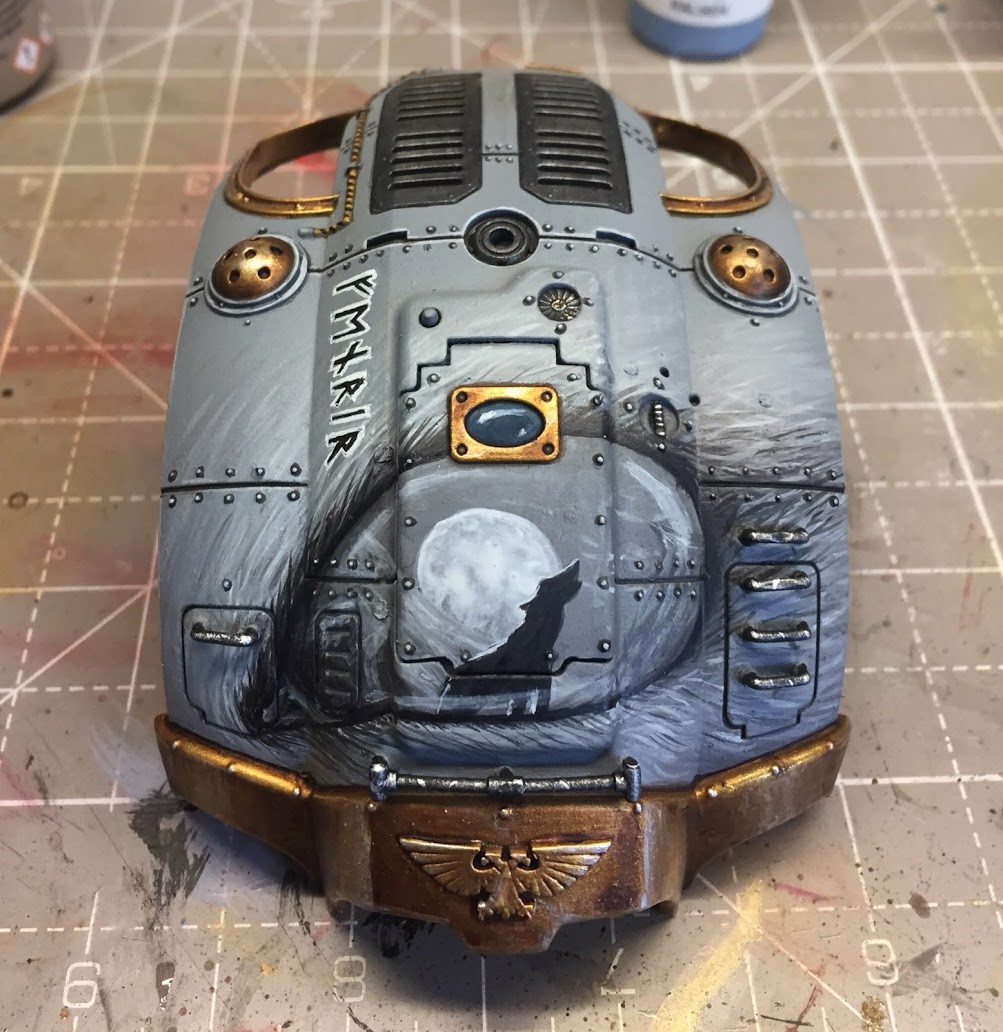
I’m equally as happy with this piece as I was with the pauldron. It was also a fair bit quicker to do, I think overall the freehand itself probably took about 2-3 hours and the rest of the time was spent doing all the other details on this armour piece.
I also remembered to take some photos of it as I was going along, so put together a small montage showing it coming together.
I hope this inspires you or gives you some ideas on how to achieve something similar on your own pieces, as you can see if you start with the rough outline you can easily build it up from there – that is the beauty of paint.
I’d also like to point out the rough and ready TMM effect I put in on the gold here.
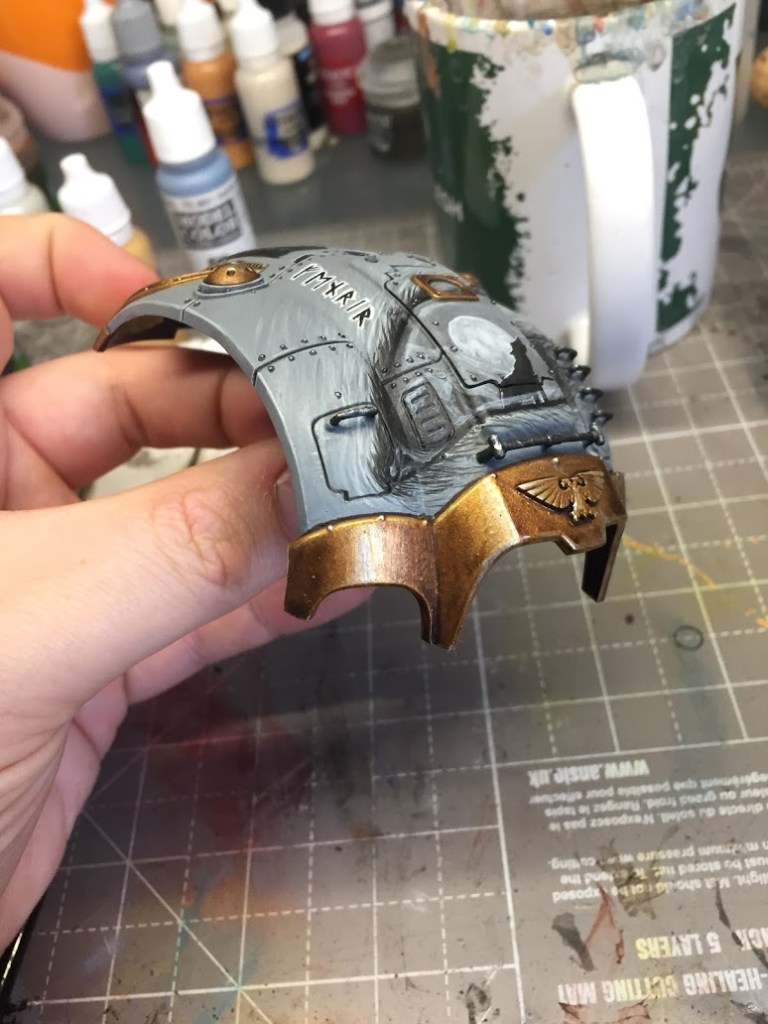
For this I washed the base colour with Agrax a few times, focusing it stronger towards where I would consider the shade to be, and then used a thinned down gold and silver to build the highlights up again and bring the shine back into the gold.
You can go very hard with this effect building it up over hours and hours over thin layers – or you can be lazy like me and do 3 coats of wash followed by a layer of thinned gold and silver. I like it, and it didn’t take me dozens of hours.
Next up I wanted to try out a new effect so picked up the cannon barrel off the weapon and took an airbrush to it.
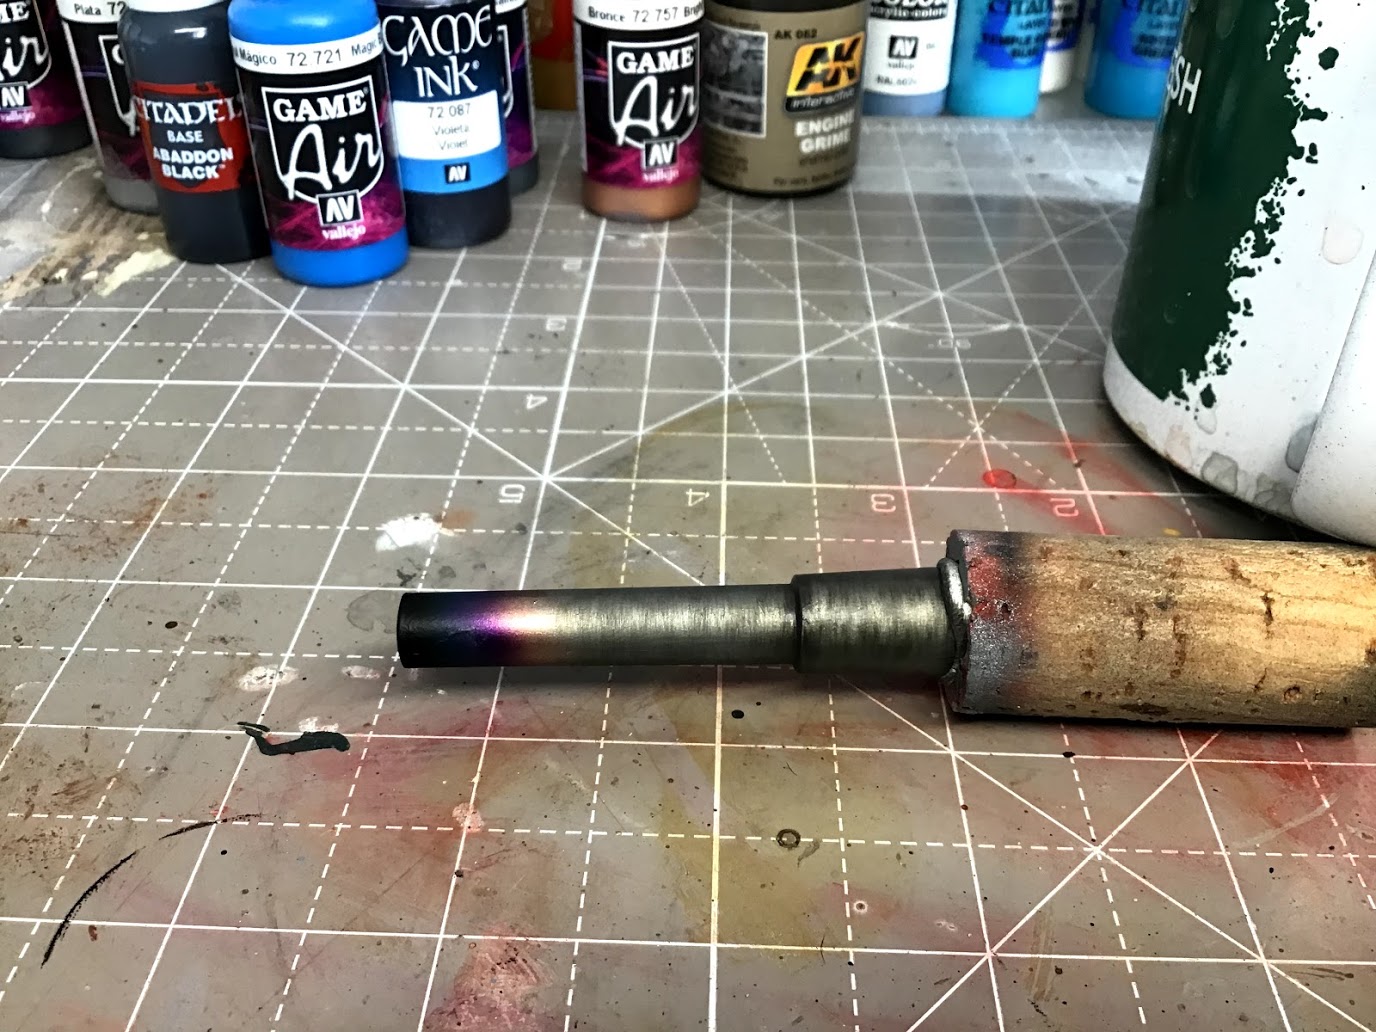
I’ve seen this effect before but wanted to see how I could recreate it. Copper, violet ink, bright blue and black over the base metallic gave a reasonably realistic effect. The Vallejo violet ink in particular was an absolute dream to use and I’m going to be looking for reasons to use it in future. Over the copper and through the airbrush it has such an intense feel to it. To give the barrel a brushed steel effect I took my trust AK Interactive engine grime and some enamel thinner and brushed it… with a brush. Brushes.
Phew. Don’t worry. We’re almost done…. It’s been a reasonably productive week for the painting.
After the reasonably intense weekend I fancied something a bit lighter earlier in the week, so just spent a bit of time painting up the more basic armour plates.

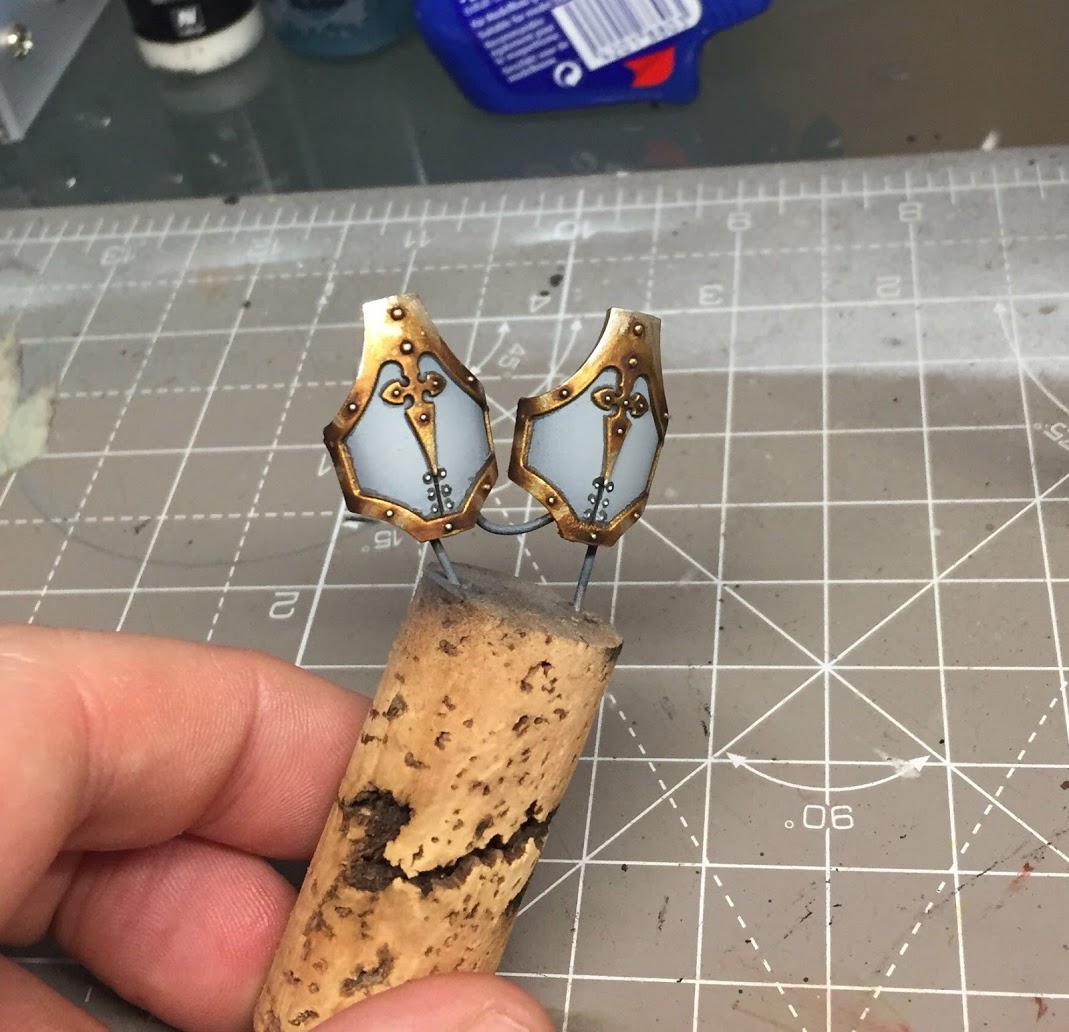
The knee pads and chest plate isn’t finished yet because it was too damn humid for the paint to dry last night. Disgusting.
Well that’s it for another week, I got a load done on the Knight. The only things left are the shin plates, other pauldron and the shield… And the main body piece.
Well on track for completion by the trip to Warhammer World, should even have enough time to paint up a Kill Team for use while I am there too at this rate.
Until next time!

Looking good mate – I’m particularly in awe of that base… Beautifully done!
LikeLiked by 1 person
Thanks! The pigments and enamels are great for getting a decent looking effect with minimal effort!
LikeLiked by 1 person
Another great design and free hand. That base is beautiful! Great heat effect, lovely violet on there. This beast is coming on fantastically.
LikeLike