This post’s focus is on the bio-mechanical leg of the knight. From a design perspective I really like the chaos stuff which is quite asymmetrical and for this Knight I envisaged one of the legs being largely unmolested (aside from corrosion/battle damage) and the other having fleshy growths incorporated with it.
I didn’t really know how I planned to do this. I couldn’t see a way for me to use the expanding foam at this stage as relatively speaking the leg is quite small compared concentrations of foam that would come out (I imagine there scope for experimentation with this though). Its a shame because the foam produces quite cool swollen looking fat skin and I really like the Nurgle style, elephantiasis style legs you see on a lot of the models.

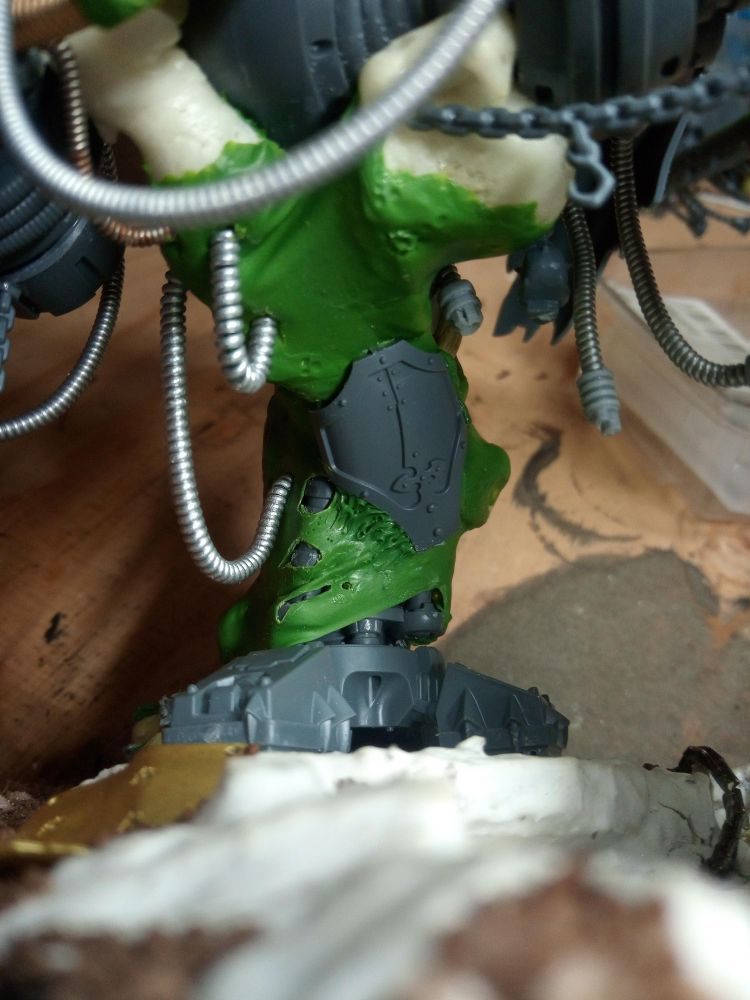
I had to start somewhere though, so I got the leg build and added some small lumps of expanding foam to give the leg a better transition in to the organic lumps of the body.
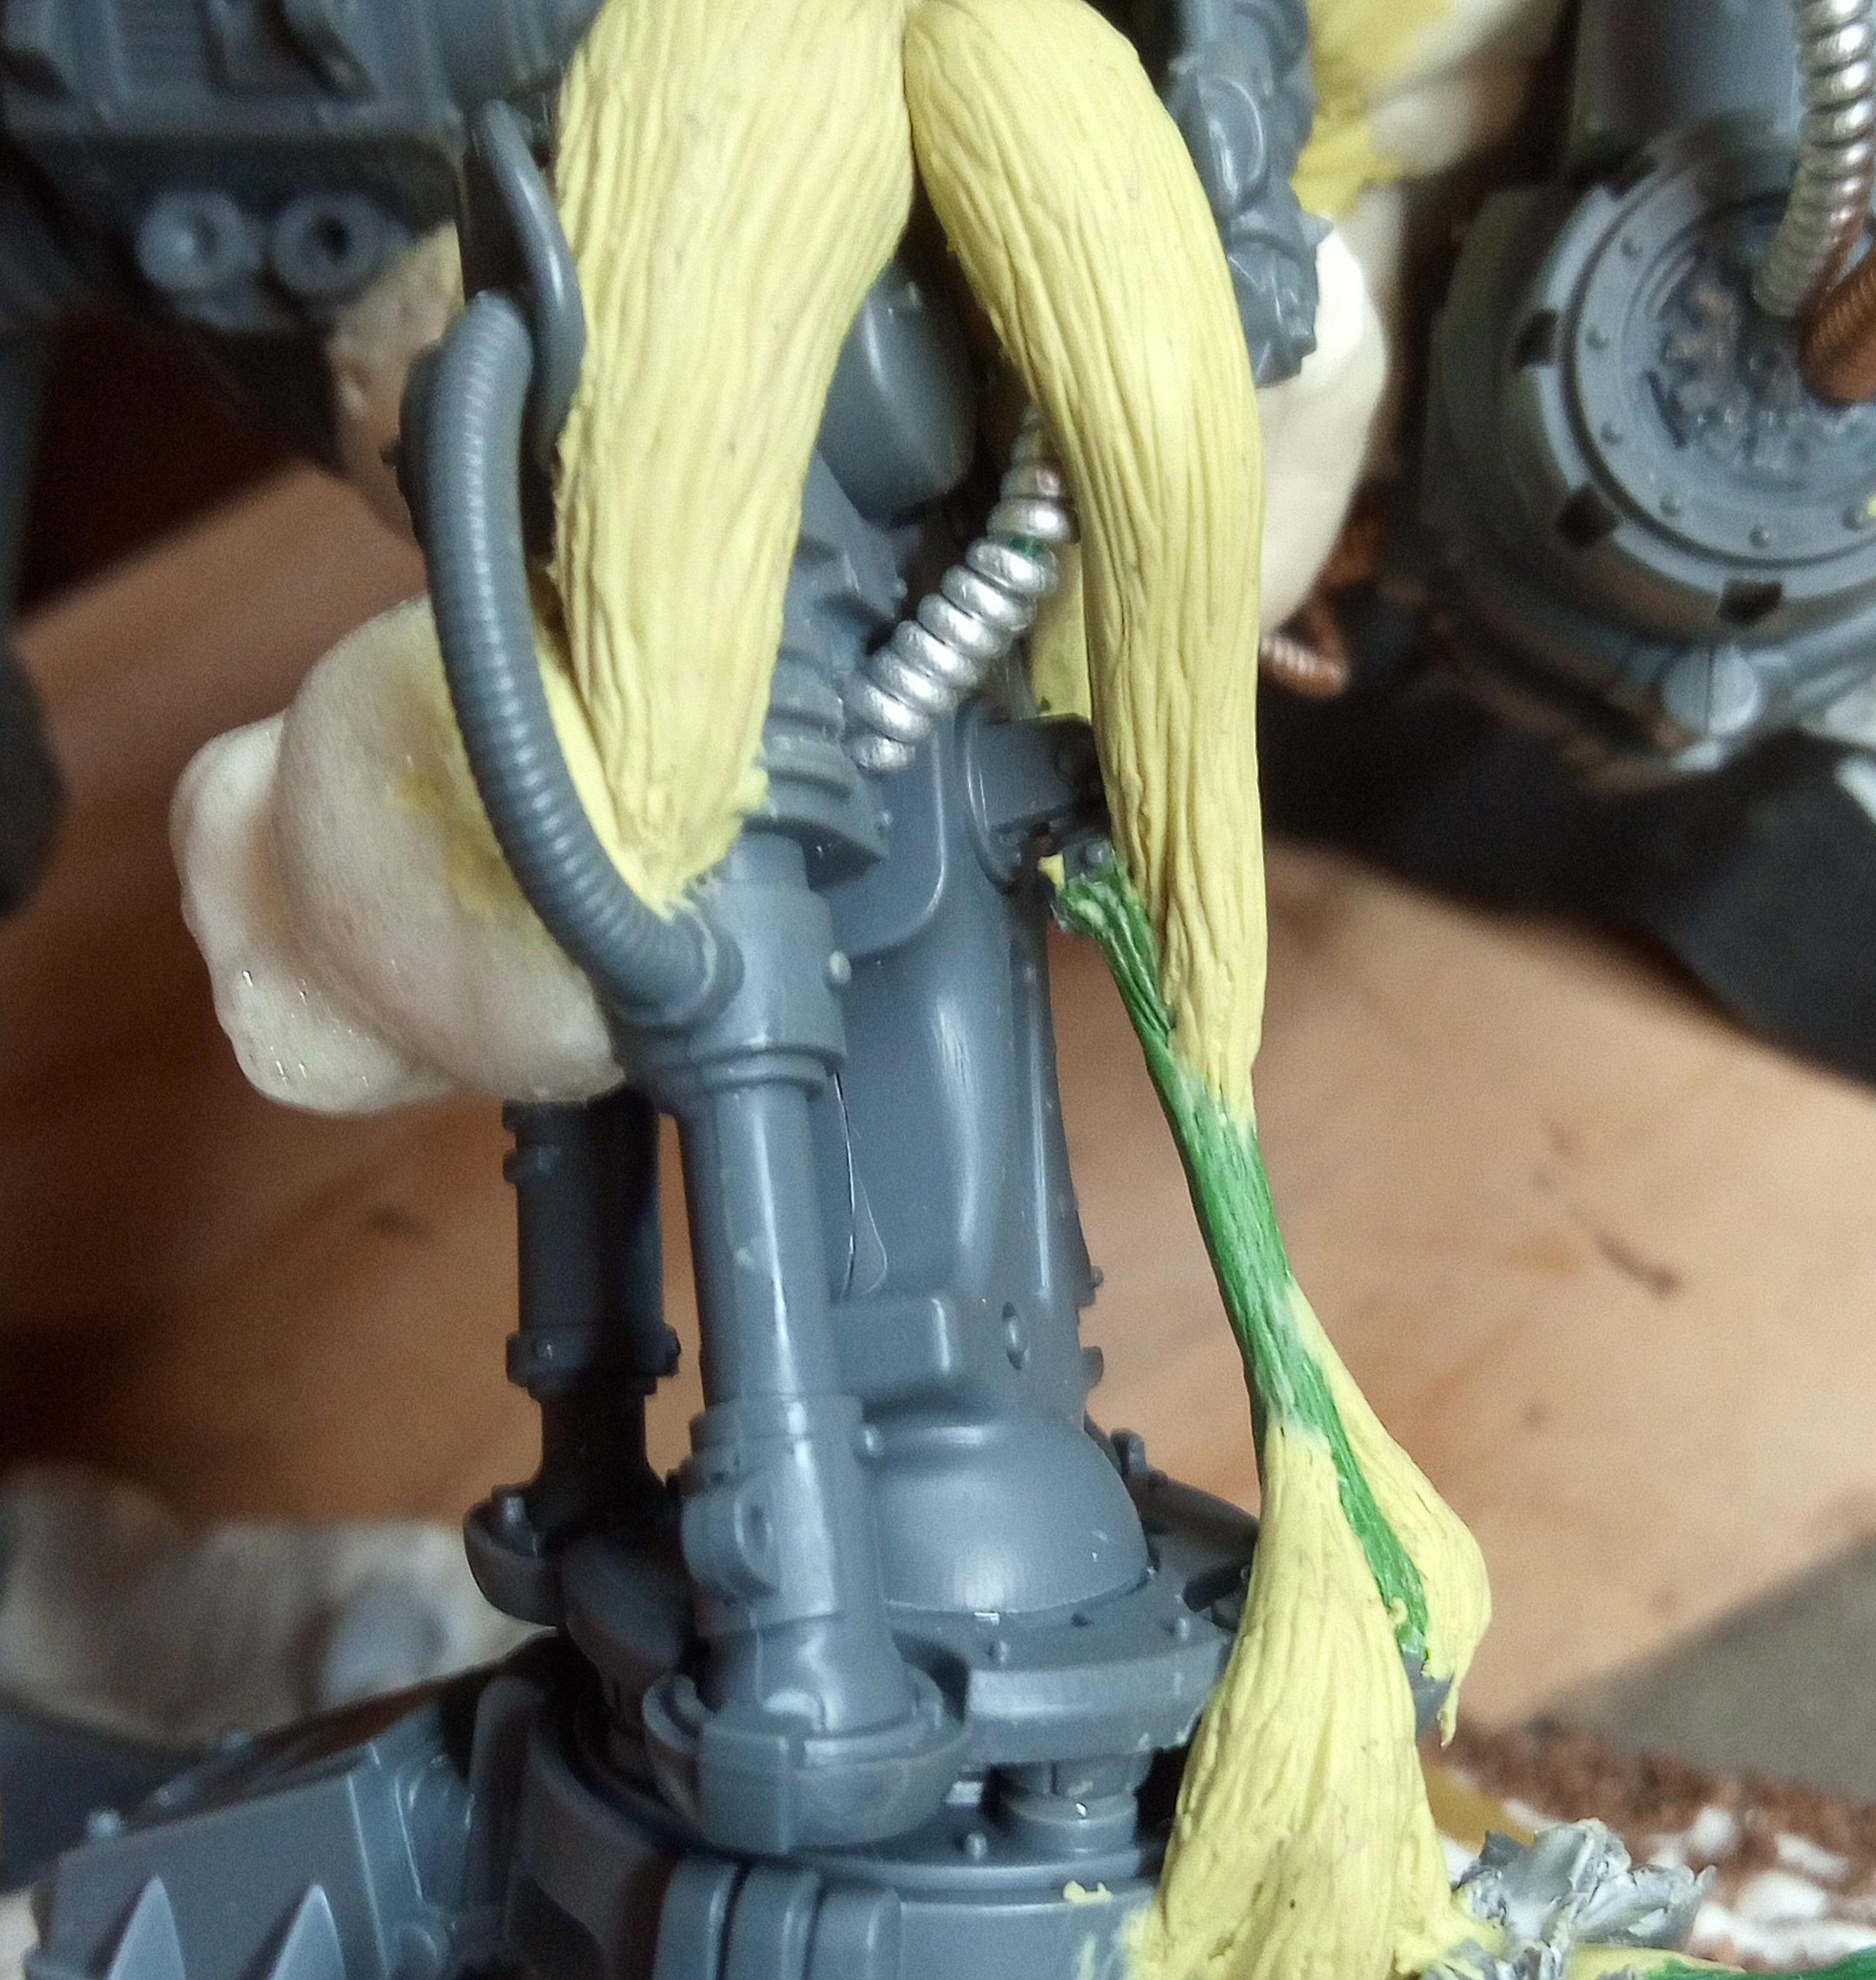
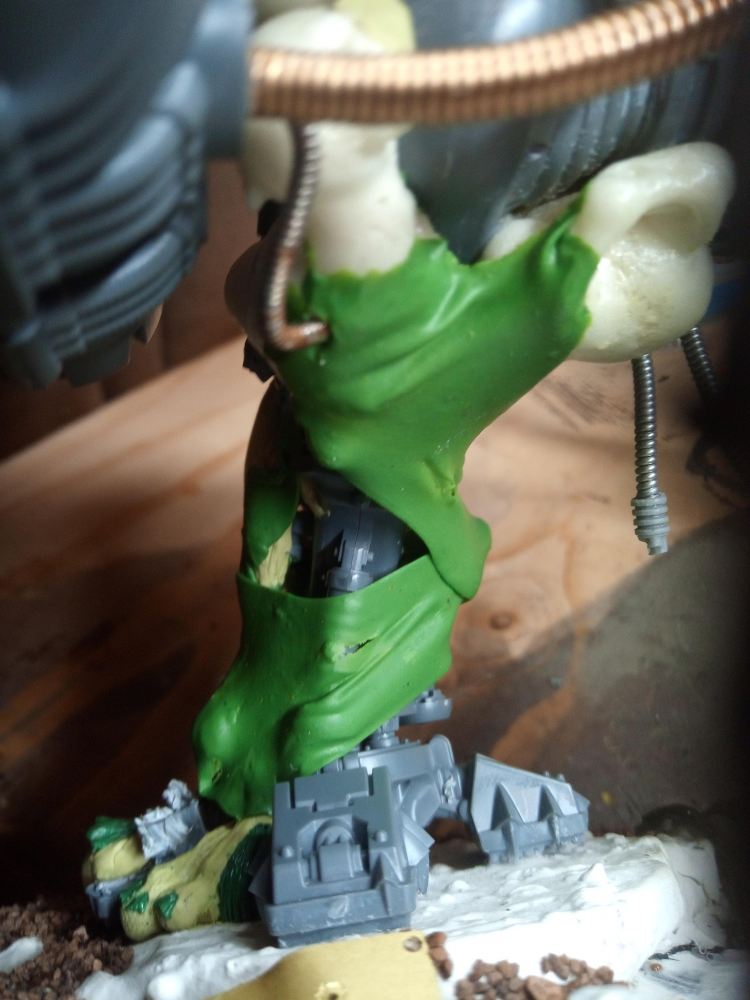
Once I got the structure of the leg down I was able to start doing some fun stuff. added some pistons from the Skull Cannon kit to the knee. Other than adding to the chaotic asymmetry I liked how this looked like it might both support the leg under the vast bulk of this side and also restrict the legs movement, mechanically hobbling it. The other obvious addition is bands of muscle I started to add. I think these were the first ones I put on the model so it was very experimental, and would later be a focal point of the Scythe Arm. They are just made out of sausages of milliput that I then taper to a point both ends from and off centre position, maybe quarter of the way along. I would then attach both ends to the model, make sure they were secure and then draw in the fibre striations with round pointed sculpting tool, but you could use a need or whatever.
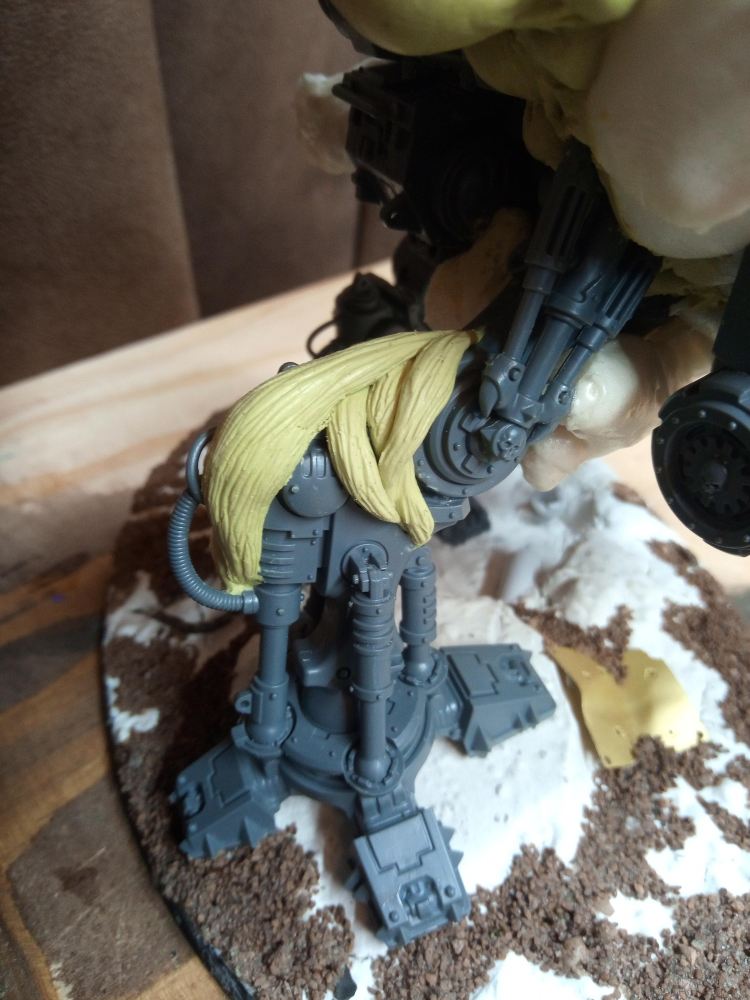
As a side note, because Milliput doesn’t have green stuff’s elasticity, it can tend to break or tear when you pull on it or like while I was dragging a tool on the surface, as a result I would sometimes end up with these small little grains that had rolled up with the tools movements or tiny fraying tears. When I did the muscles on the arms I would to a pass of using an old paint brush to gently paint water over the surface to smooth it slightly. No need to go wild on this, just a little, or you can just smooth off all the detail.
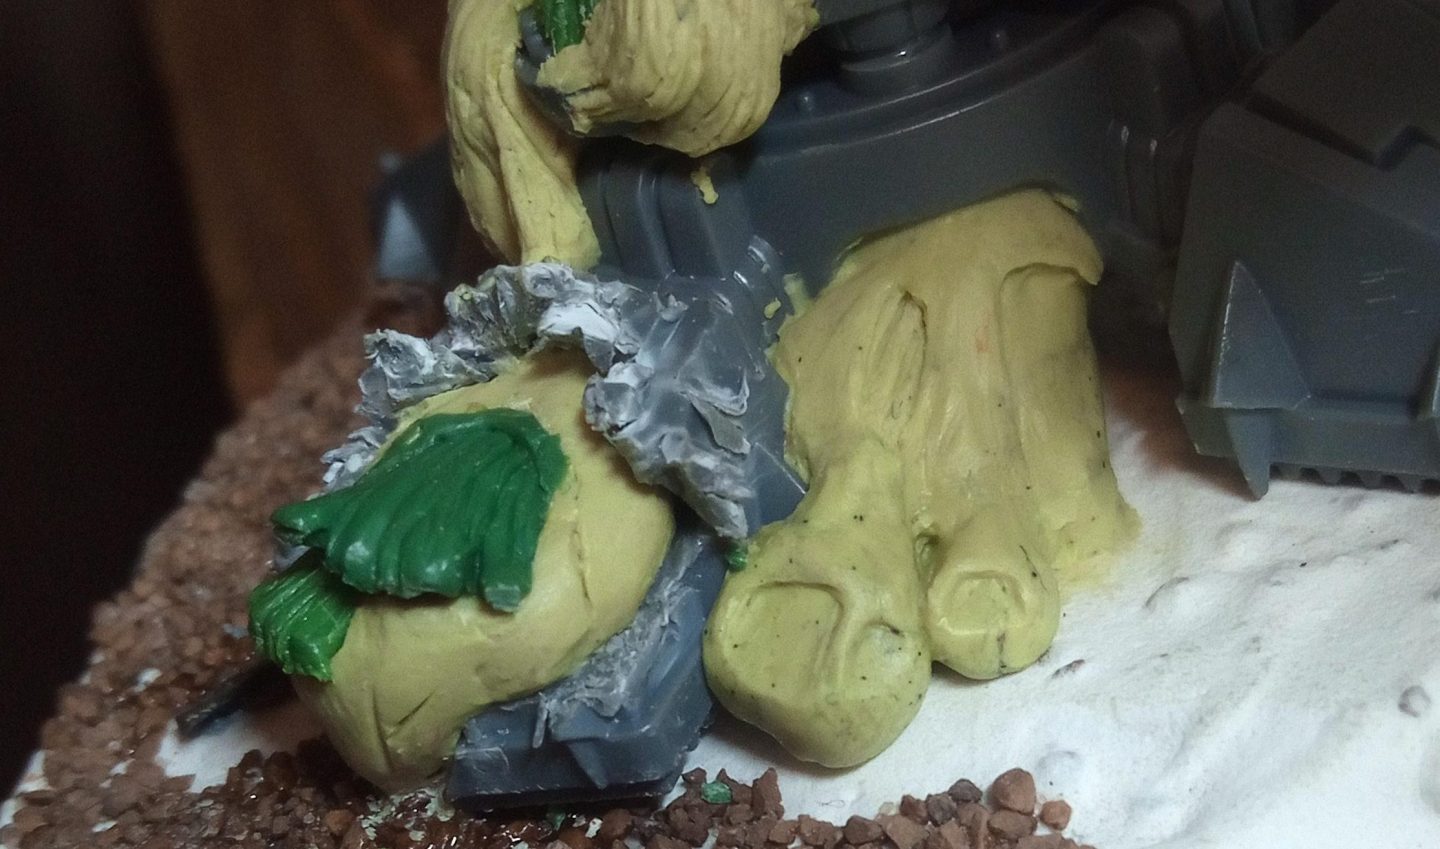
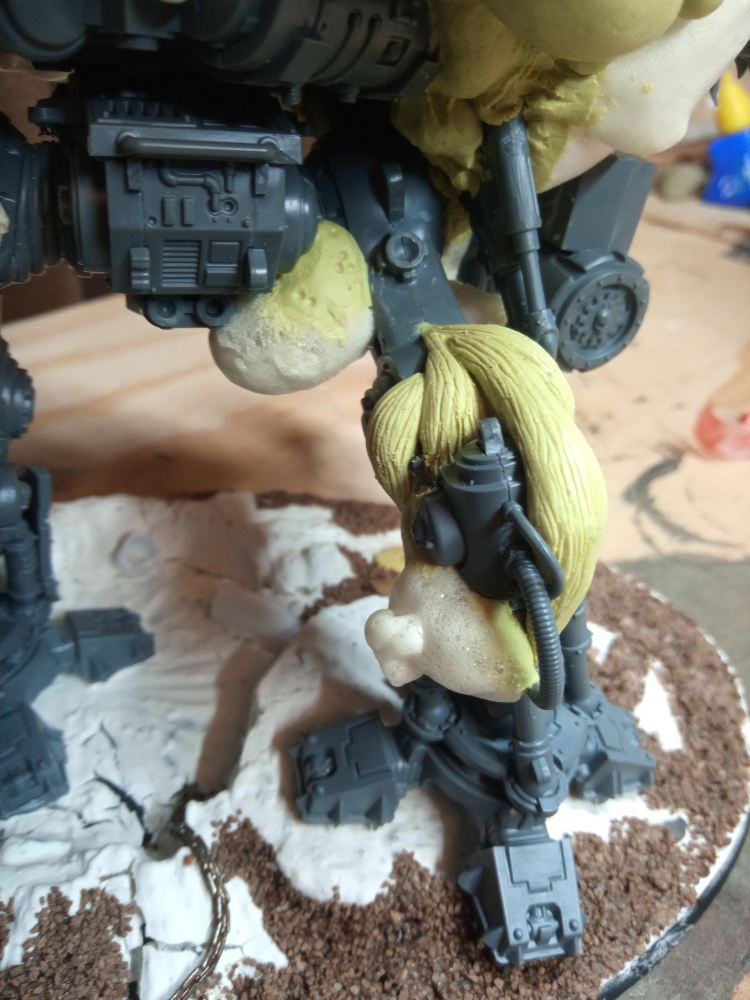
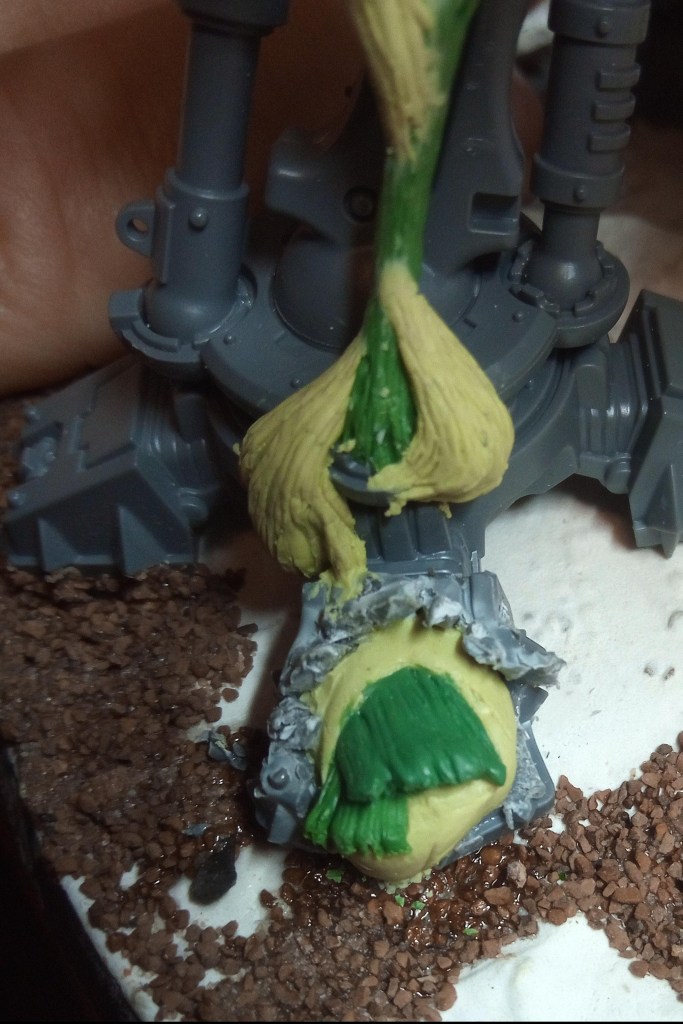
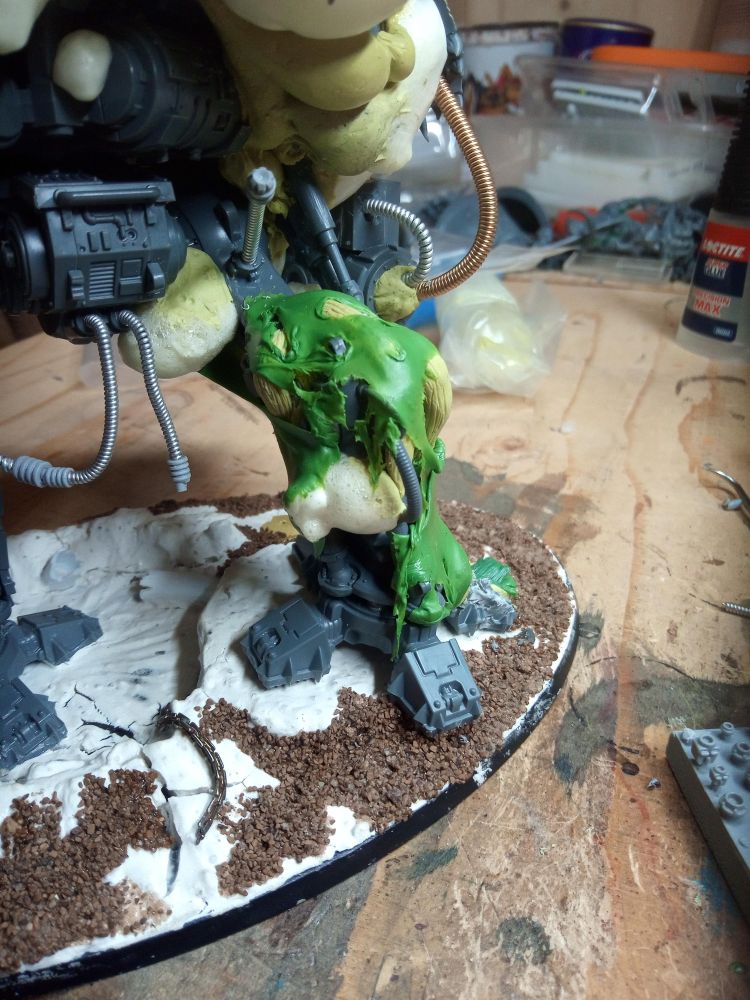
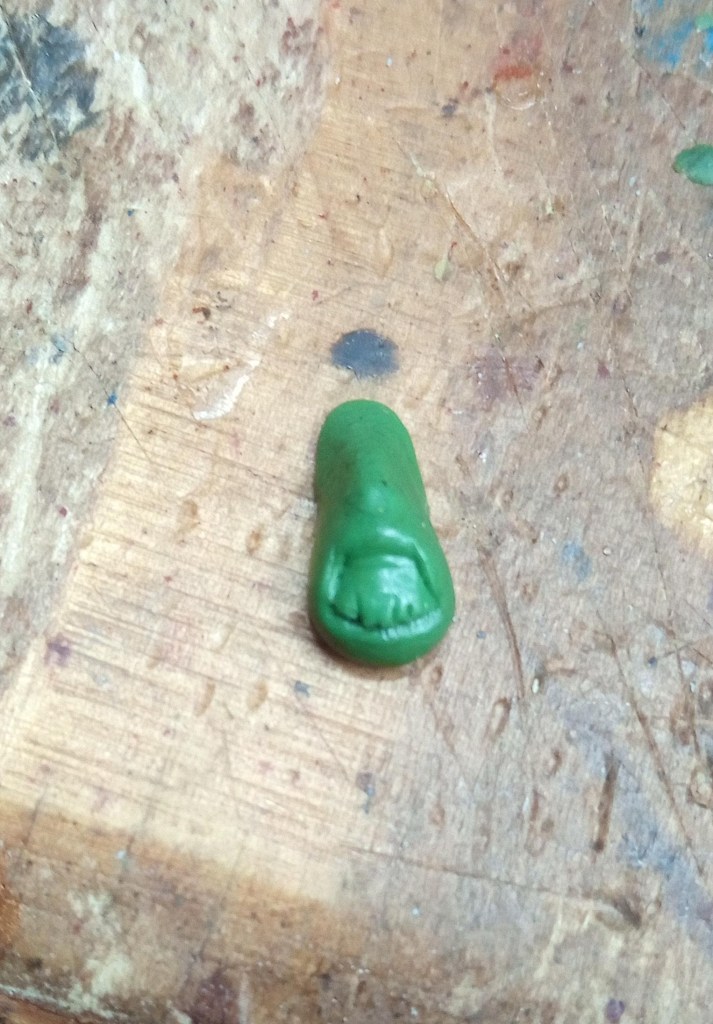
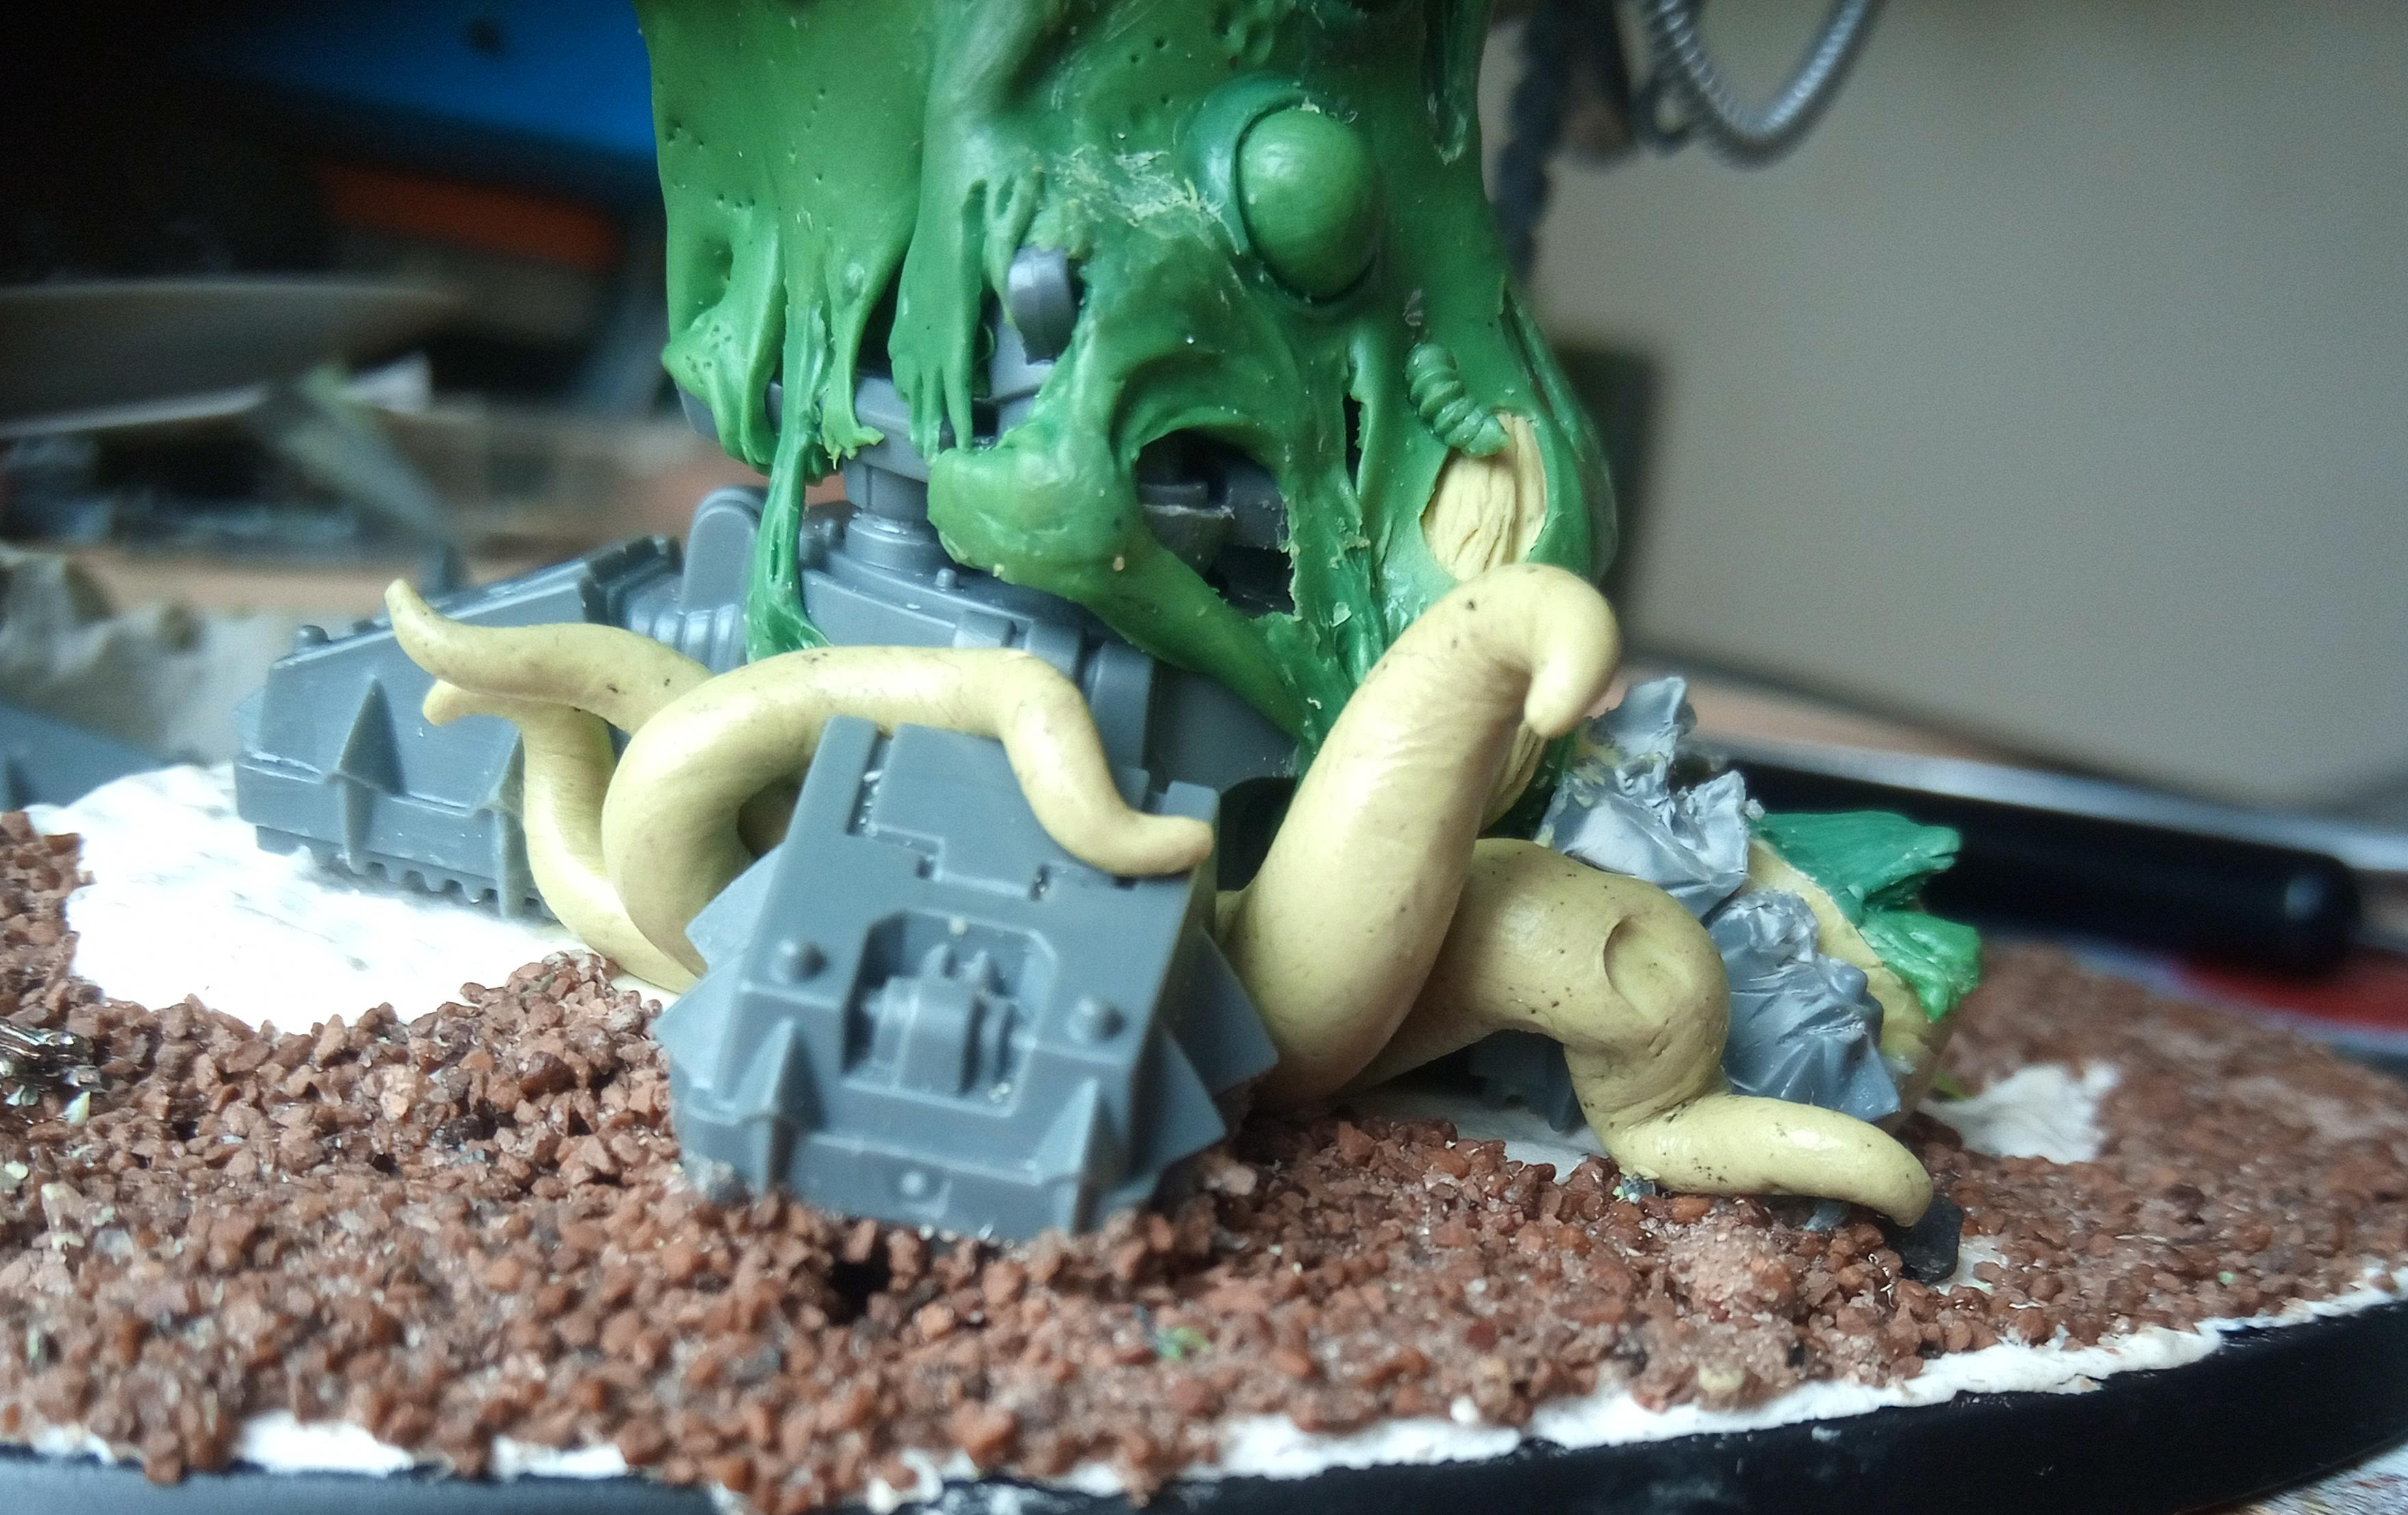
The Next details I added were to remove one of the pistons and replace it with a tendon and then added some muscles to that. I don’t even think this tendon ended up being visible but again it was another precursor to something I would later do with the Chain Scythe arm. The other thing id did here is one of the more quirky details I got stuck in with on the knight and this pretty much ended up setting the tone for the leg, the big toe. I liked the idea of the inside of the knights machinery filling with organic material to the point where it just bursts out of somewhere, in this case the knights toe. So I thought it would be fun to have a big toe, uncomfortably forcing its way through. In addition, for an extra layer of gross I had a second layer of toe nail growing beneath the top one and added striations and flaking ends to suggest something like a fungal infection.
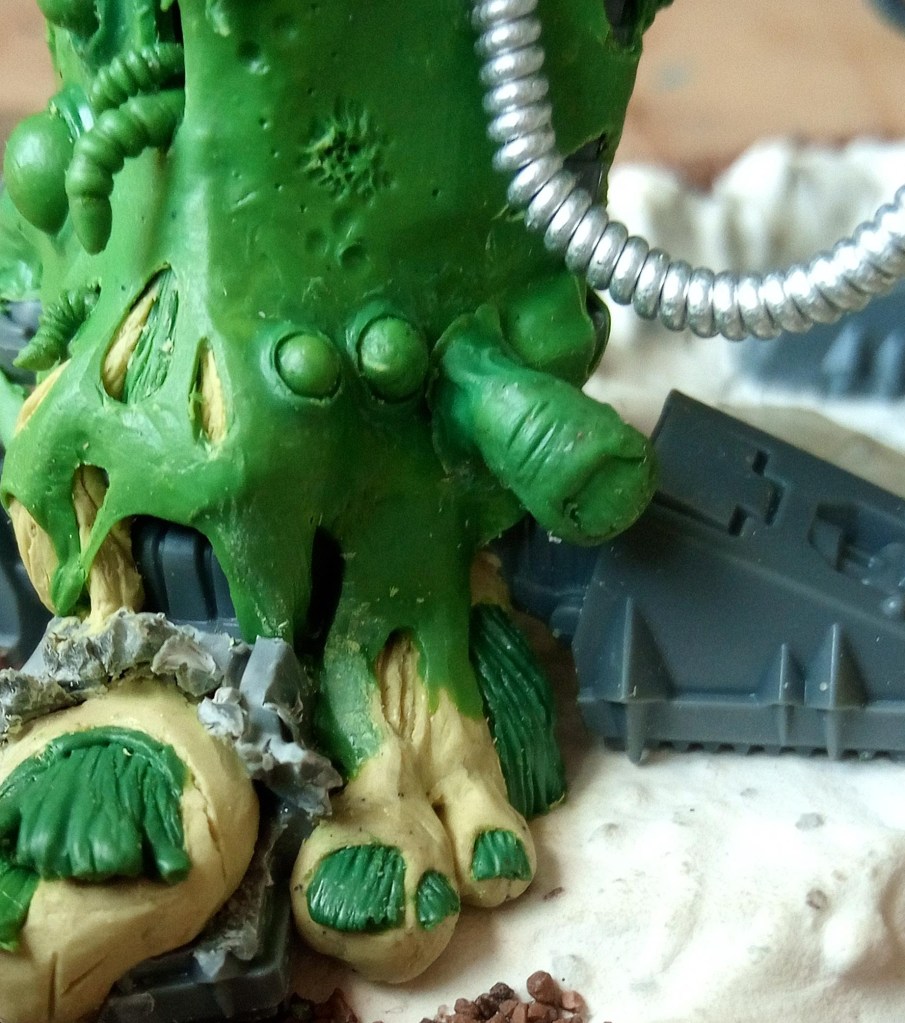
I loved the look of the toe but I wasn’t happy with how strange it looked with the big fat toe having burst through the armoured toe of the knight but squeezing through the narrow join between the toe and the foot. I wanted bulk out the foot a bit more with organic material so I just went to town with some more toes, nails and even a large like cloven nail just on the side of the foot.
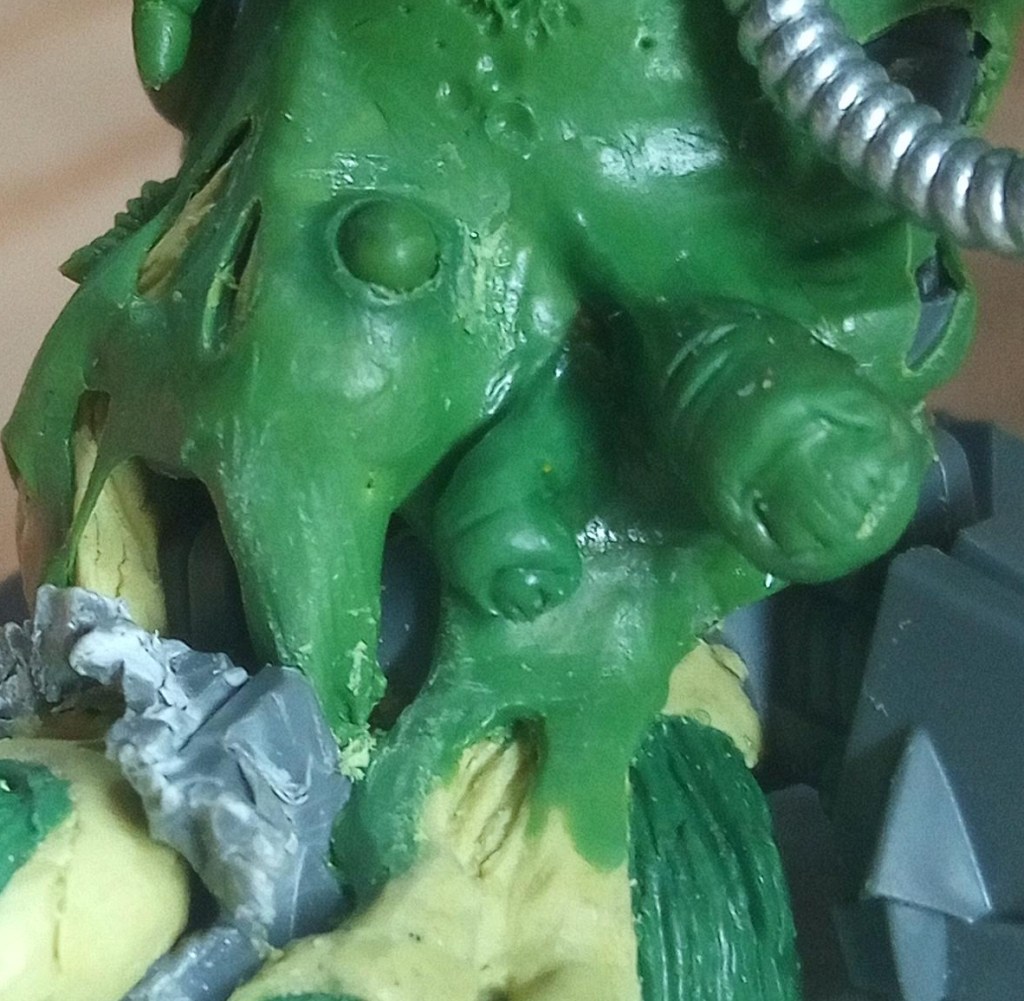
So, next was skinning over the muscle I had used to build up some more organic shapes. I knew I was going to cover up a lot of the stuff I did, but I wanted to be able to cut through this skin if I wanted to expose bits of machine or organics beneath. So leaving some sheets of Green Stuff out, when they were partially cured I wrapped them round parts and an anchored them to parts of the model I then cut away at some of the bits that didn’t look right like overlapping green stuff or just harsh edges were where a sheet of green stuff passed over the edge of another piece creating long straight ridges,
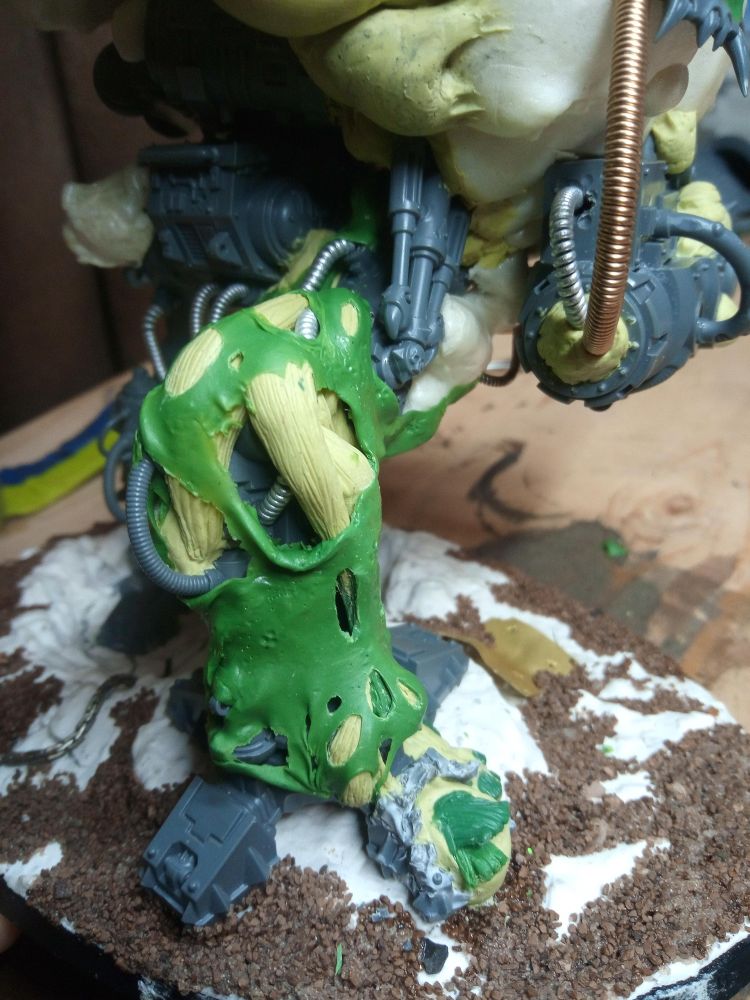
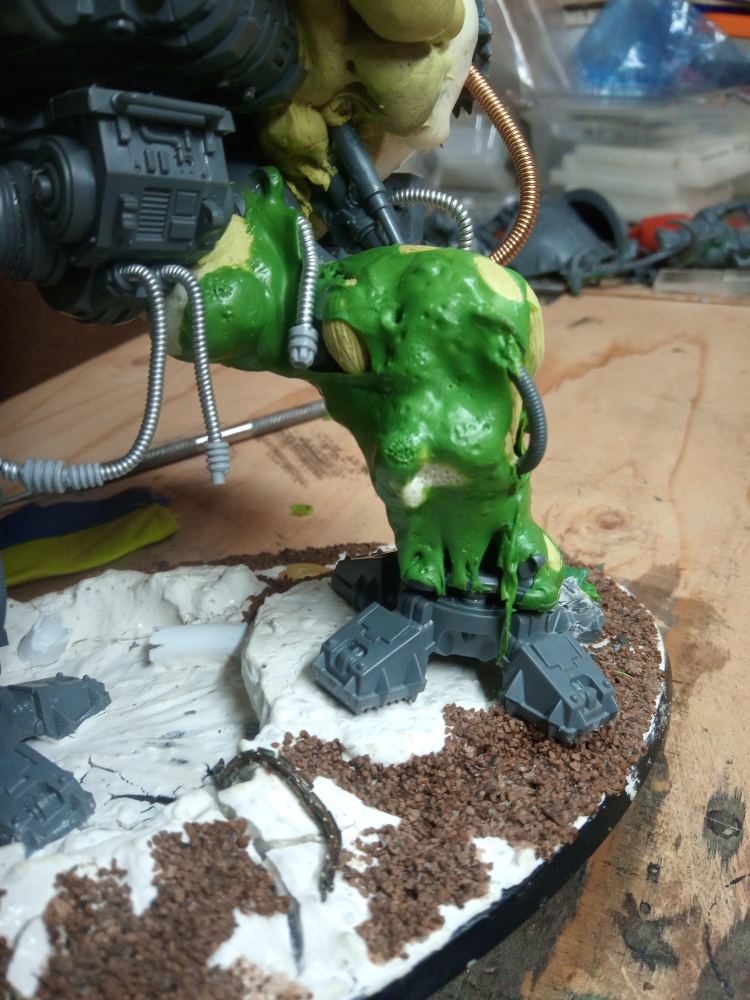
This is quite a good example of the sheets I was laying down and then patching over the gaps. also fun to see some of those textures of the knights pistons showing through the taught skin.
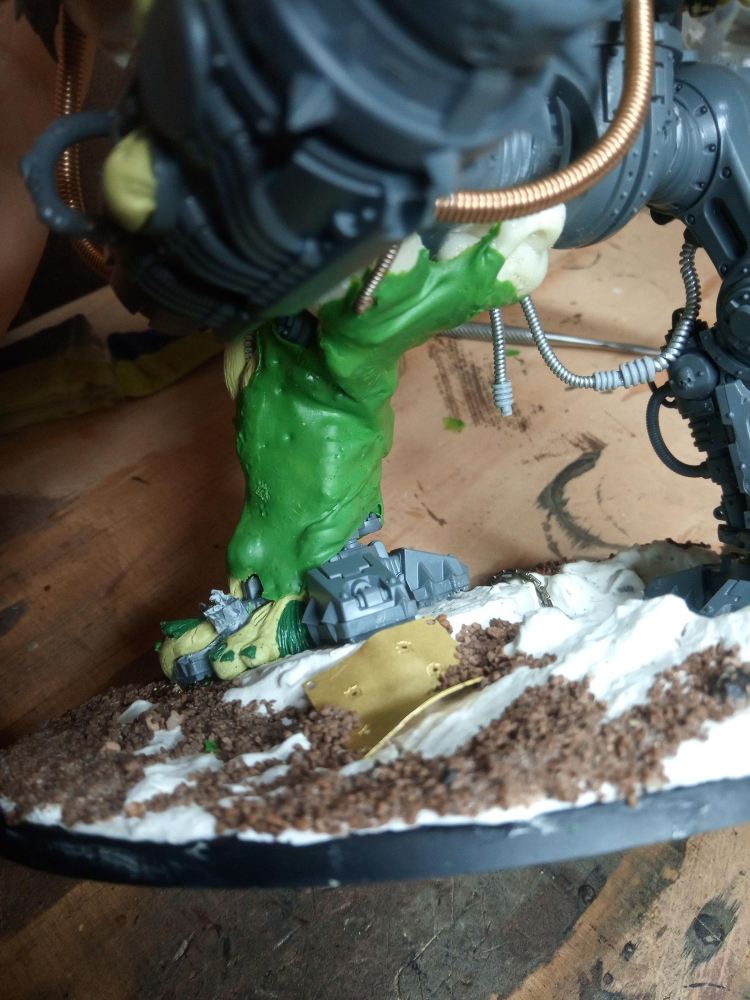
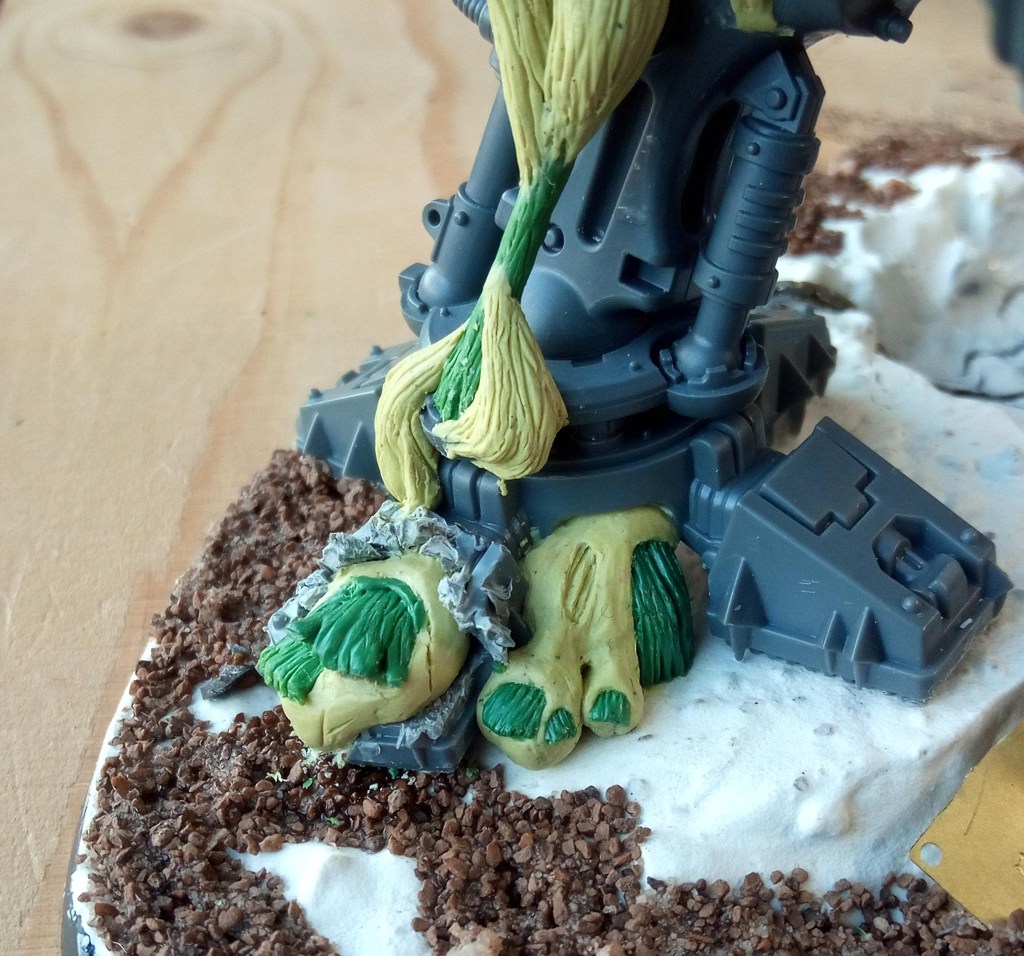
I had to come back to the foot too. I think it started when I had some left over Green Stuff so I practised making a toe for fun I liked it so much I decided to attach it part way up the leg of the foot too look a bit more weird. then when I had don that, individually it looked quite cool but next to the rest it just sort of looked shoved on… which it was. So to tie it in a bit more I have a crooked little friend to that toe which gave the foot 5 toes in all with 2 of them on the ankle/shin. I liked it. I still wasn’t satisfied with the gap under the foot though. from one angle the foot looked fine but from the back you could see under the foot ant appeared as if the organic stuff was sort of flowing out of a front edge, when what I really wanted it to look like was that the organic matter was pushing down and then being forced out to the sides and taking shape as it appeared. so around the back of the foot, I filled in the gaps between the toes and threw in some tentacles for good measure, reaching and whipping out from under to foot. I was way happier with the foot when I had done this. (I also gave the closest tentacle to the toes some toe nails… because… yes)
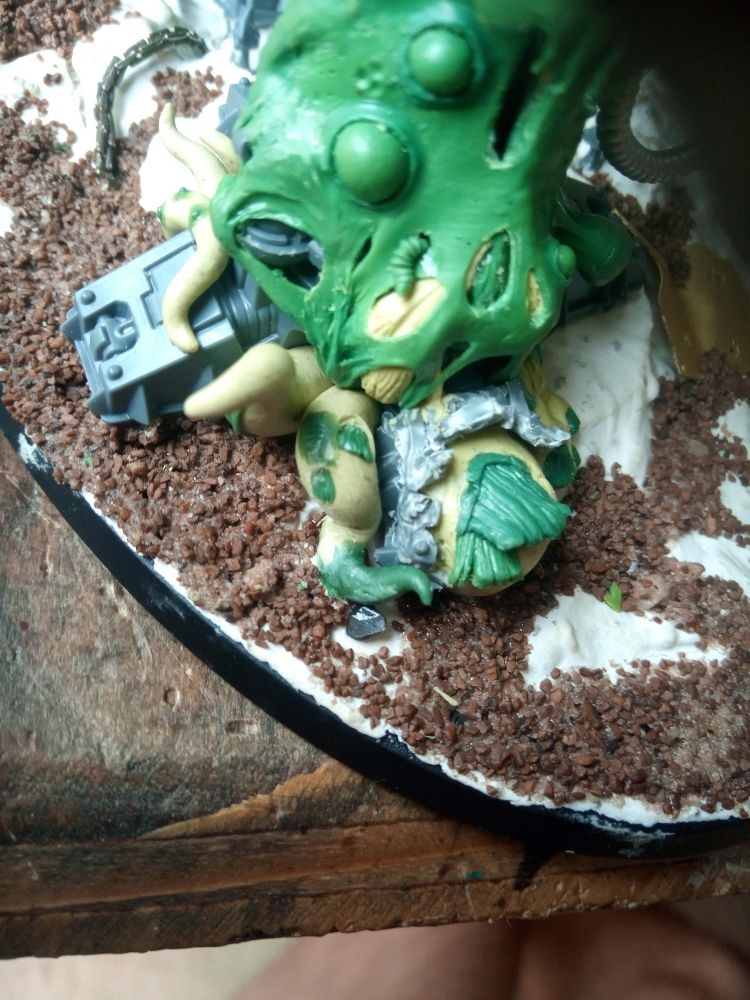
That’s largely it for the foot. these aren’t the completely final photos of the foot but its like 98% of it. I hope you liked this focus for the Nurgle Knight and you find any of the article entertaining or useful somehow!
~Pandora’s Bitz Box~

Man, that is so cool, I love the layering of mechanical parts, muscle & skin, and then the paring back to reveal internal bits… it’s bloody brilliant, and those toes are just perfect 🙂
LikeLiked by 1 person
Thank you! I didn’t really know how it would look. In fact… At one point I freaked out because I though I had accidentally used one of the chaos knight legs I wanted to keep because the original knight leg was so unrecognisable 😂. Really pleased with how it looks though, loved how the toes came out. I still worry about how smooth the skin is in places but it’s in keeping with the rest. Krakendoomcool was laughing at me because I had said to him that he may want to add his own little embellishments to it and that I had left room for him to texture it… Then when I got it he was like “what do you THINK I’m going to do to this and WHERE?”
LikeLiked by 1 person
This is really cool. The expanding foam idea is awesome.
LikeLike
Original idea to use it wasn’t mine but I refined the execution. If you want I can make the next post the one where I cover the expanding foam a bit more, that and the mouth
LikeLiked by 1 person
Yes please!!
LikeLiked by 1 person
I think I fell in love with that foam! Wondering now it it would be too late to add some of that to my… thing… Thanks for the inspiration! True talent at show!
LikeLiked by 1 person
I’m glad you like it! It’s very easy to control if you just pre make some lumps and let them set which does not take long at all. I’ve literally just finished writing a post which will go up on the blog tomorrow (6pm GMT) about the expanding foam!
Do you have a link to any photos of your project so far? I’d love to see it.
LikeLiked by 1 person
Sure! Would love to get any feedback!
https://tvcgartist.wordpress.com/category/wargame-miniatures/
I won’t miss that post of yours! This technique looks gold!
LikeLiked by 1 person
That is wonderful- really got the ‘look’ right imo.
Cheers,
Pete.
LikeLiked by 1 person
Thanks Pete 😊
LikeLiked by 1 person