
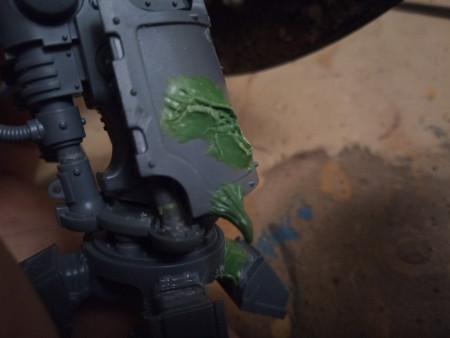
I hope everyone prepared for Christmas, not long now. This is a post I was avoiding putting up until my friend received his Christmas present. He has promised not to look at the blog until after he opens it though, so I get to share this little teaser with you!
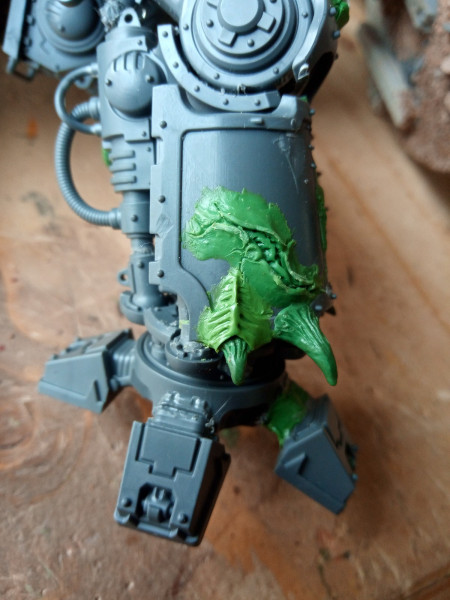
I have posted regular updates of my progress over on my Chaos thread on Bolter and Chainsword and while I was working on the claws growing out of the armour trim, I was asked if I could give some step by step instructions by someone who visited my thread, who wanted to also use that technique. So this is what I came up with…
The Tutorial
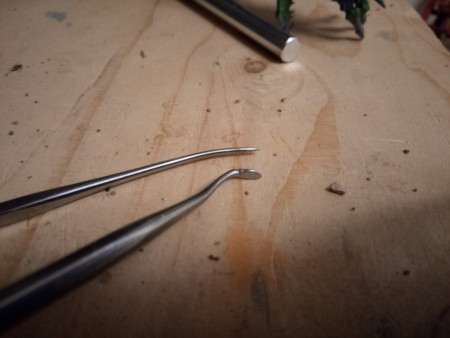
These are the two tools I used for this, they are the two I use the most of my metal tools. You can use a silicone shaper too if you have one, they are really good. For lubricating my tools use oil or I just rub them on my face because you don’t need much at all.
- I mixed an equal amount of yellow and blue by just smushing and rolling it between my thumb and finger. It doesn’t very long, probably less than a minute.
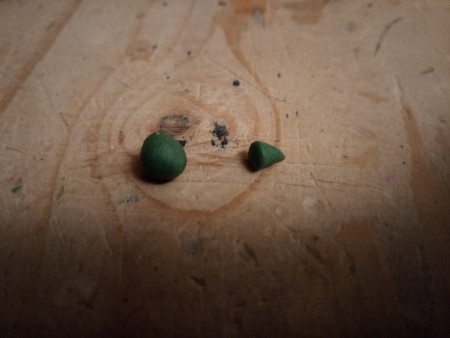
2.
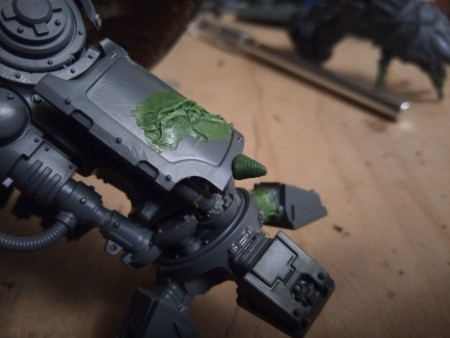
Once its a uniform colour, I break of a little piece, mould it into a cone and then push it into place on the armour.
3.
I use the tool with the flat tip to press the edges of the cone onto the surrounding plastic. This helps adhere the Green Stuff to the plastic with its larger surface area.
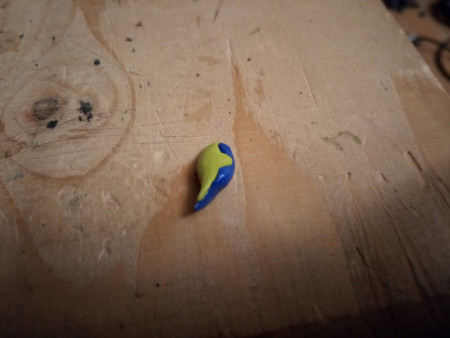
4.
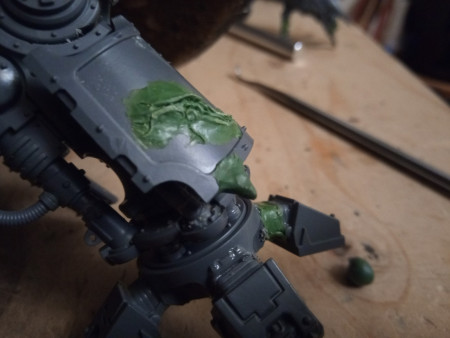
Next I just lick my fingers and very gently pulled at the surface of the cone to get the desired Claw shape. If you pulled too much, just push it back down and try to tease it back again by pulling on the surface, careful not to remove it accidentally.
5.
Next I used the pointed too to drag some shallow grooves into the claw. Just be sure not to press too hard, you can always do another pass on the same groove.
6.
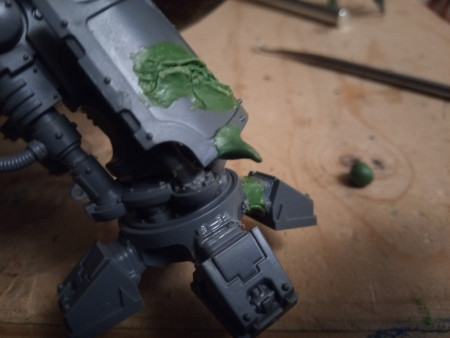
Finally, I very carefully used the too with the flat tip to get the curve and angle I wanted. Then this stage is complete.
LET THE GREEN STUFF CURE!
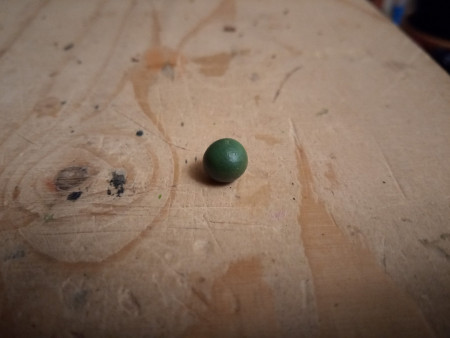
I can’t stress this bit enough. Green Stuff dries like plastic so if you don’t like how something looks you can cut it away. Its always a good idea to plan what you want to do and do it in passes, allowing the green stuff to cure in between. It is very tempting to do too much, maybe you’re very eager or have some green stuff left over… but it’s pretty harrowing if you have so far done a job your really happy with, only to accidentally press one of your thumbs into a bit of work that is still soft, or slip with a tool or something. I do the same with eyes as I have done here, but I just roll Green Stuff balls out of spare Green Stuff, cut them in half once cured and glue them on. sculpting eyelids around the eyes then means you wont damage the eyeball, just like sculpting the trim around these claws once they have cured.
LET THE GREEN STUFF CURE!
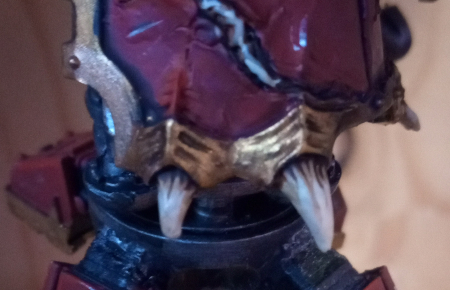
7.
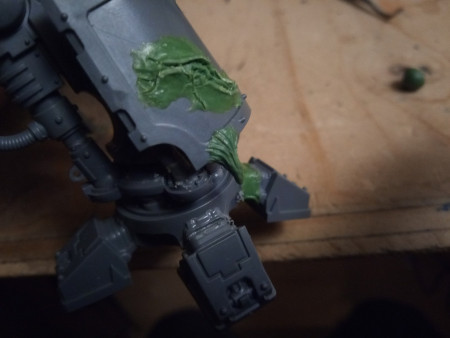
Next pass starts with mixing up more stuff and then I press a small triangle of it pointing away from the claw.
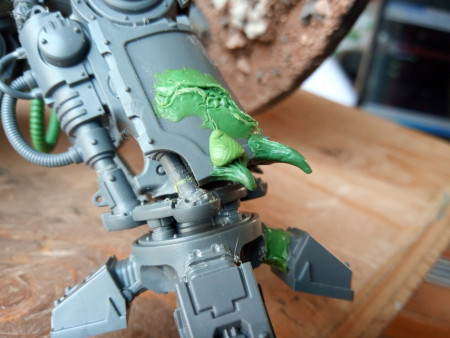
8. Next, just like last time I start pressing the sides down to meet the plastic, and shape it around the claw.
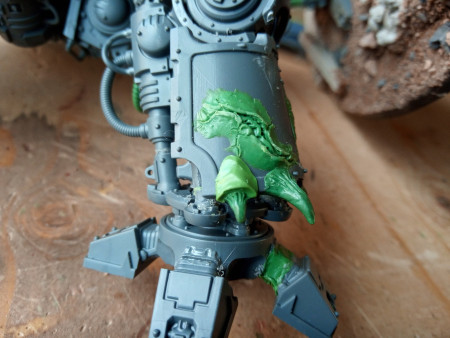
9.
Next step i refined the shape using the flat tipped tool, trying to get a small step to match where the Trim meets the armour plate and a ridge down the middle. (You can see some lines it it already because I forgot to take a photo so I had to do this bit twice)
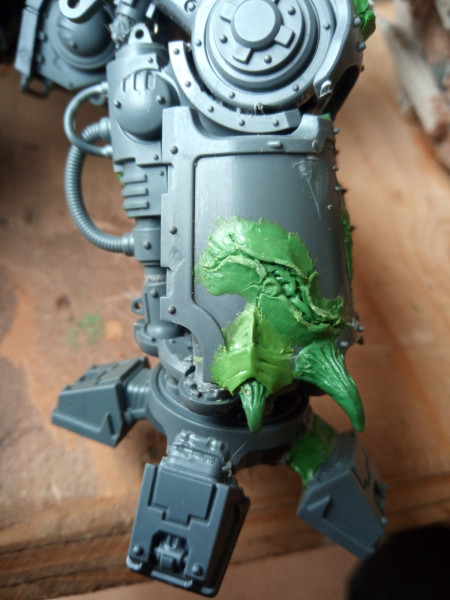
10. Lastly to complete the claw, I added some detail to this part of the claw. pushing the tip of the flat ended tool into the Green Stuff. Then either gently dragging grooves out with the same tool or the pointed one. I also used the pointed too to get a sharper line where the trim meets the armour. (the slight grooves in the surface are from me accidentally forgetting to take some photos and having to undo the next stage)
Then you’re done!
If that tutorial is of use to only one person, that’s good enough for me. if you have any questions I can help with, requests for things I could try or what ever… feel free to ask! Even better, if you can sculpt, please tell me how to be better!
This is to be my very appropriate entry for Azazels Diabolical December 2018. So stay tuned and If I dont speak to any of you before then, have a nice Christmas.
~Pandora’s Bitz Box~

Thank for sharing this tutorial. If there is one thing would like to stress it’s the let the green stuff cure part.
Seriously, let it cure. Sculpt, cure, sculpt is so important.
LikeLiked by 2 people
I still fall afoul of trying to do too much and it’s always a very painful reminder.
LikeLiked by 1 person
Great tutorial- you make it look simple but replicatedable too.
Cheers,
Pete.
LikeLiked by 1 person
That’s the goal! Thanks 😄
LikeLiked by 1 person
Great tutorial. I do struggle with green stuff but in fairness I tend to put it in the “too hard basket” BUT 2019 will hopefully seeing me giving it a crack more often
LikeLiked by 1 person
Well I’m glad you liked it, and hey… If there’s anything specific that you want to try out then let me know and maybe I could try and do tutorial on that? I mostly started sculpting out of necessity because I didn’t have enough spare parts for a lot of my conversions… So I just had to make them.
LikeLiked by 1 person
Cool tute. I haven’t done much at all with GS over the years, but it’s always great to see another perspective on how to use it effectively for the day that I might actually break it out for more than gap filling and joins! 🙂
LikeLiked by 1 person
You should give it a go! I’m thinking of making a spawn and trying to do a load of different effects on it, doing a tutorial for each one. Some things are really effective and don’t take that long. I have. Thousand Sons Baneblade that I want to add nests of eyes too sometime (amongst other things), so that will be a fun project 😄
LikeLiked by 1 person
As always, time is the issue – with so many models to attempt to paint, I’ve gotten into a mentality of just wanting to chew through them – especially the many, many models that I’ve started being a mental roadblock to starting new models. All of that and needing a particular motivation/goal to do something with it. Maybe once I start my Word Bearers….
LikeLiked by 1 person
Ah yes… I know where you are coming from, I’m desperately trying to slam the breaks on the conversion train. Trying to get through some of these other minis.
LikeLiked by 1 person
Great tutorial and I love the result.
LikeLiked by 1 person
Thanks! I had no intention of doing tutorials but someone on Bolter and Chainsword asked me to do one for this before I had finished them all. I also did a tutorial for a base for a Knight if your interested. If I do any others I’ll happily let you know about it and you can pick and choose what to use 😊
LikeLiked by 1 person
That’s how I started doing tutorials, not because I wanted to, but because people were asking. Watch out because soon you’ll have like 40 tutorials 😉
Yeah, send along anything you got for the site. The more the merrier.
LikeLiked by 1 person